 Niall Maher3 min read
Supabase is Awesome - Create Full-Stack Apps Fast!
Supabase refers to itself as "an open source Firebase alternative".
That comparison doesn't do justice to just how great it is. I've been building a pretty complicated app recently with it and testing all the features.
Supabase leverages the power of one of the most popular databases, PostgreSQL.
Their secret sauce and security come from using PostgreSQL's row-level security, which they leverage to create a simple way of interacting directly with your database from a client-side application.
This allows developers to define, manipulate, and query data efficiently and securely.
The fact that we can query a PostgreSQL database directly from our client apps makes it stupidly quick to get a complex application running fast.
I'll show you how to start querying your database with Supabase, but I wanted to mention the other features that make Supabase very useful:
Self-hosted or Fully Managed: You can host your Supabase instance on your own servers or use Supabase's fully managed solution. This gives developers a lot of flexibility, depending on their needs. I've been using the hosted version and found their pricing very competitive.
Realtime Subscriptions: By using this feature, developers can keep the user interface of their applications in sync with the changes happening in the database.
Authentication: Supabase provides a robust system for user authentication and security. It includes features like signup, login, third-party logins (OAuth), and security roles.
Storage: Supabase provides a system for managing and storing files such as user-generated content.
Edge Functions: If you need to handle something serverside, you can quickly build and deploy Edge functions that Supabase will manage for you.
Getting Started With Supabase
Before integrating Supabase into your app, we must set up a project on the Supabase platform.
Here are the steps:
- Visit the Supabase website and create an account if you haven't.
- Once logged in, click on the 'New Project' button.
- Choose a project name and password.
- Select a region that's closest to your user base for optimal performance. Once the project is created, it should show you some details about your project, including your "anon" key and the project URL. If not, you can find these details in the API settings of your project. You'll need the URL and anon key to query/create data from client-side applications.
Create your first table
Create a new table from the "Table Editor" screen in the project.
Create a table called tasks and add a column called description.

Ensure you have RLS checked as enabled so you can securely interact with the data.
Add a Security Policy
We must add security policies to ensure we securely interact with our database. We will use a quick start option to allow our users to read any data in our database and not be allowed to insert data by default.
We can do that by selecting our table in the column to the left on our table editor page:
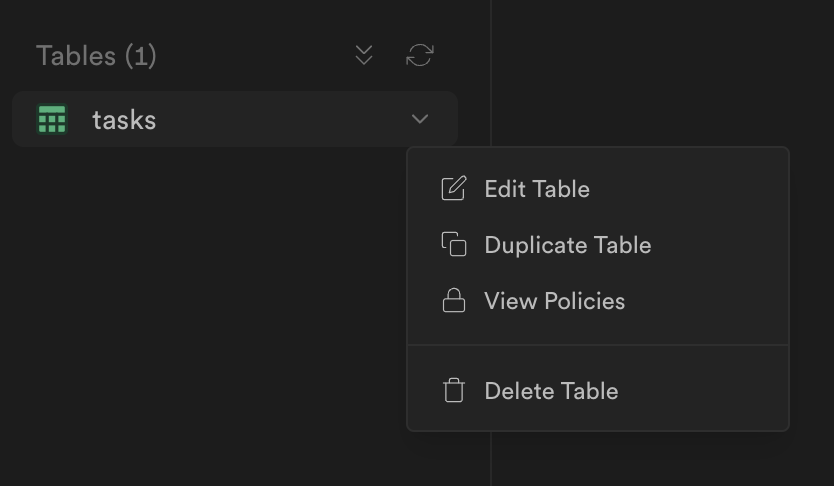
Then select "View Policies".
Then press the "New Policy" button.
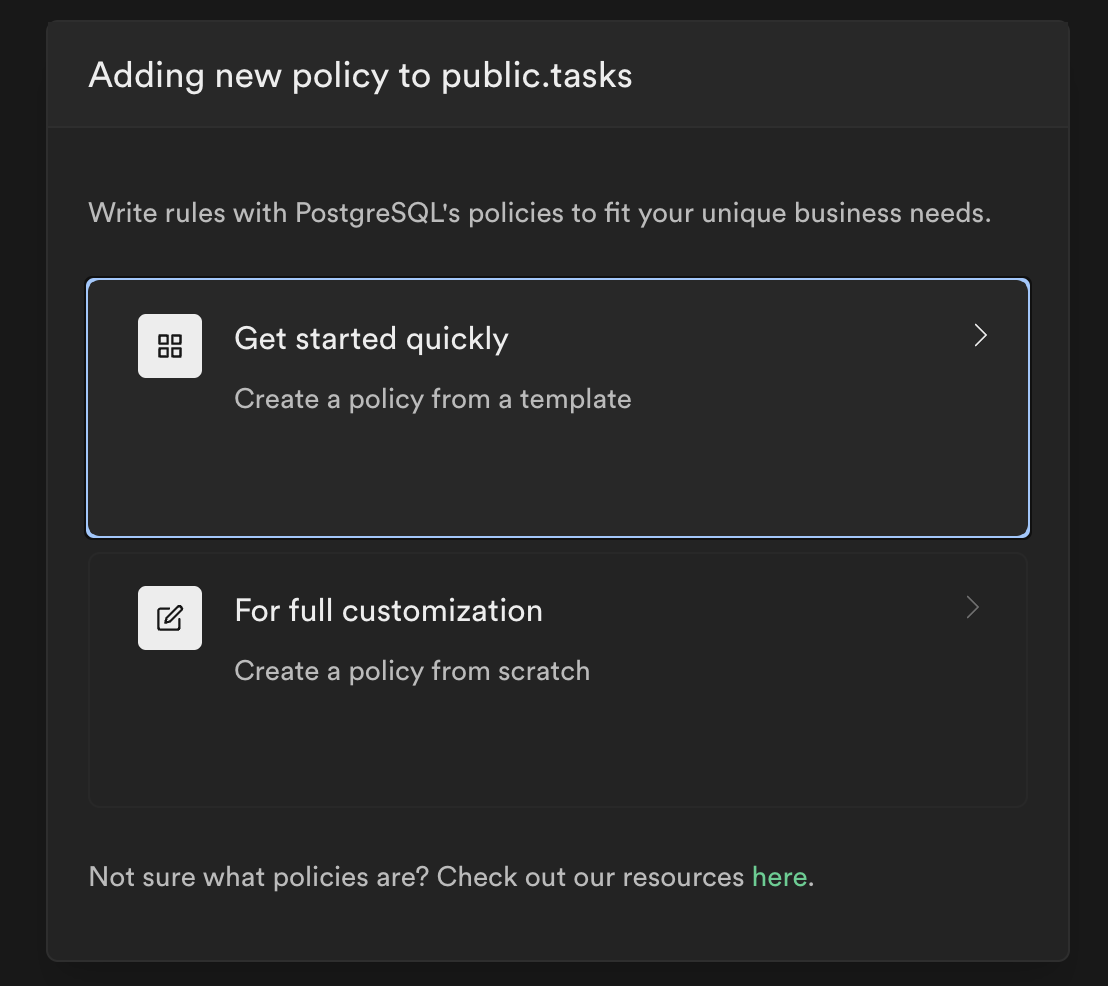
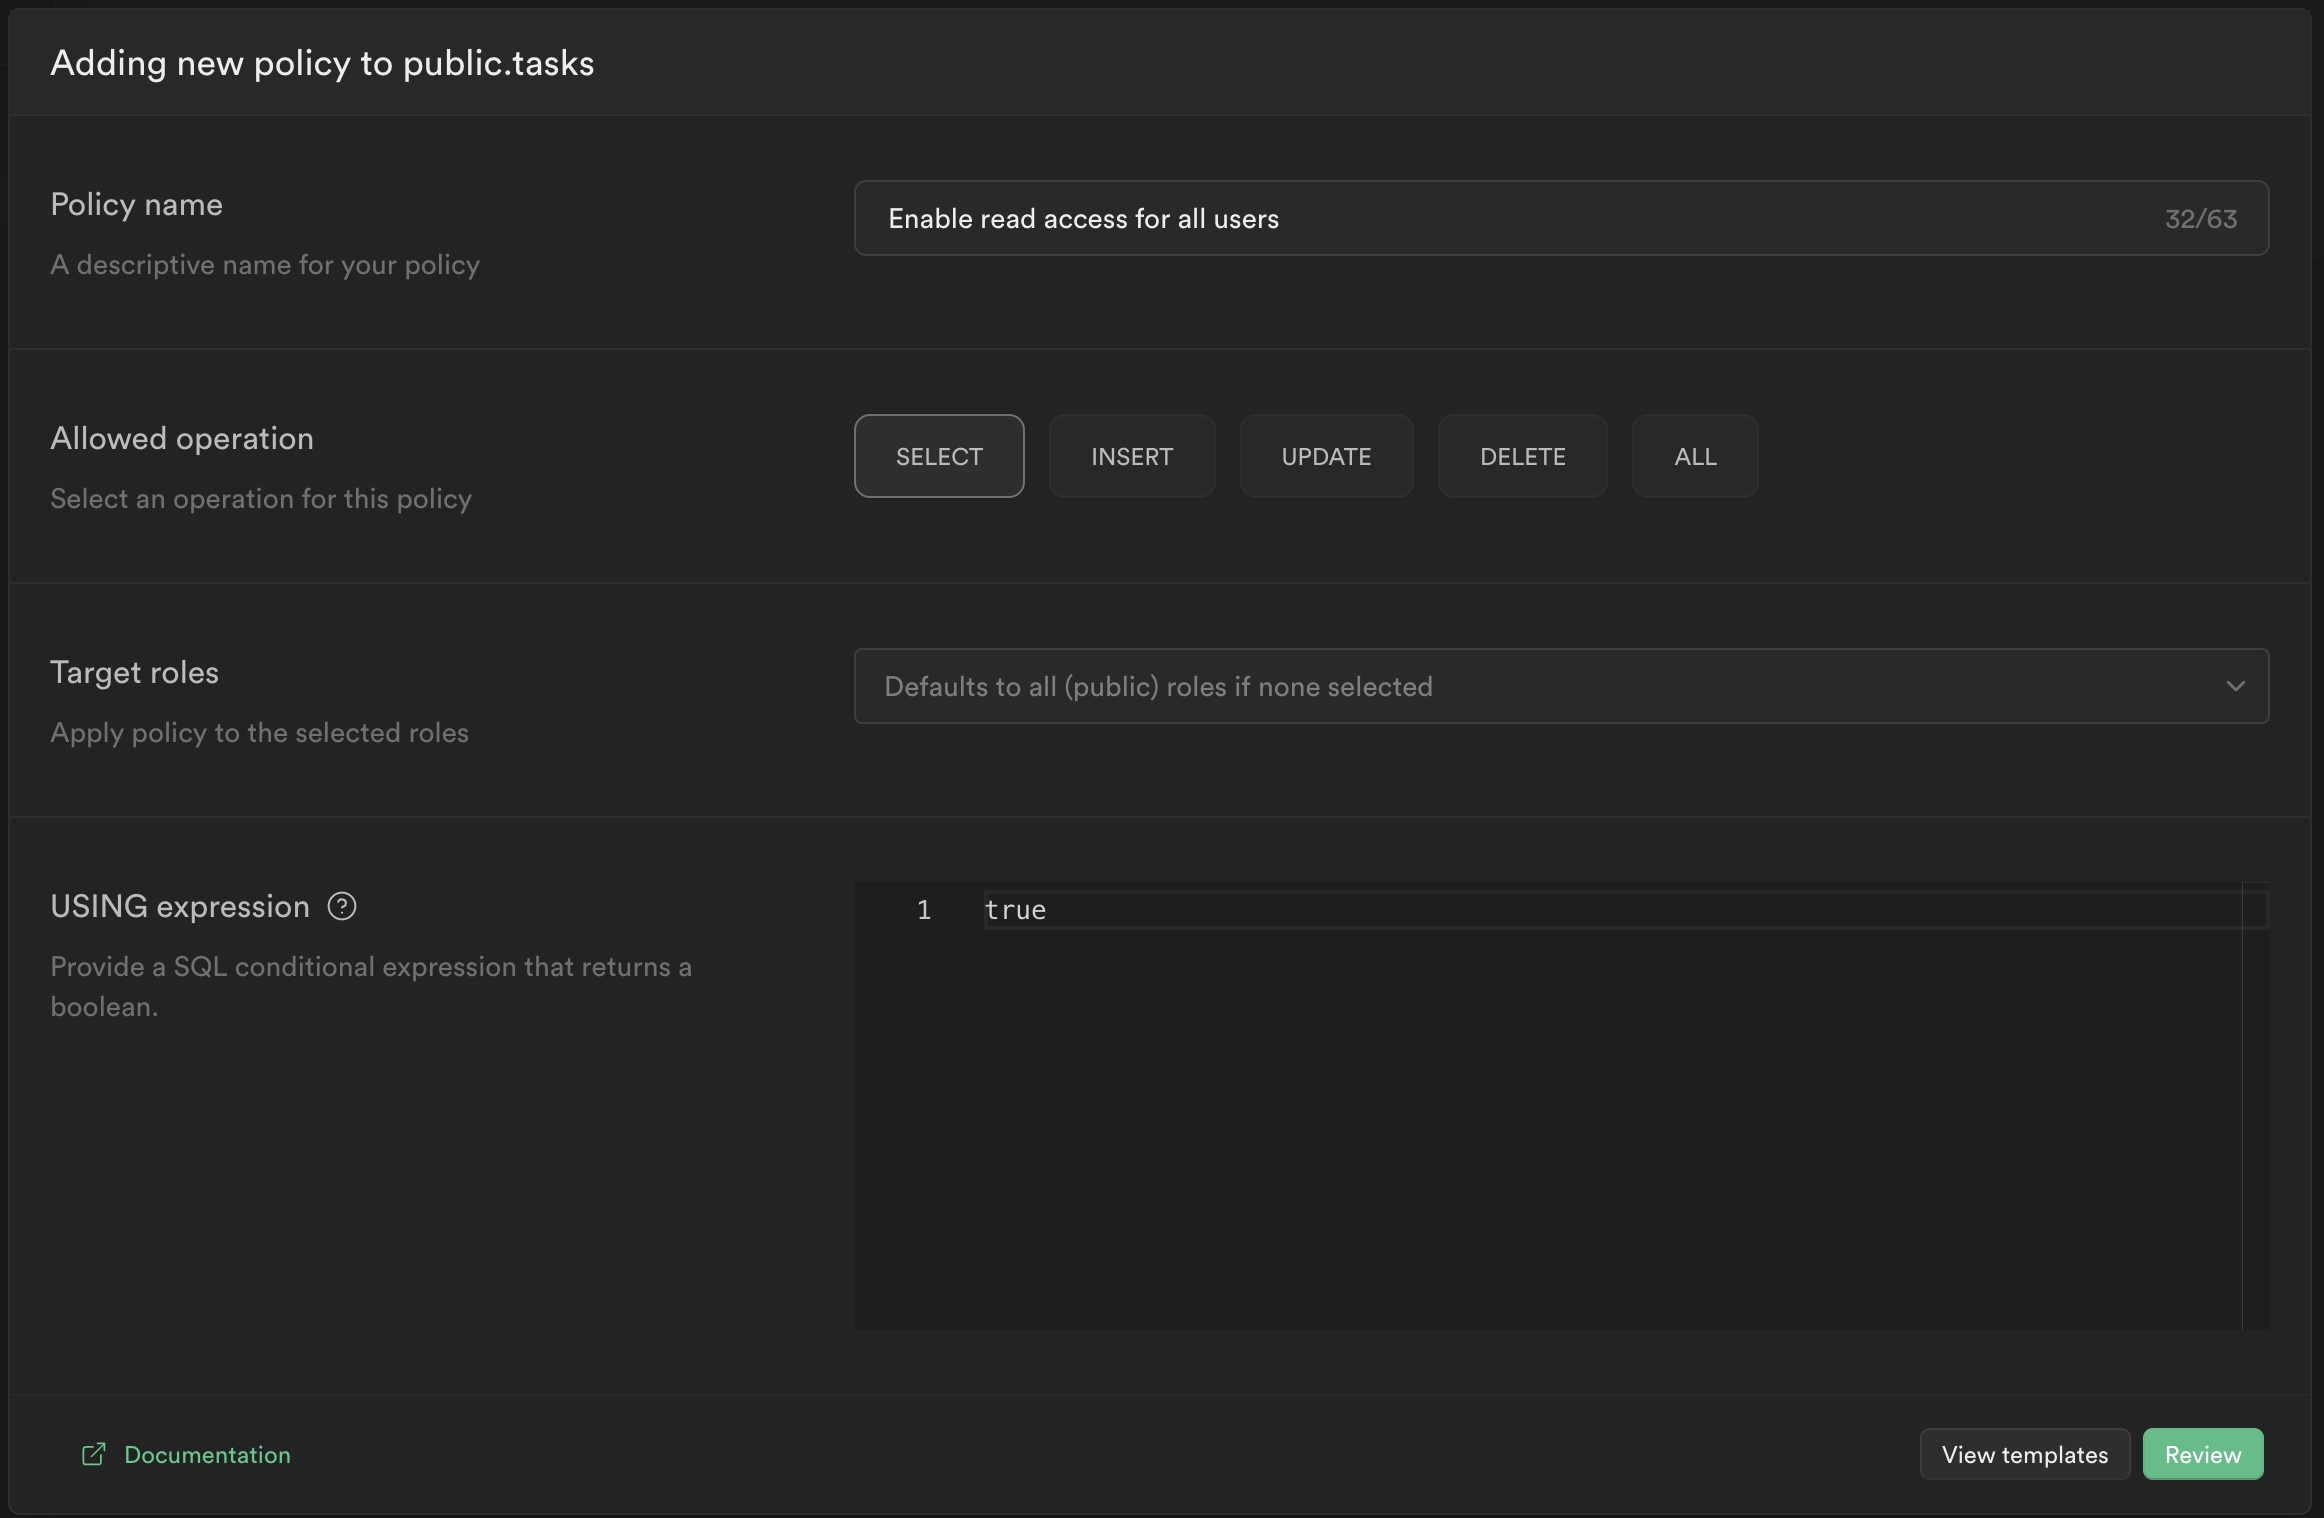
Next we will select the "Get started quickly" option:
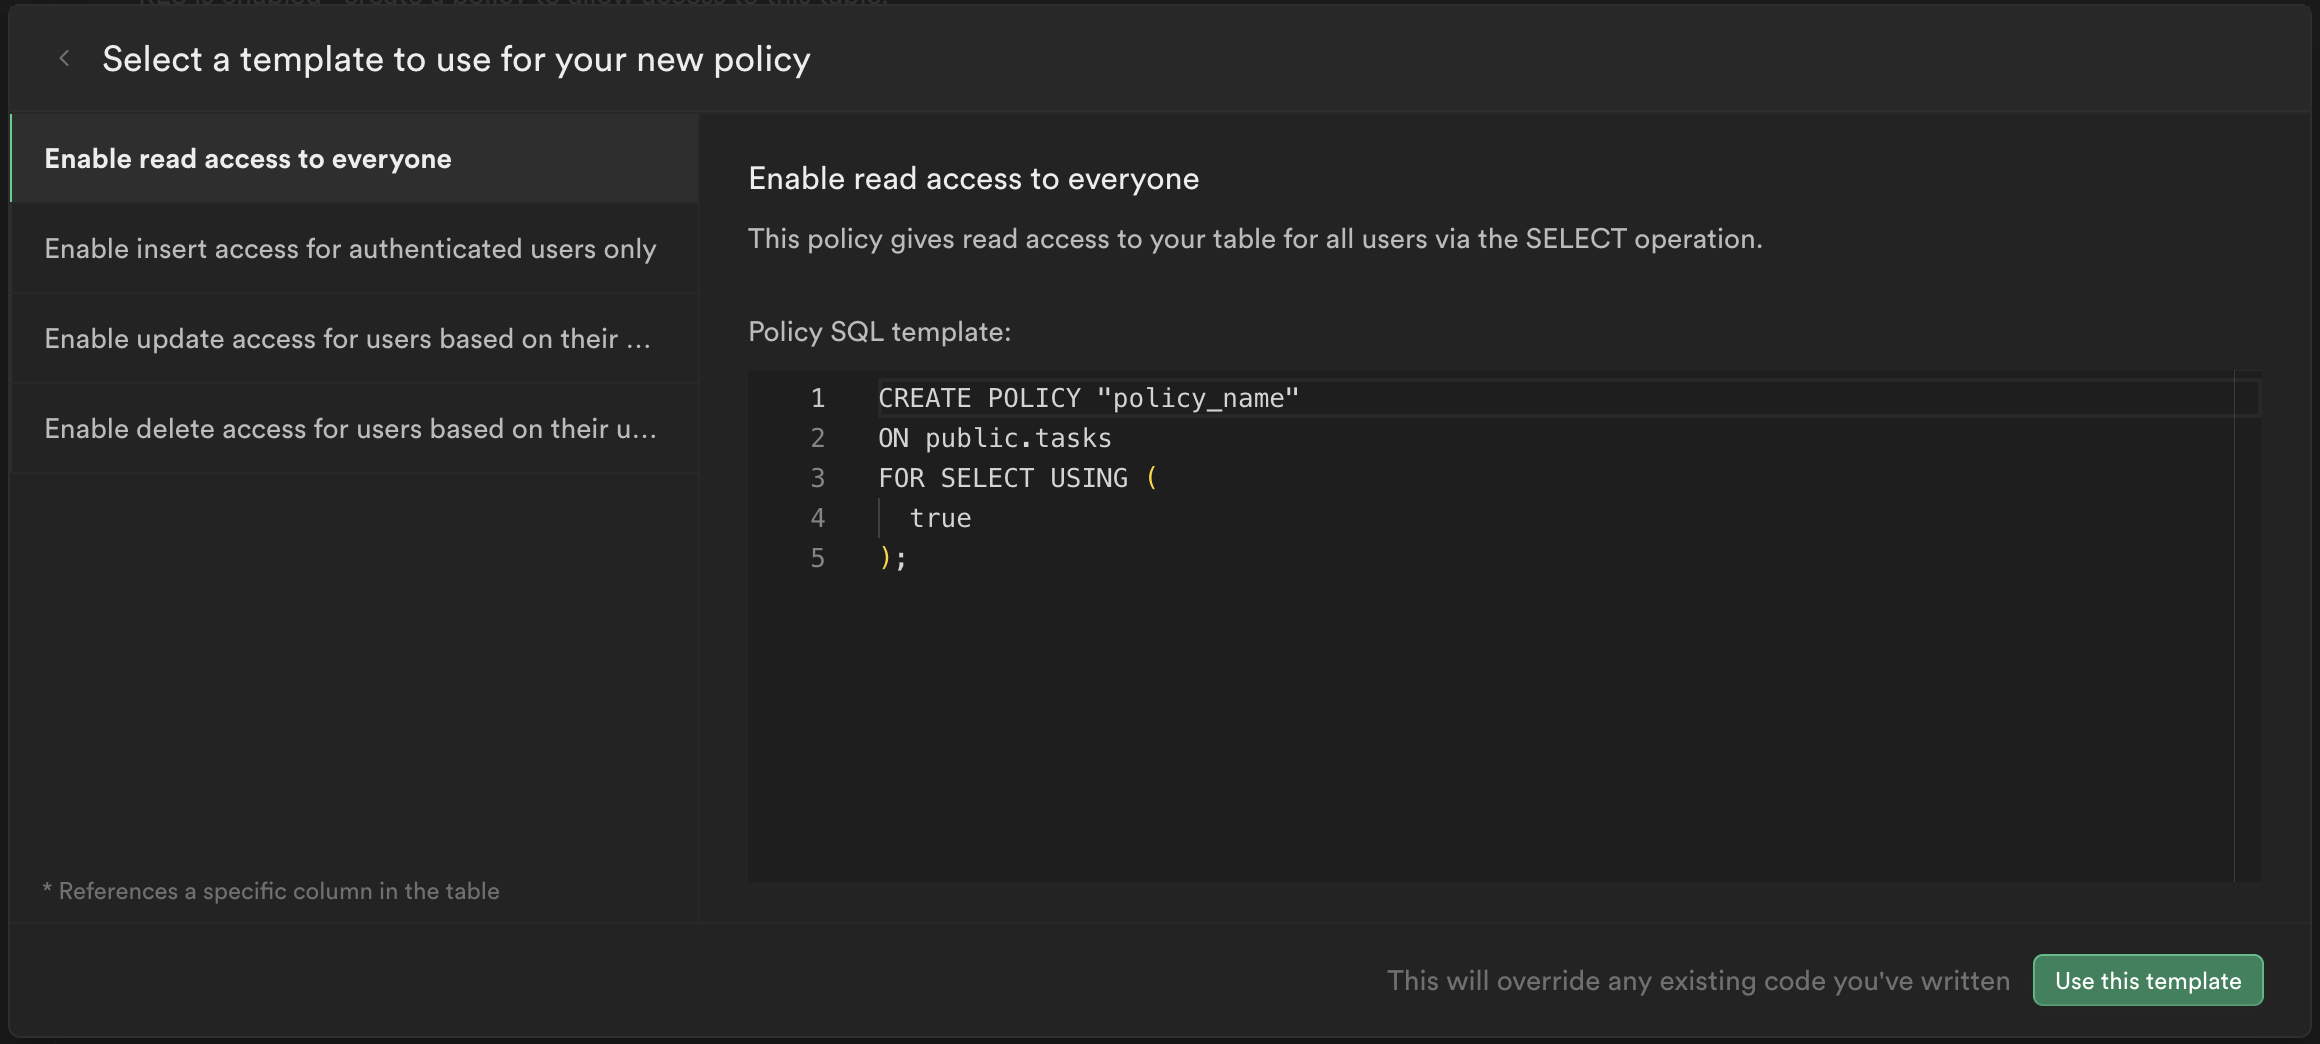
Select the "Enable read access to everyone" template. Then press "Use this template":
We don't need to make any changes so you can simply review and save the policy:
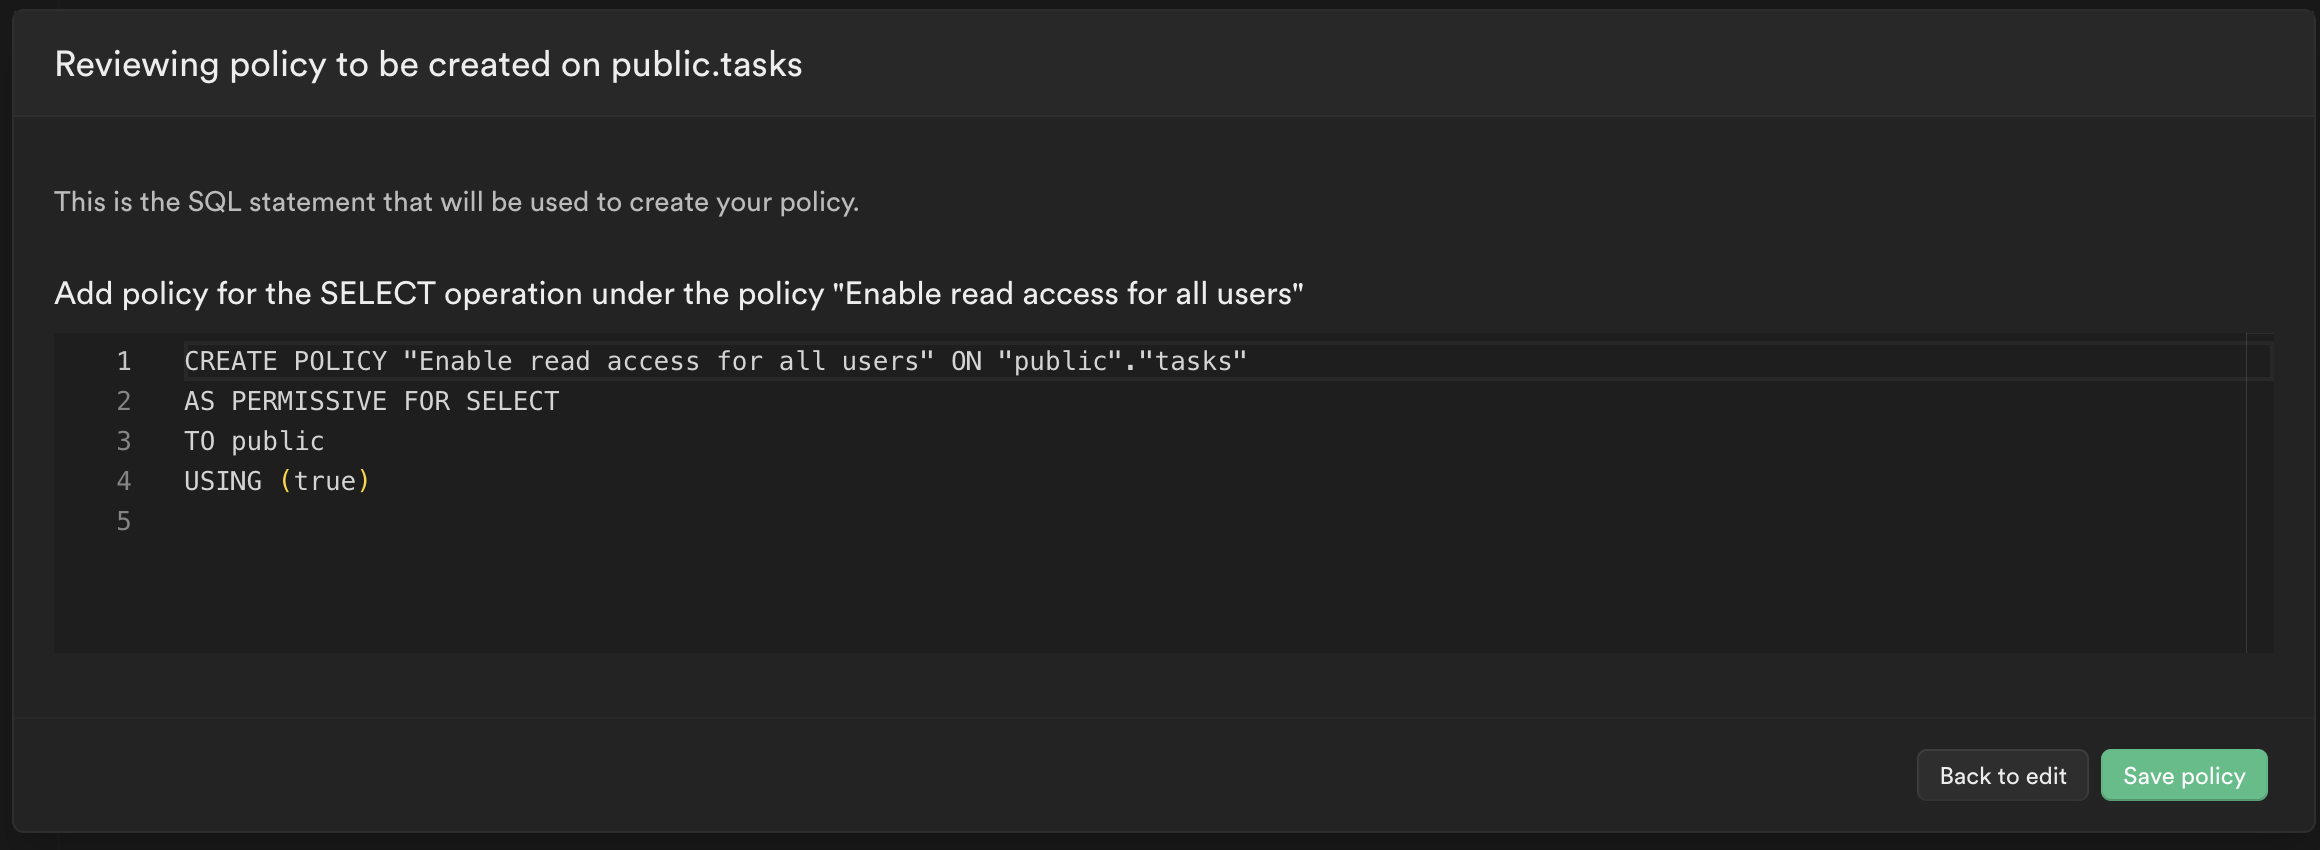
Now you have security enabled to stop people from writing to your database but being easily able to view the data.
Create a Supabase Client
First install supabase in your app:
npm install @supabase/supabase-js
Then create a reusable client that you can use in your application:
// supabase.js
import { createClient } from '@supabase/supabase-js'
export const supabase = createClient( 'YOUR_SUPABASE_URL', 'YOUR_SUPABASE_ANON_KEY' )
I usually create this in a file called supabase.js.
Use the Client
The client is super easy and intuitive to use then:
import { supabase } from './supabase';

async function fetchPosts() {
  // Fetch the "description" and "created_at" data from the task table
  let { data, error } = await supabase .from('tasks').select('description, created_at')
  if (error) {
    console.log('Error: ', error)
  } else {
    console.log('Tasks: ', data)
  }
}
If you start adding data via the Supabase panel you'll start seeing real data in your apps. 🎉
In future articles we will dive into more complete examples to learn how to leverage the power of Supabase.
But for now I hope this gives you a taste of the potential.
Follow me on Twitter or connect on LinkedIn.
🚨 Want to make friends and learn from peers? You can join our free web developer community here. 🎉
Founder of Codú - The web developer community! I've worked in nearly every corner of technology businesses: Lead Developer, Software Architect, Product Manager, CTO, and now happily a Founder.
Loading discussion...
Hey! 👋
Got something to say?
or to leave a comment.