The Importance of IAM in AWS
Did you know that in 2020, more than 80% of data breaches were caused by stolen or weak credentials? As more businesses move to the cloud, it's more important than ever to secure access to your AWS resources using IAM.
What is IAM?
IAM stands for Identity and Access Management. It is a set of processes, policies, and technologies that allow you to manage users and control their access to your resources.
In simpler terms, IAM is like a gatekeeper for your AWS account. It helps you control who has access to your resources (like your data, applications, or services) and what they can do with them. It also lets you track who is doing what in your AWS account.
IAM involves several key functions, including identity management, access management, authentication, authorization, and accountability. These functions work together to ensure that users are granted the appropriate level of access to the systems and data they need to do their jobs, while also maintaining the security and integrity of the organisation's digital assets. Tip: Nice explanation on the difference between authentication & authorization.
Overall, IAM is a critical service in AWS that helps you manage and control access to your AWS resources, and is an important first step for anyone working with AWS. It is strongly recommended that you create an IAM User for yourself and avoid using root access, even if you are the only person utilising the AWS account.
Why should I use IAM?
The default user when you create an AWS account is the root user. To sign in, you use the same email and password that you used when creating this account. Best practice is to not do this, instead use an IAM User. Here's why:
Security: Using root access is a security risk since it grants unlimited access to all AWS resources. With an IAM User, you can restrict access to specific resources by assigning permissions to that user. This means that if your IAM User account is compromised, the attacker will only have access to the resources that you have explicitly granted access to.
Least Privilege: It is a best practice to use the Principle of Least Privilege (PoLP) when granting access to AWS resources. This means giving users only the permissions they need to perform their job and nothing more. By creating an IAM User, you can assign specific permissions to that user and follow the least privilege principle.
Accountability: Using an IAM User account allows you to monitor and audit user activity, so you can track who is accessing your resources and when. This is important for security and compliance purposes.
Separation of Concerns: Creating an IAM User allows you to separate the management of your AWS account from the root account. You can assign different IAM Users to manage different AWS services, which helps to organise and manage your AWS environment more effectively.
Creating IAM Users & Groups
- Type IAM into the search bar on your AWS dashboard and select it from the menu.
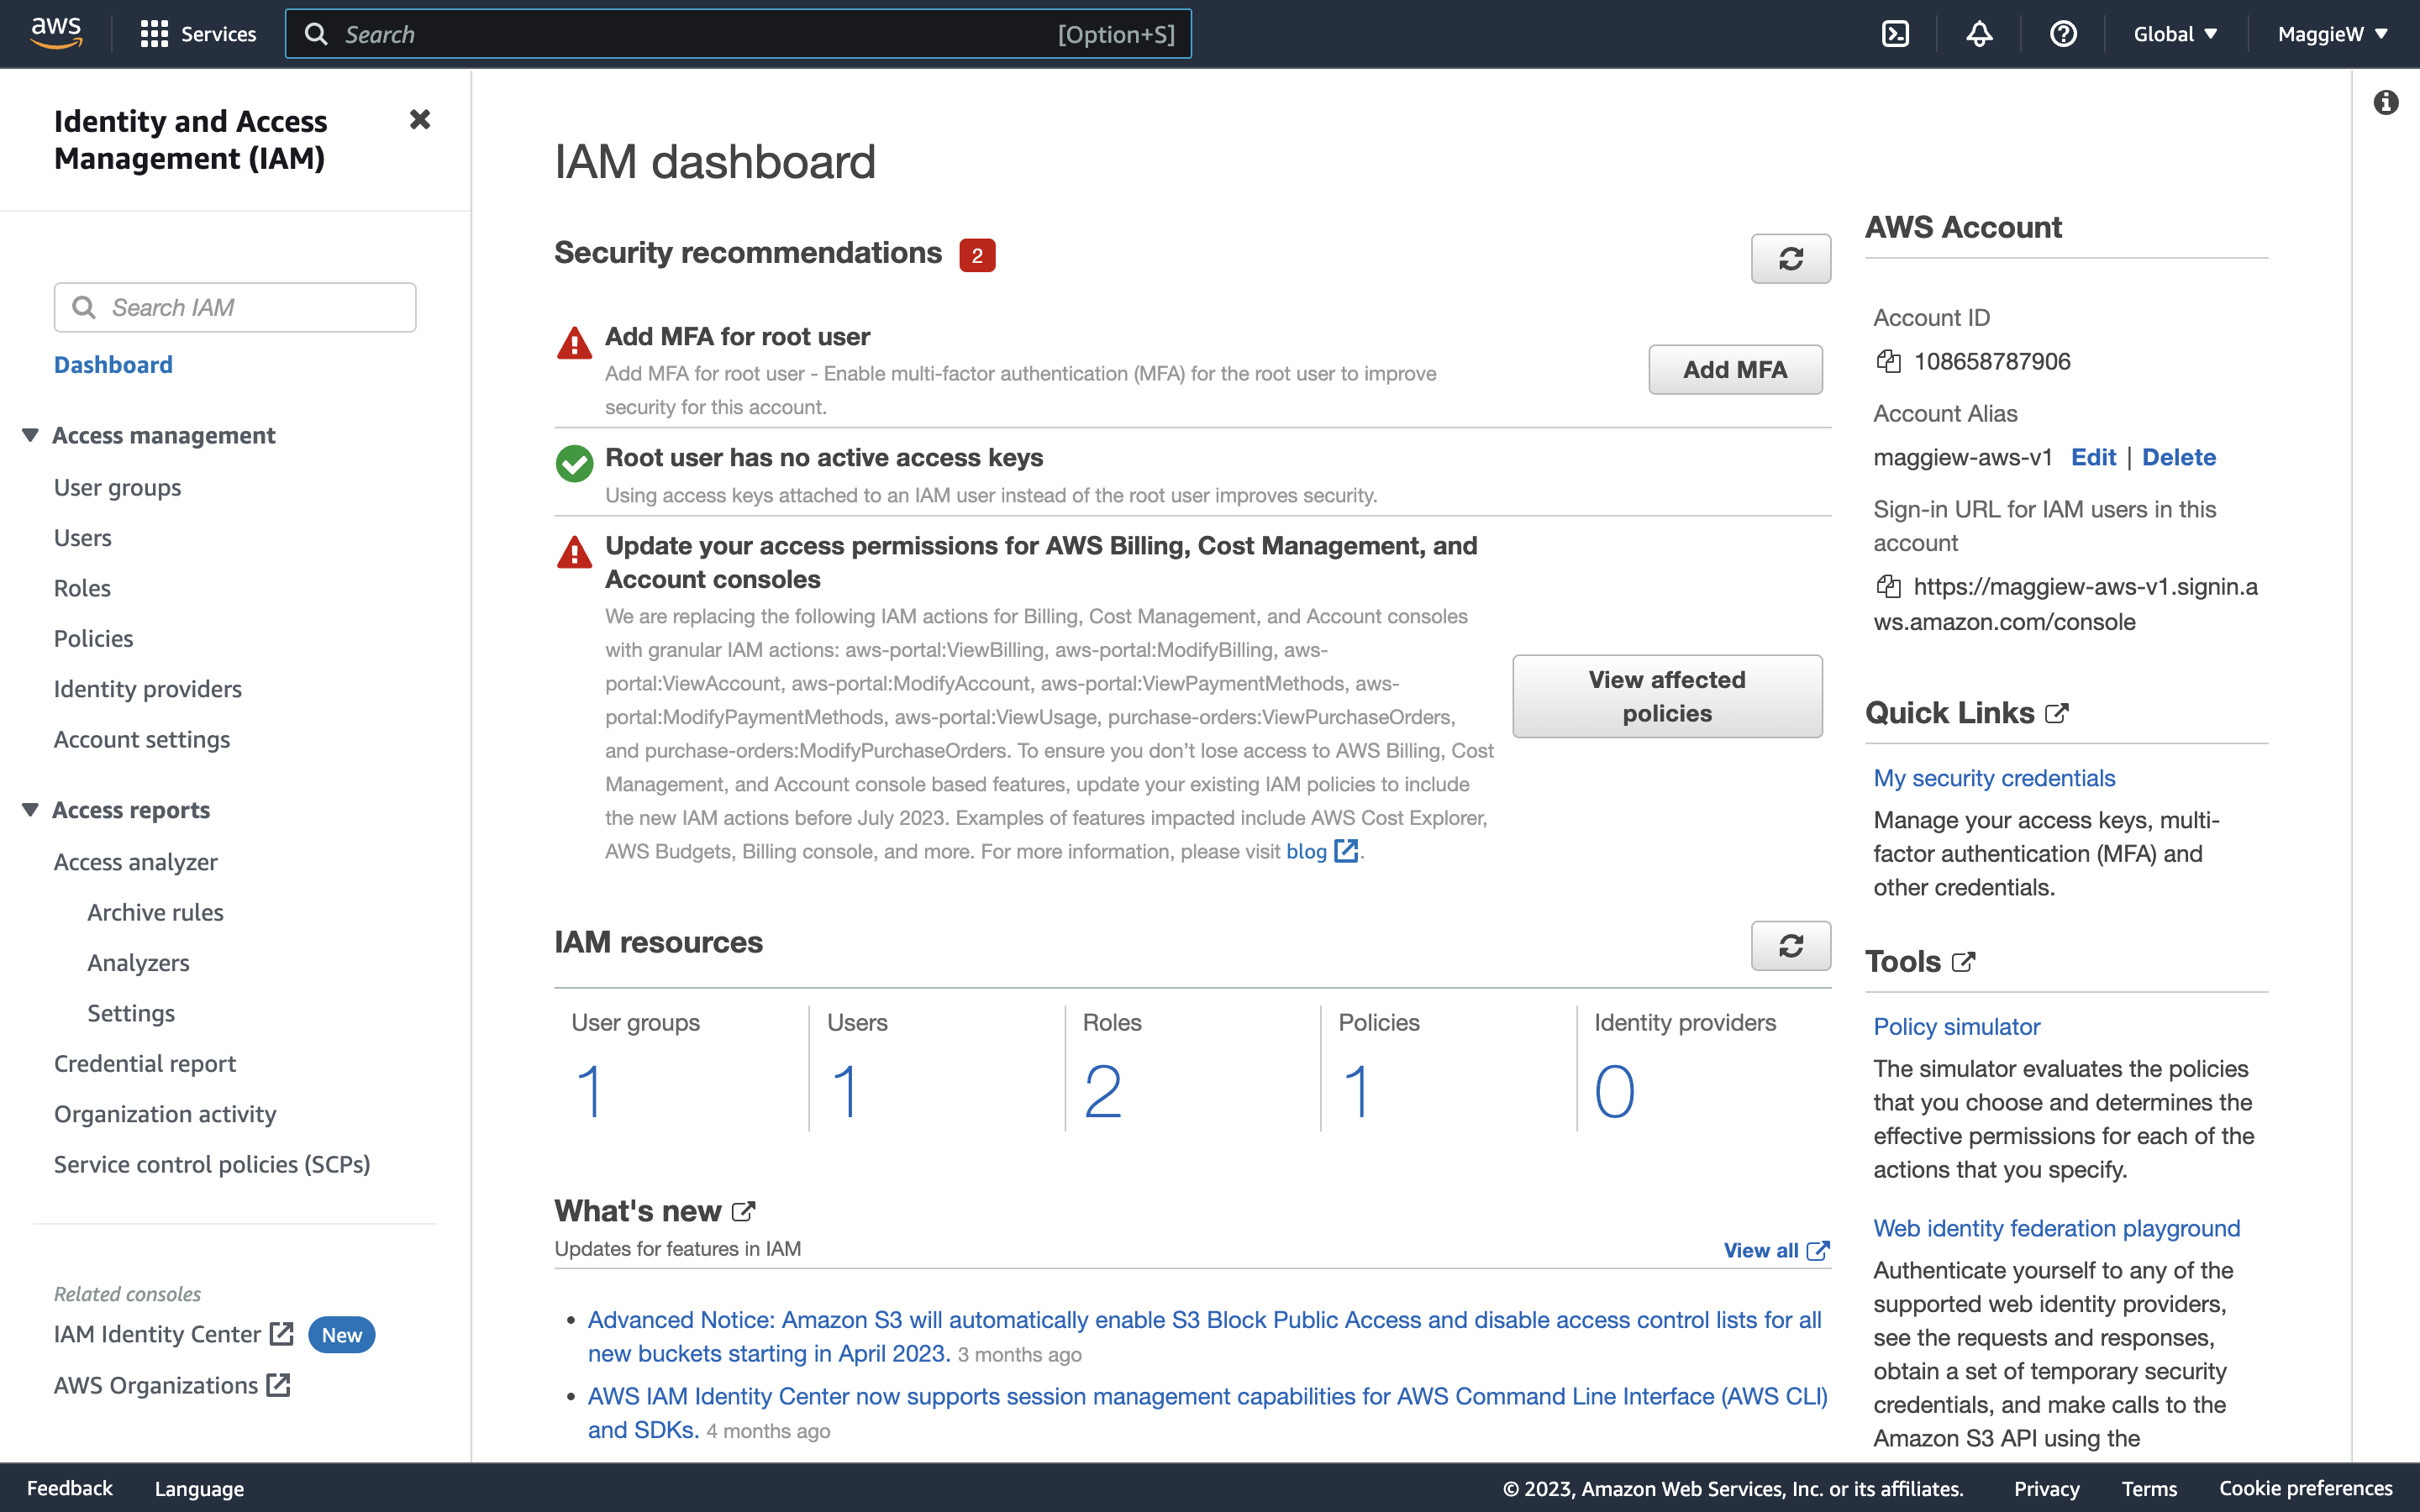
- You will be taken to the IAM dashboard. Note: In the top right corner it says ‘Global’. This isn’t typical of AWS. Normally you will see a specific region here, but IAM policies are global, meaning that you will have the same users no matter what region you have selected. Tip: When working with AWS, it can be easy to get lost trying to debug an error you may be facing. One quick and useful tip to check right from the beginning is to ensure that you are in the correct region. By default, the region will often be N. Virginia, but it is possible to switch to other regions unwittingly. It's important to note that resources may not be available across all regions, so if you can't find a resource that you know you've created, before you consider creating it again, check your region. This can save you a significant amount of time, as troubleshooting the wrong region can be a frustrating and unnecessary time-waster. It's one of those mistakes that many people make once and never repeat.
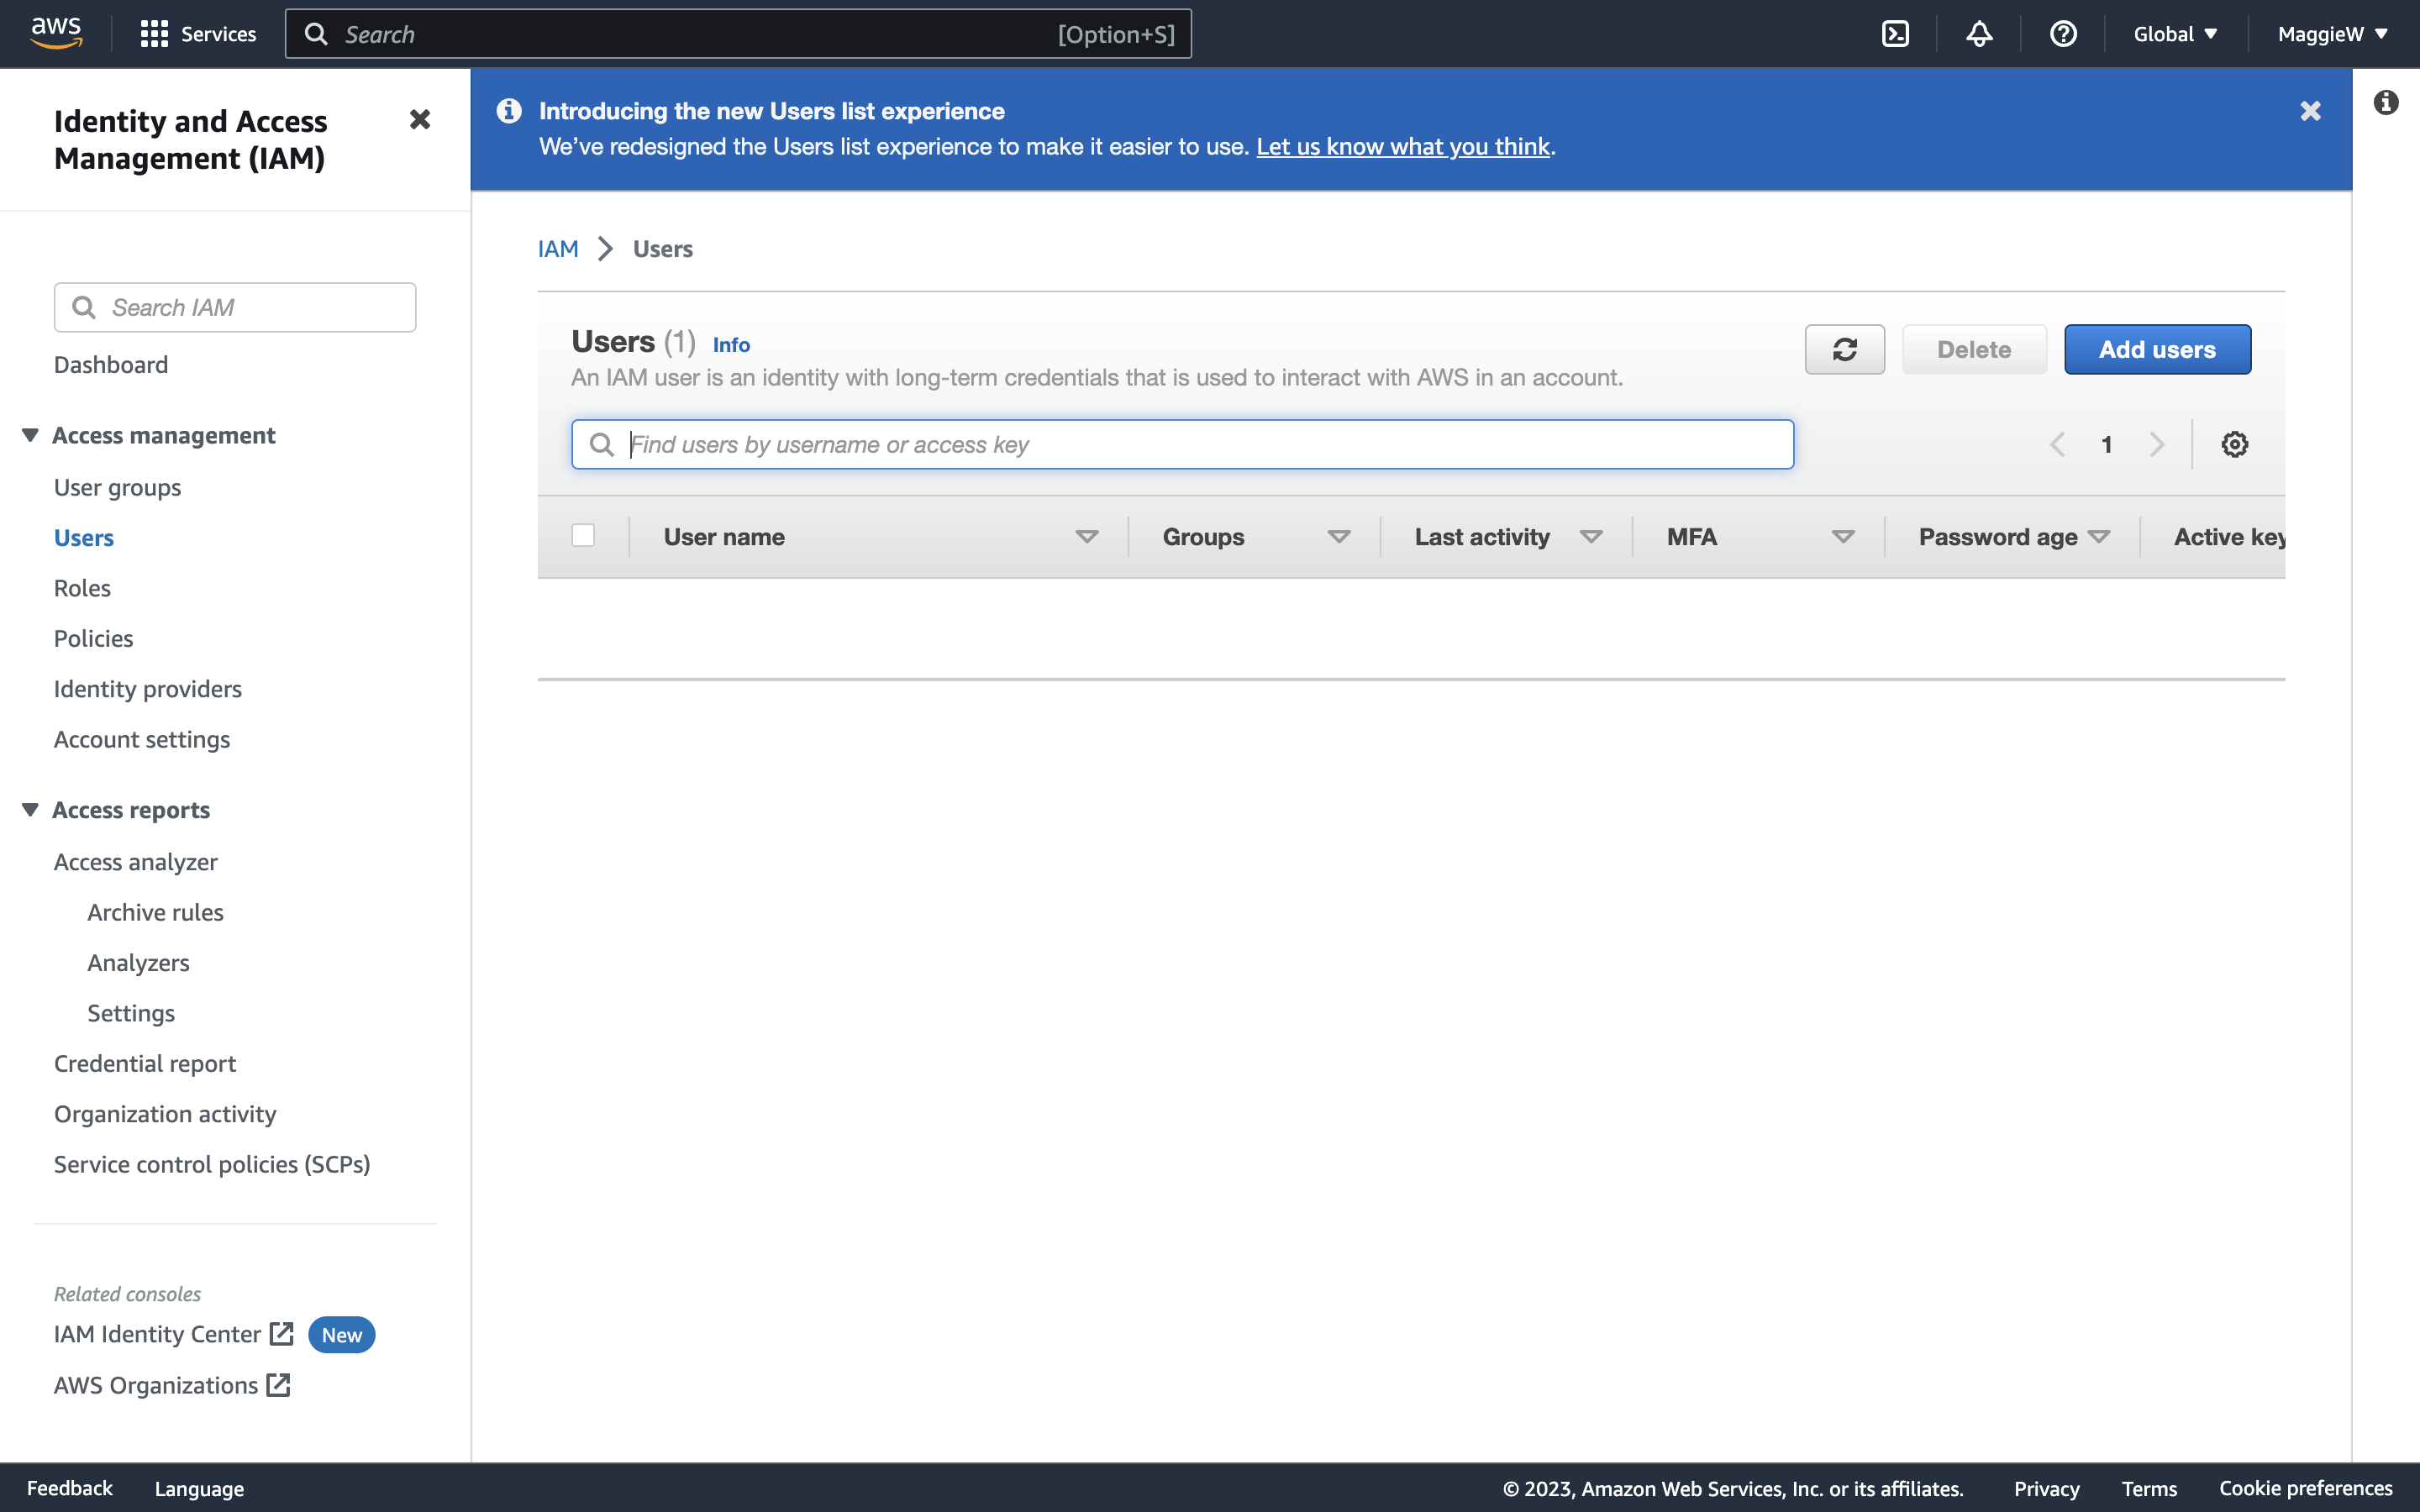
- On the left hand side you will see ‘Users’ select it. You will then see a screen with the option to ‘Add users’
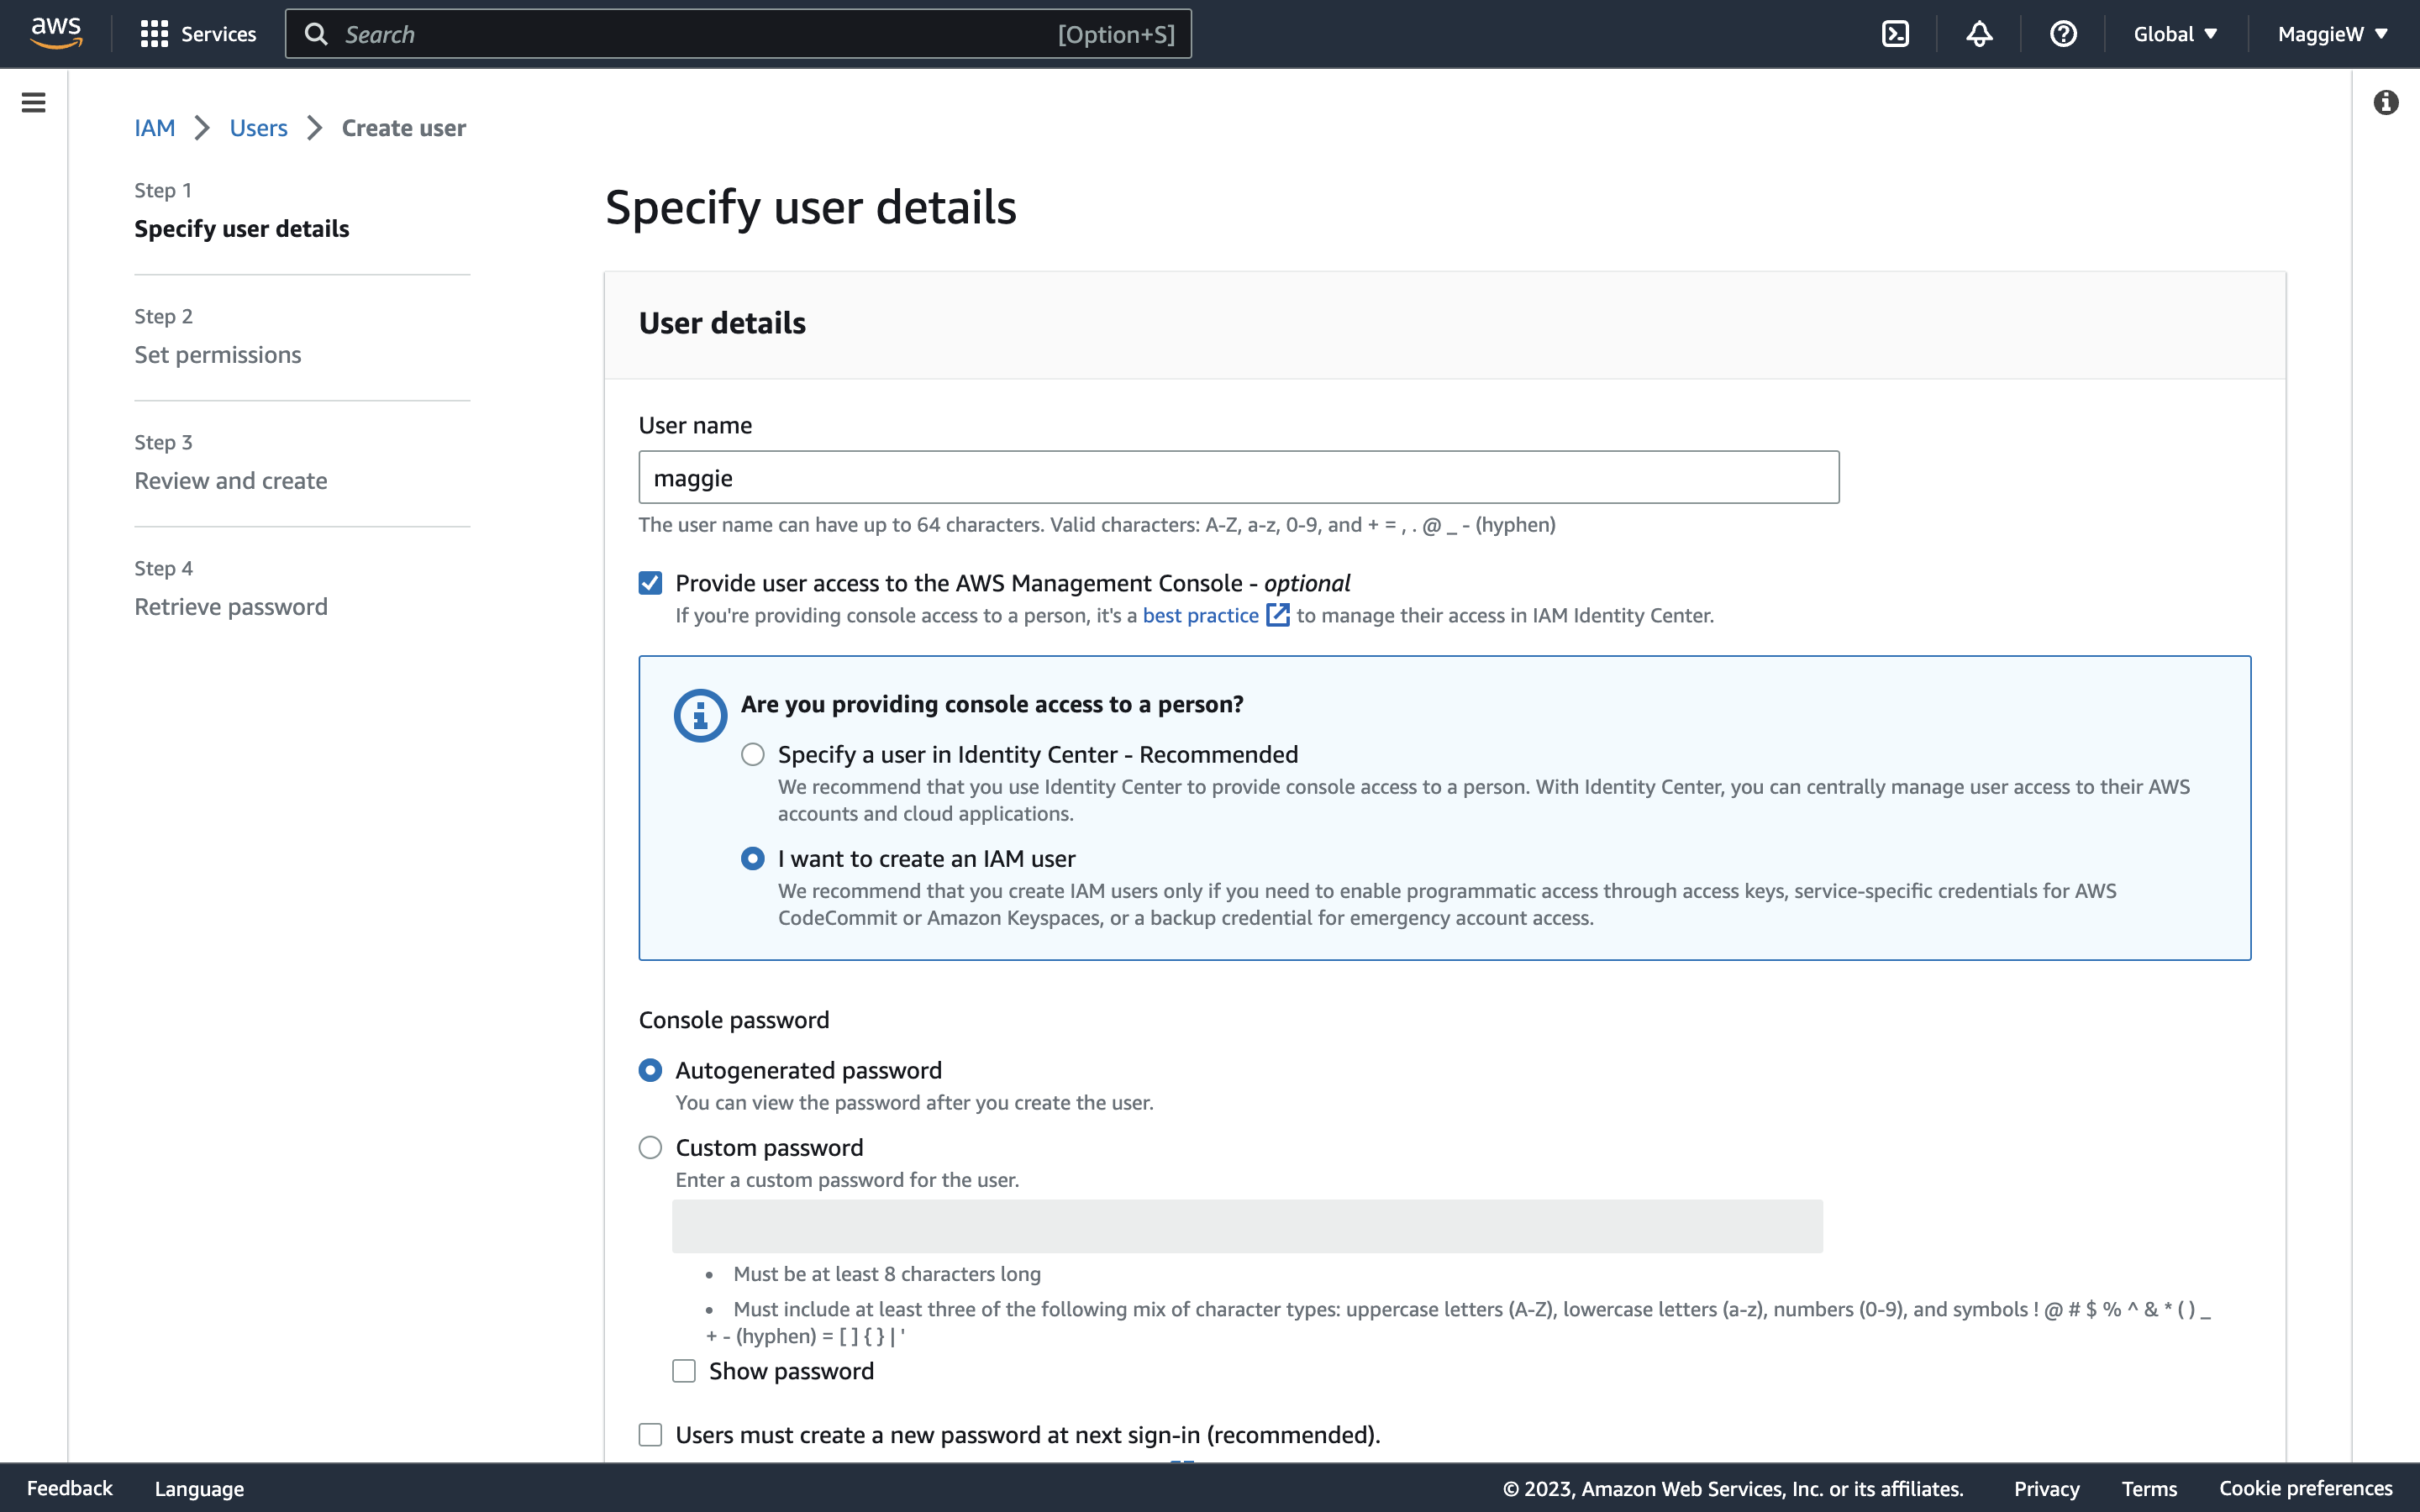
- Choose a name for your user, make sure to check the box that says ‘Provide user access to the AWS Management Console’. This will open some more options.
- Select ‘I want to create an IAM User’. Note: The AWS default recommendation is to specify a user in the Identity Center. You can of course go with the recommendation but there are extra steps involved and since I am creating this for myself I will do it this way. An organisation with many people to monitor may choose to give temporary credentials through the Identity Center.
- Add a password. You can auto generate it or provide one yourself if you wish. Just check whichever radio button you wish. There is a box checked by default ‘Users must create a new password at next sign-in’ This is the recommended option. If the user is for another person, leave it checked. If it is for yourself you can choose if you would like to create a new password at the next sign-in or uncheck the box if you don’t want to.
- Scroll to the bottom and click ‘Next’
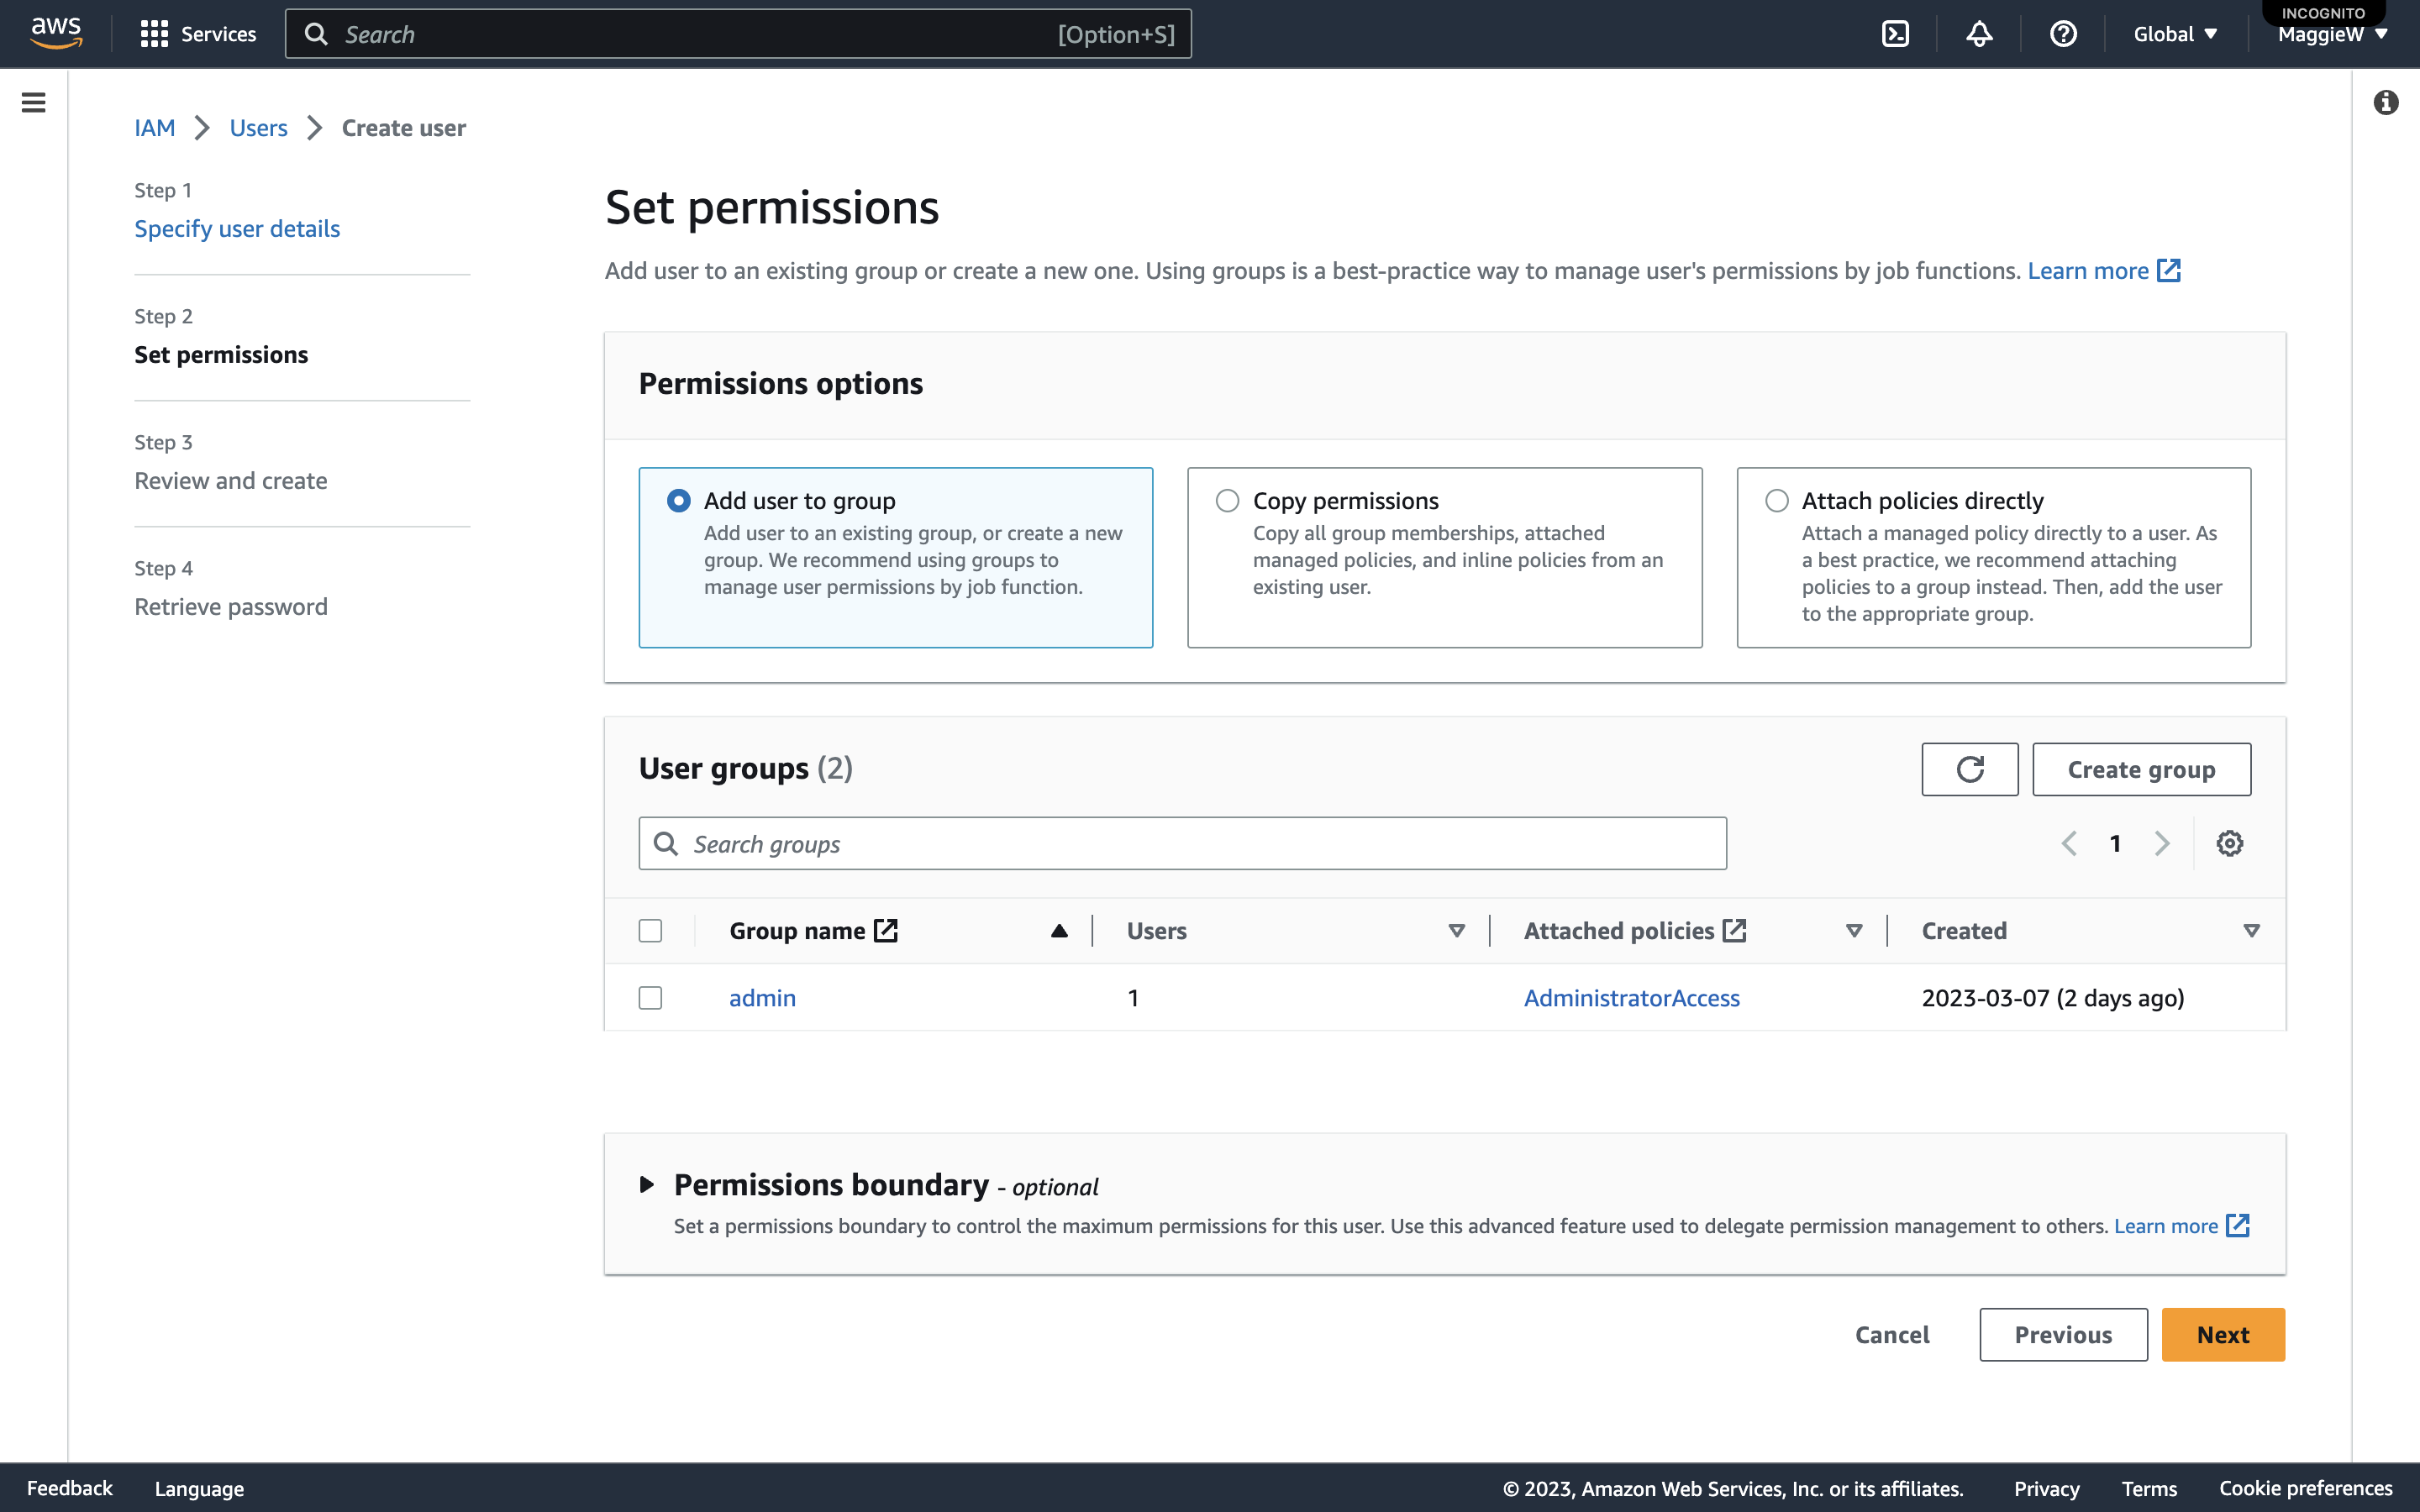
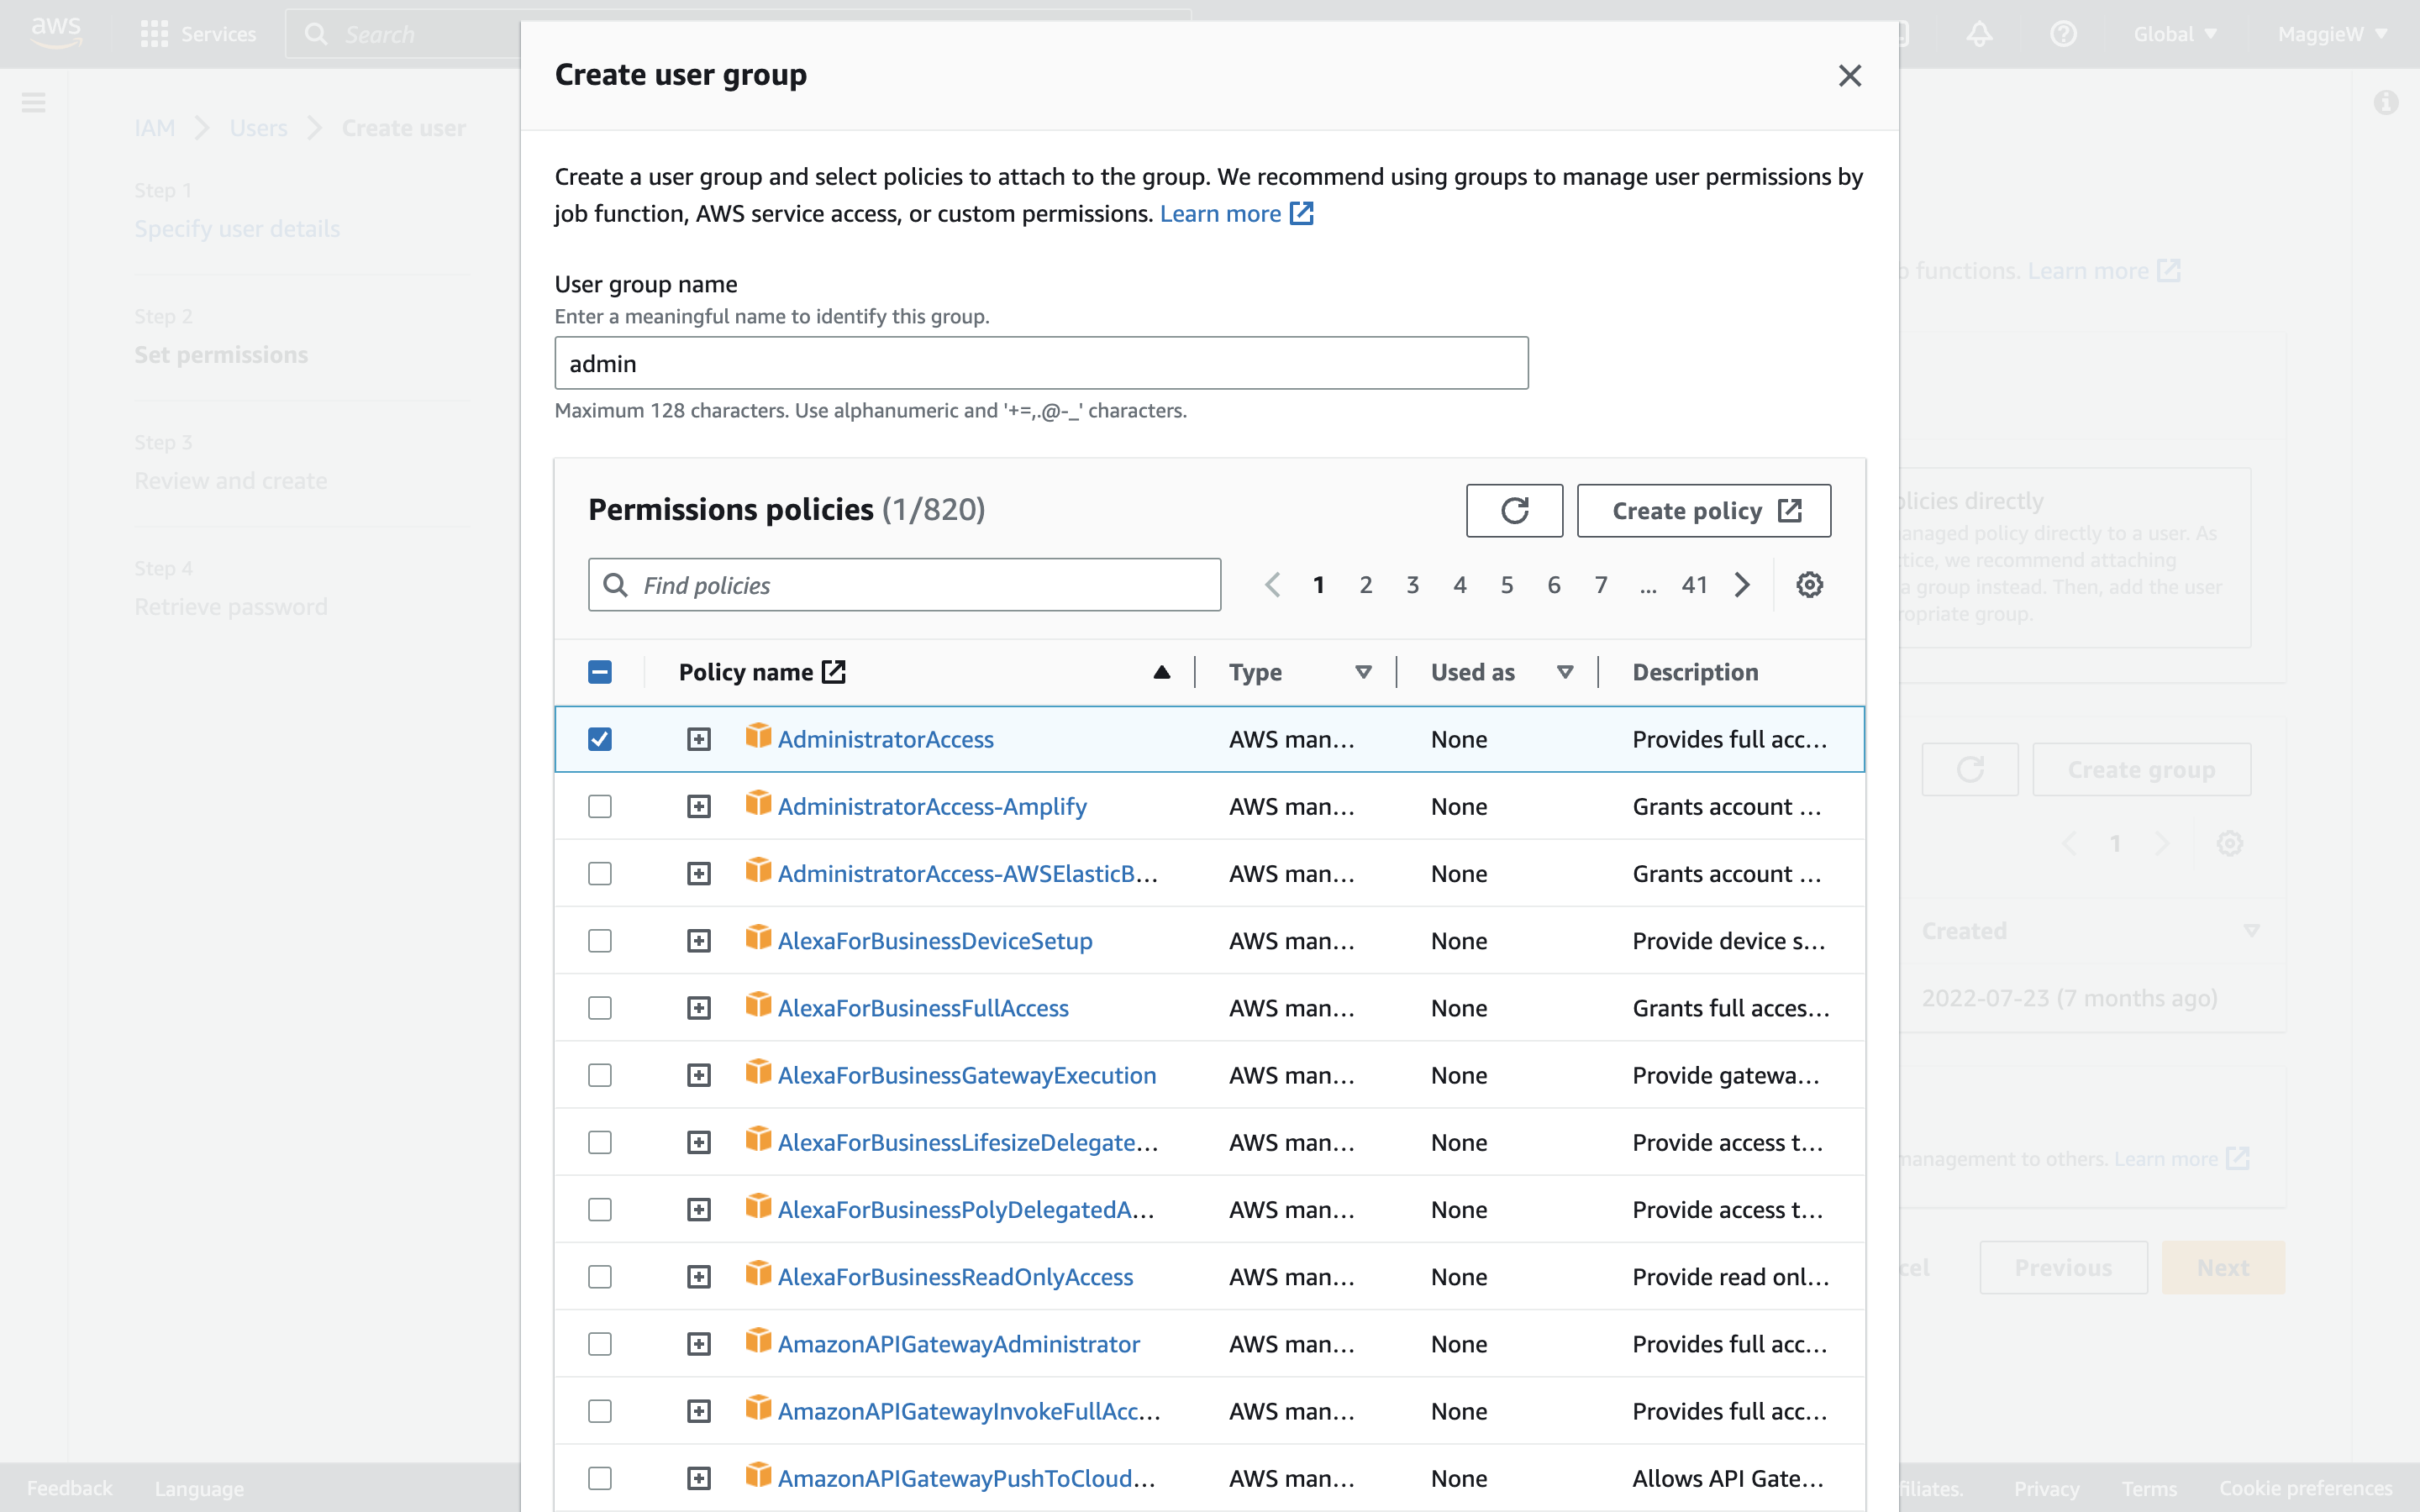
- On the ‘User groups’ panel click ‘Create Group’, a modal will pop up. Give your new group a name. I have chosen ‘admin’. *Note: Best practice is to have users in a group but they can exist without a group.
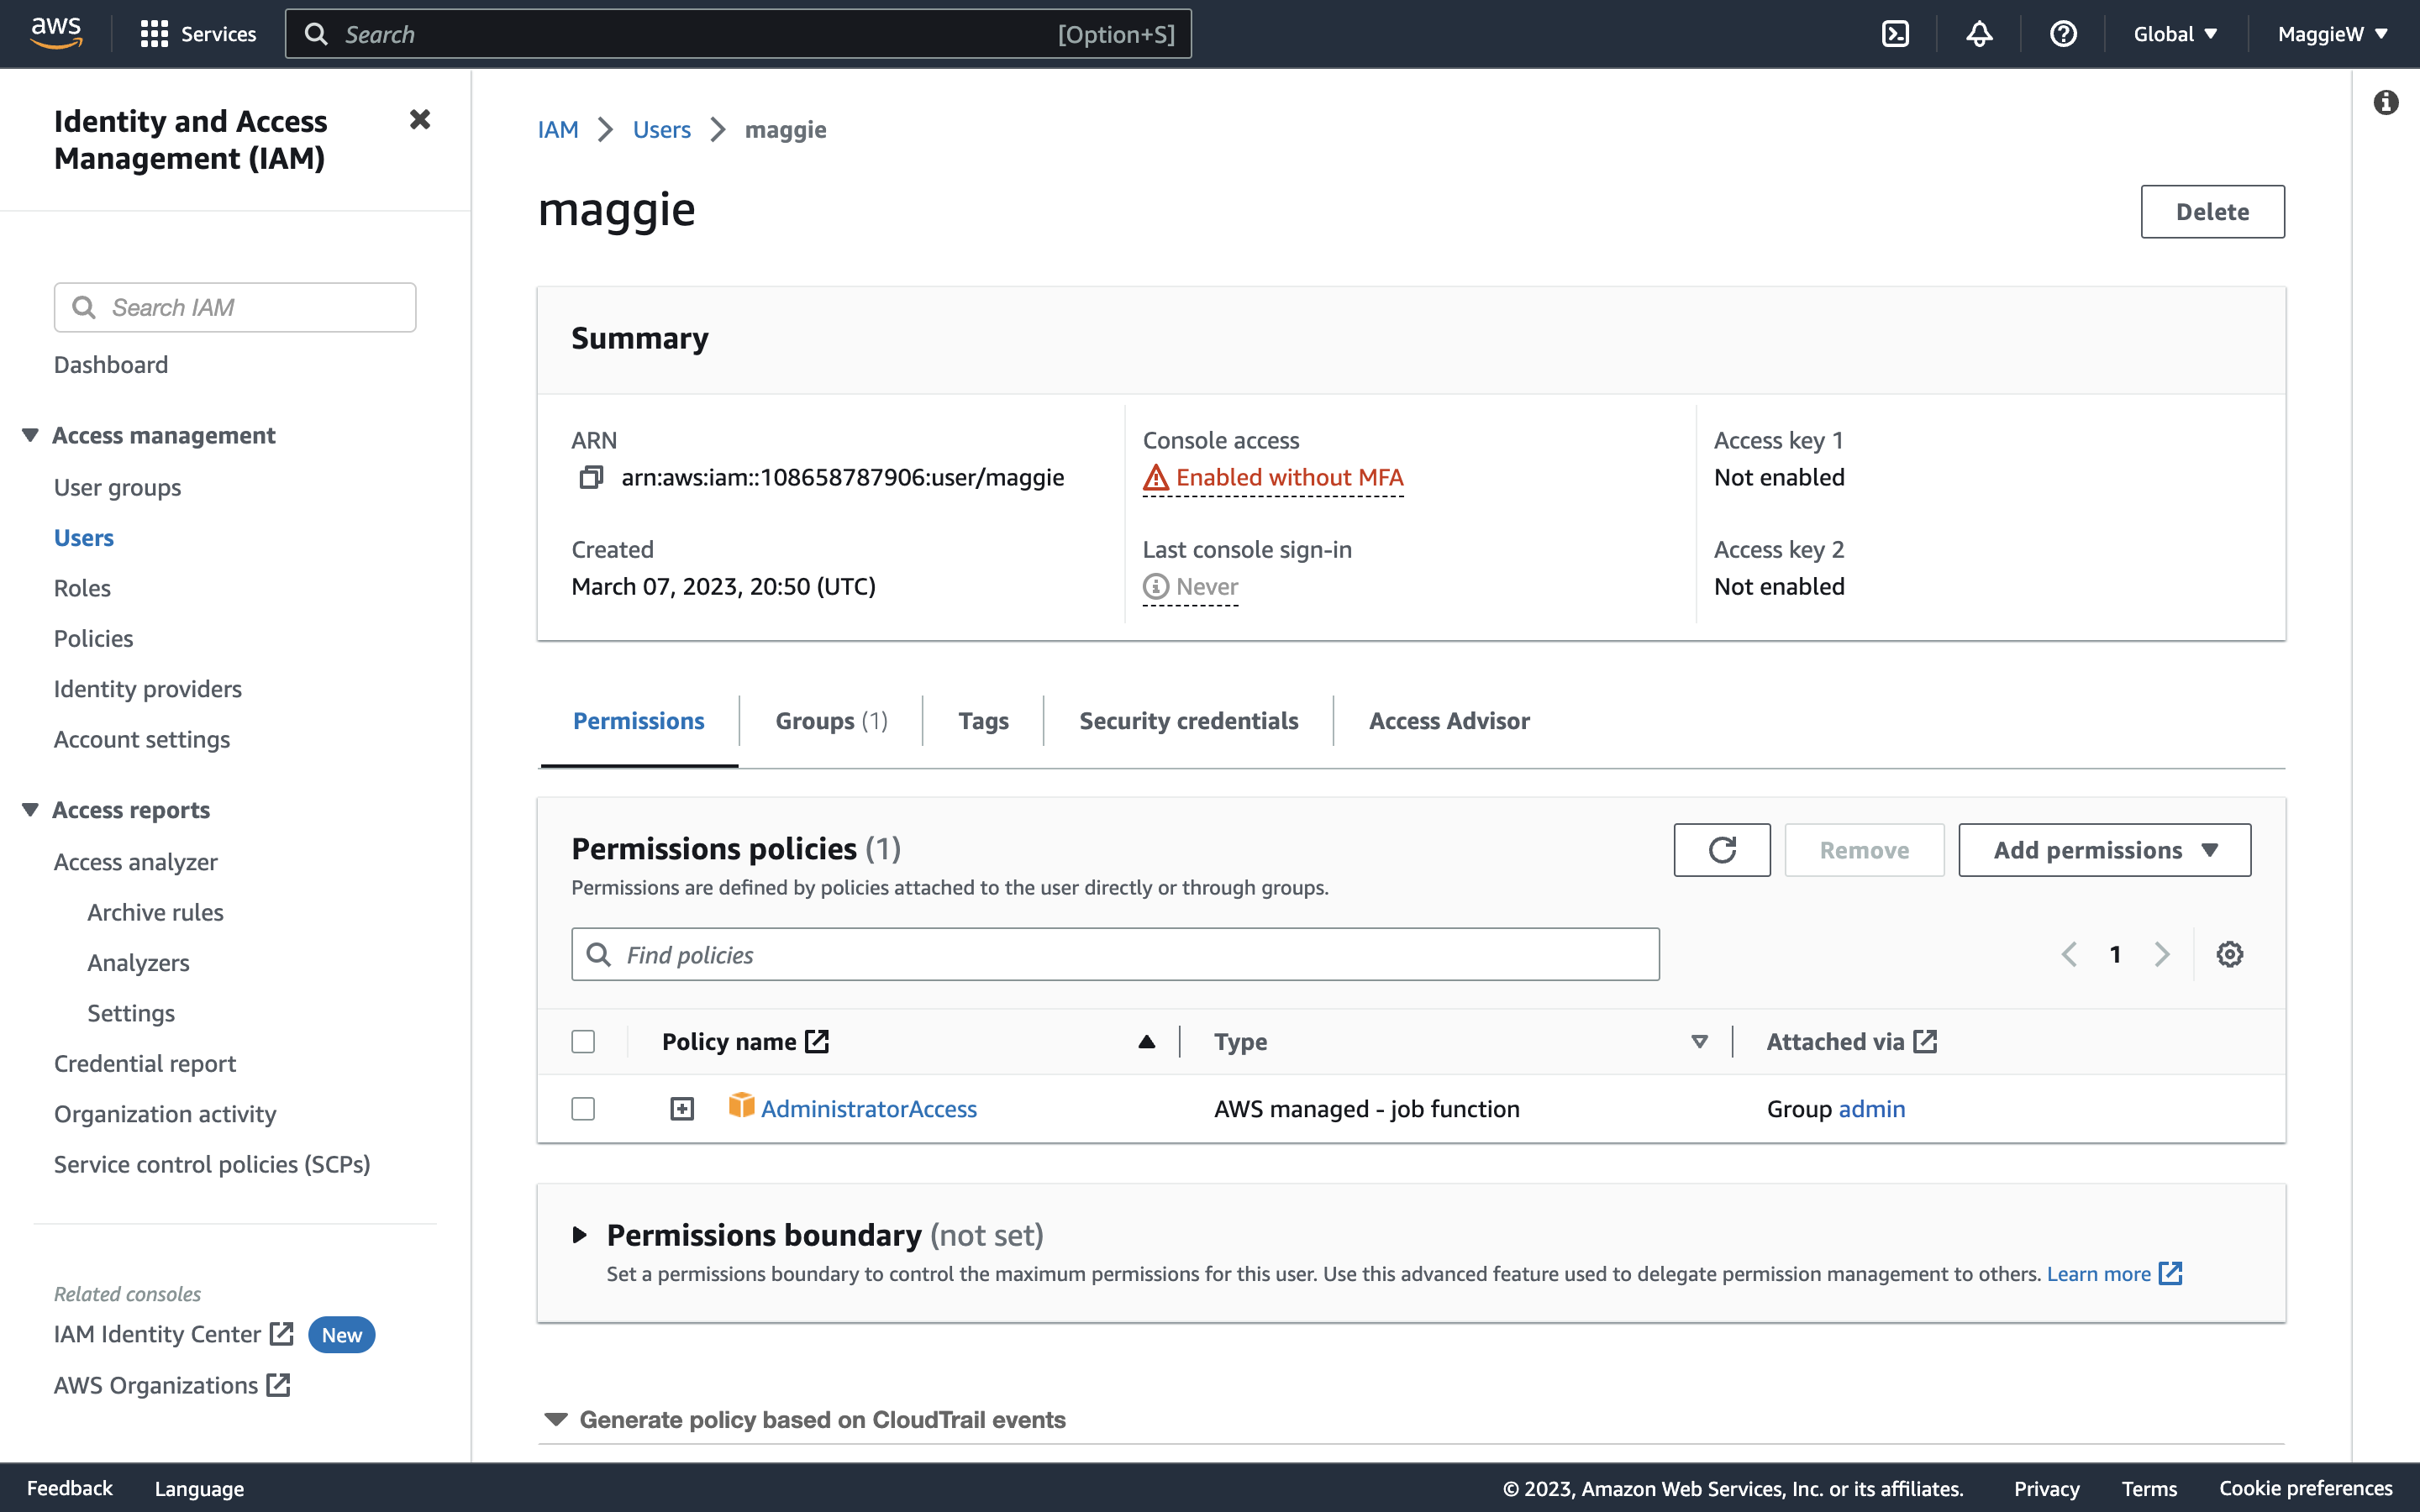
- As I am creating this Group for admin, I am going to add the ‘AdministratorAccess’ policy here by checking the box. Note: As I am creating this for myself as a more secure alternative to using the root access. I want to have as full access as I can as a user and this will allow that. If you are creating this user for someone else make sure that you are only giving them the access that they need by applying the Principle of Least Privilege.
- Scroll to the bottom and click ‘Create user group’.
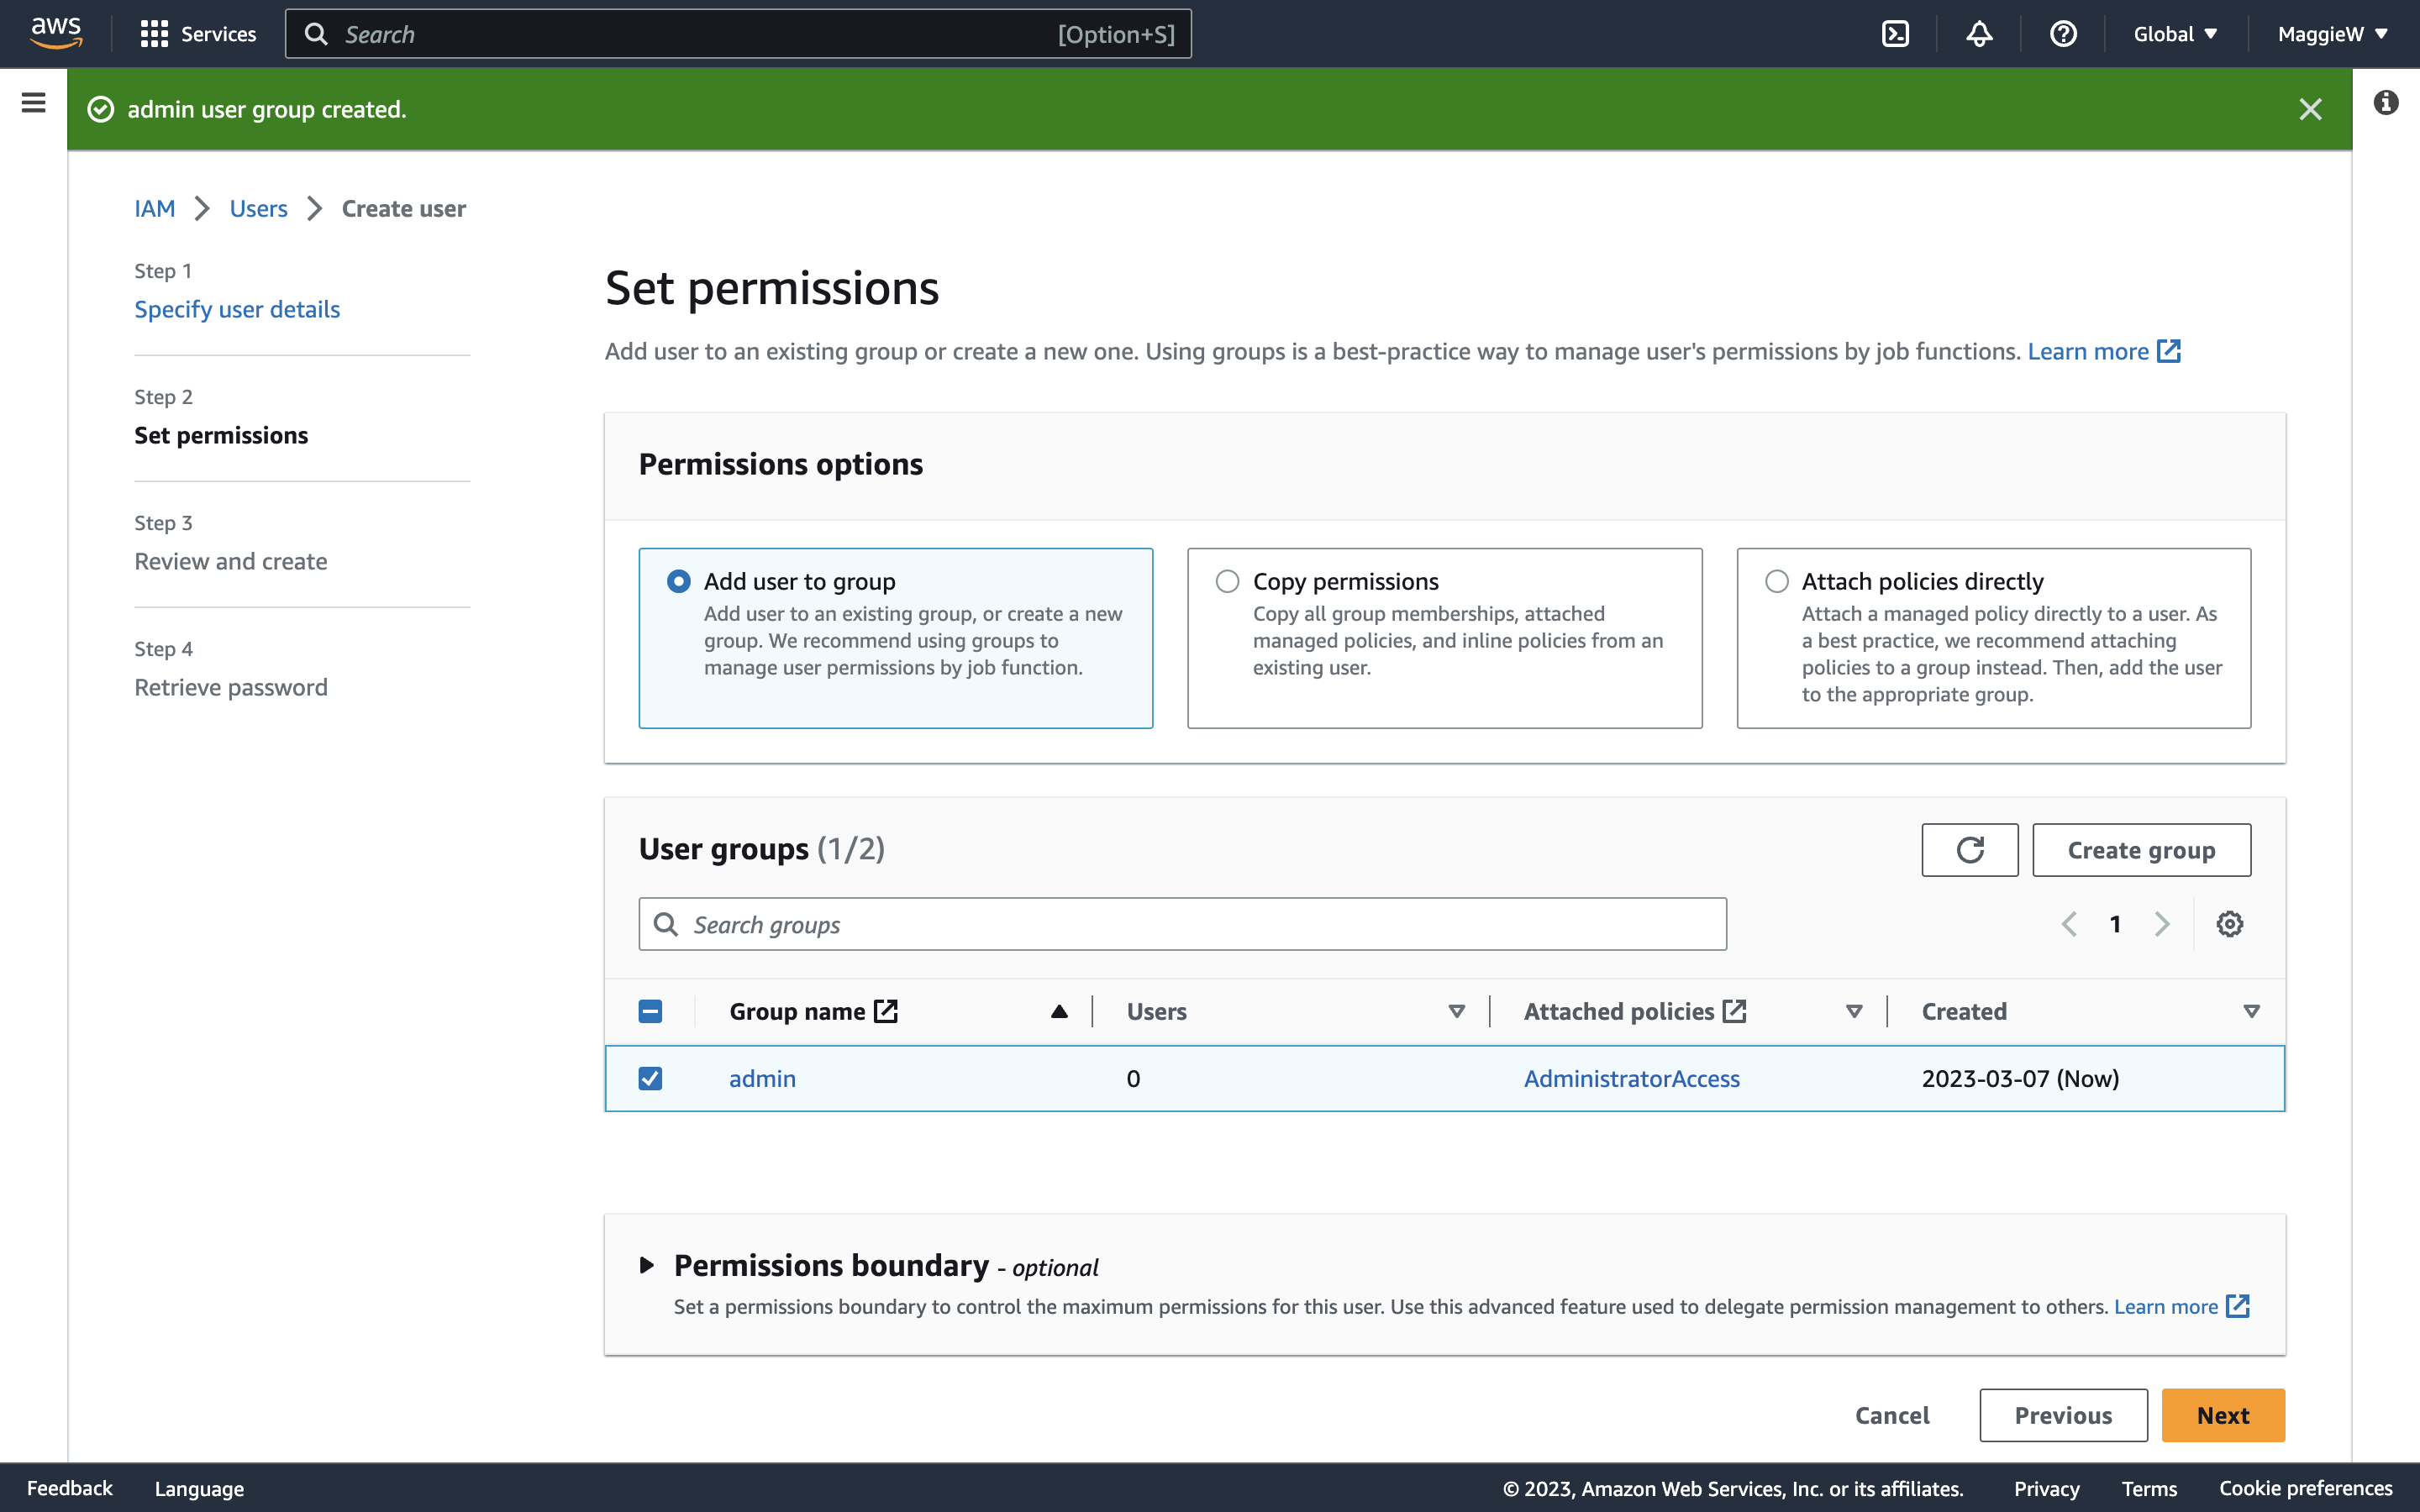
- You are brought back to the steps to create a user. ‘Add user to group’ is selected by default at the top. Check the box to select your user and click ‘Next’ at the bottom of the page.
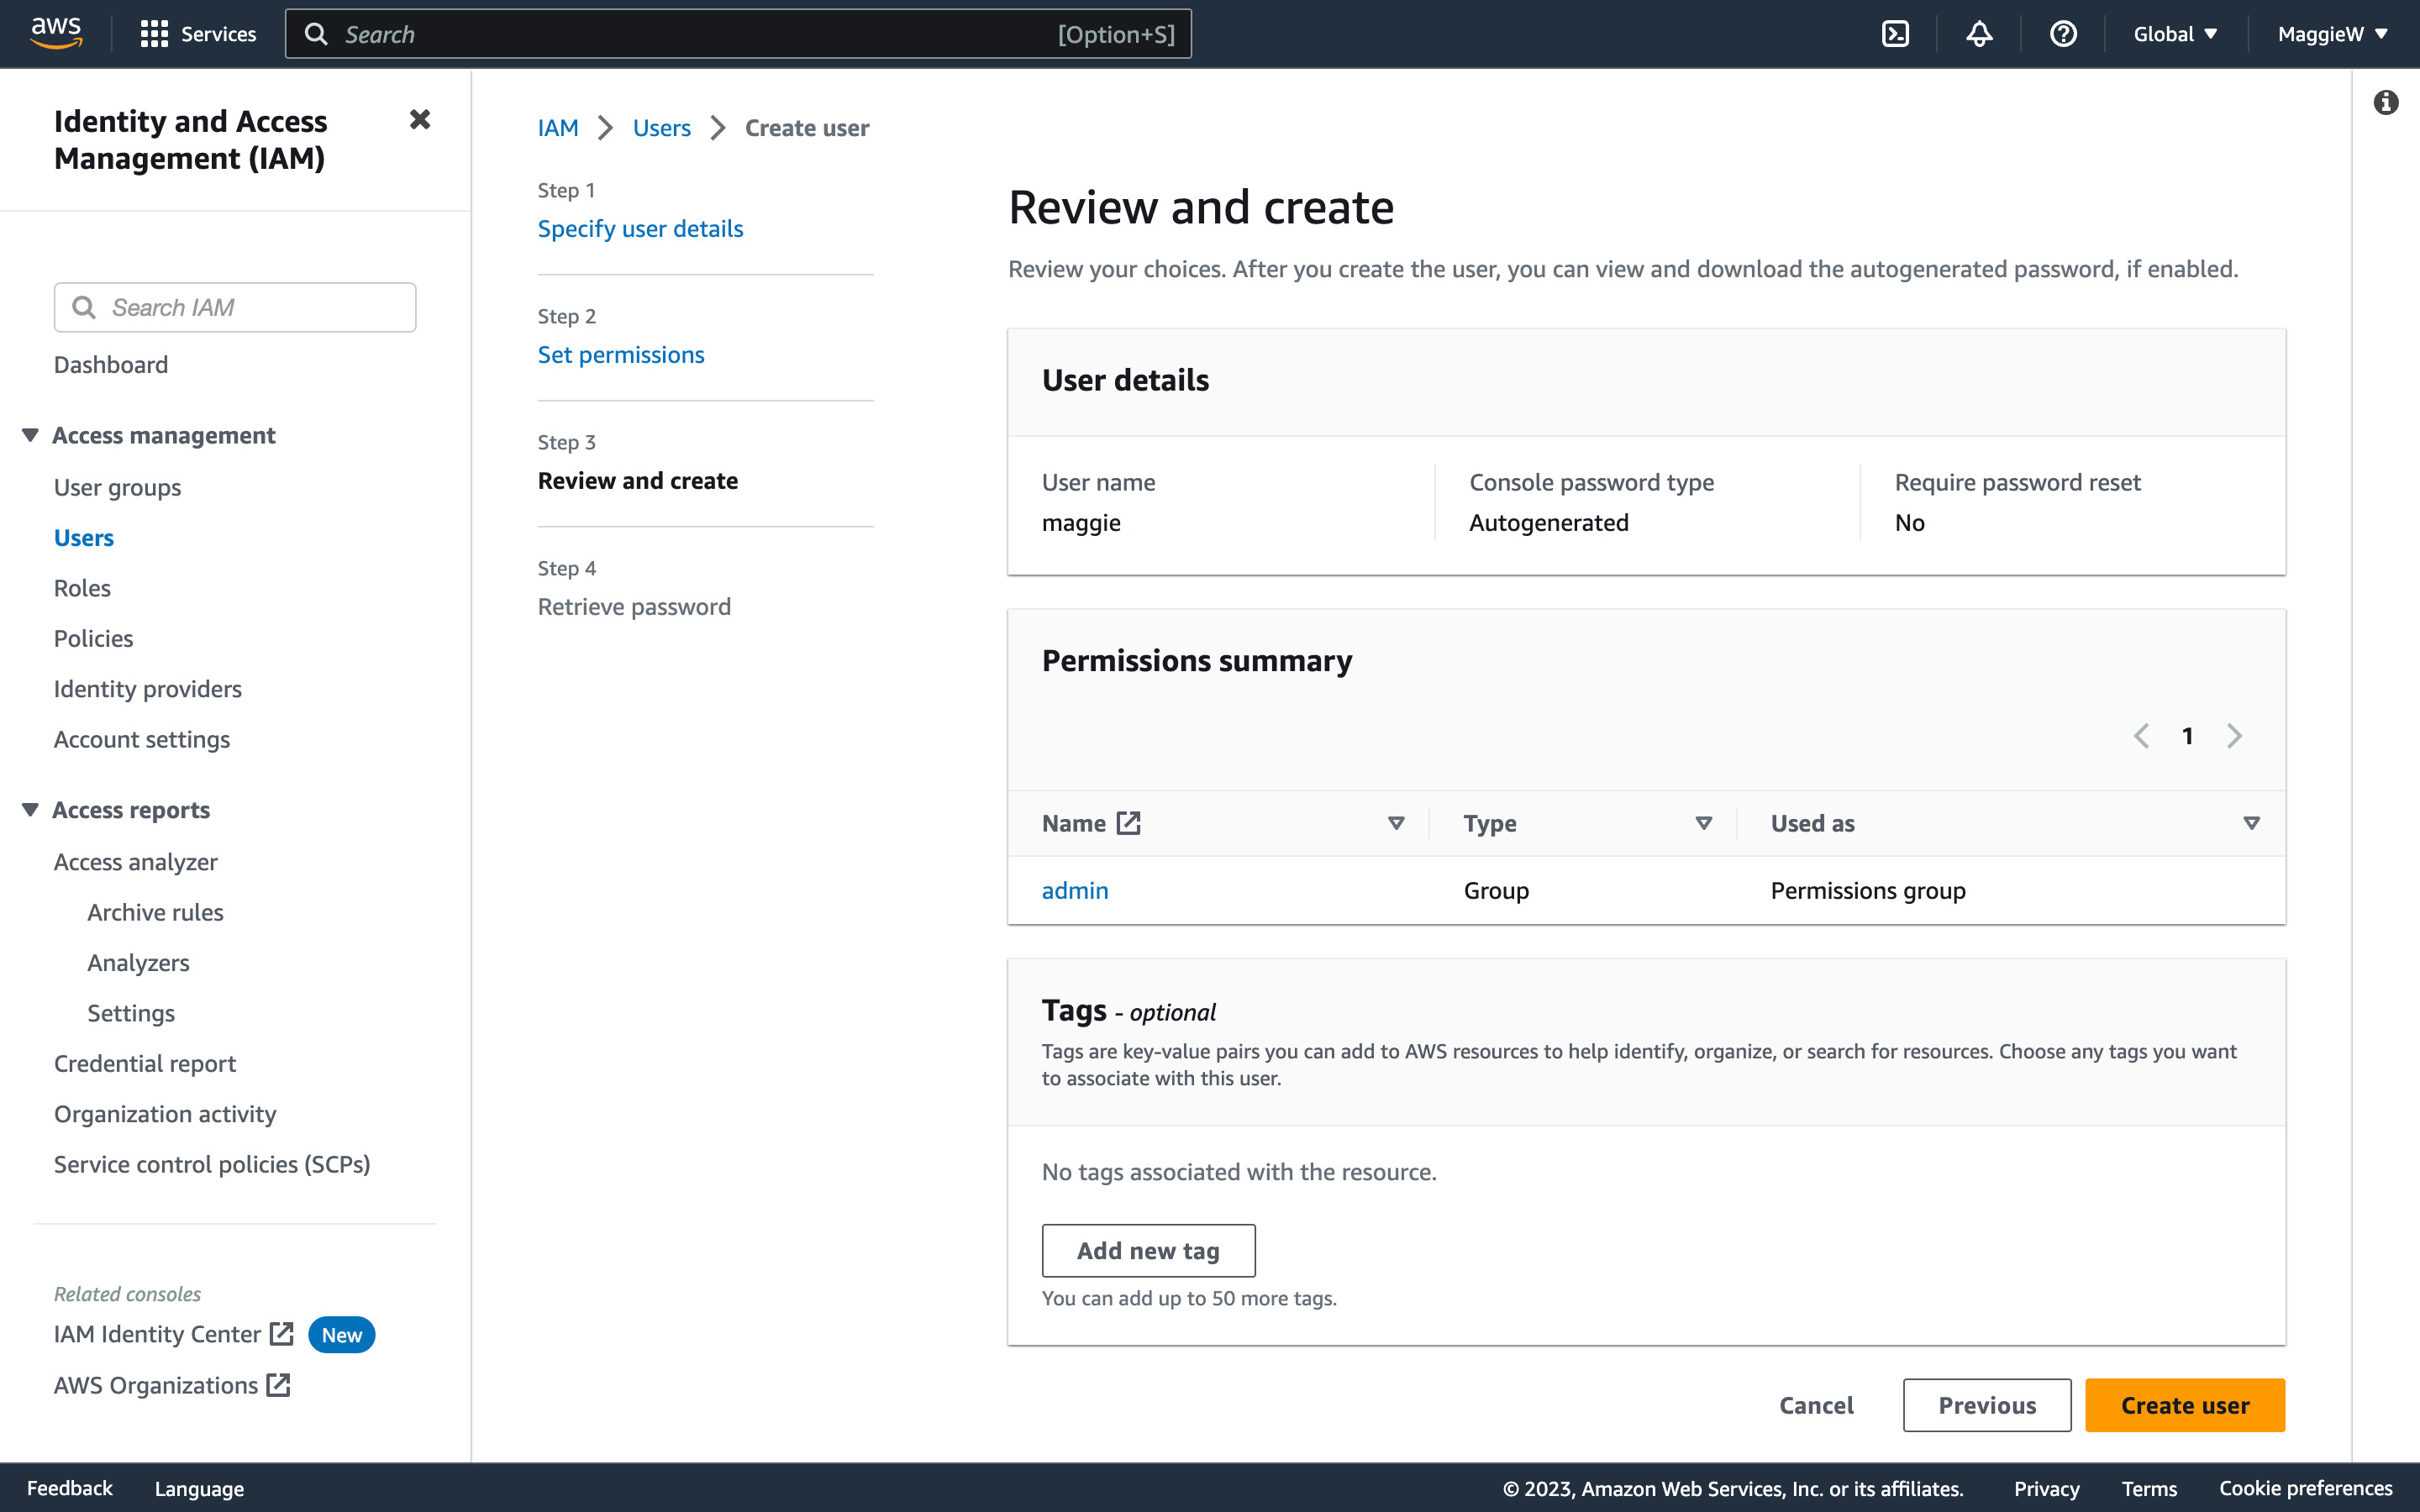
- You have a chance to review your choices, if you are happy, click ‘Create user’ at the bottom. Note: You can add tags here. It isn’t necessary but it can be useful when users want to organise, manage, and automate resource management tasks in AWS in the form of key-value pairs. An example would be to set the Key to ‘Department’ and the Pair to ‘Admin’.
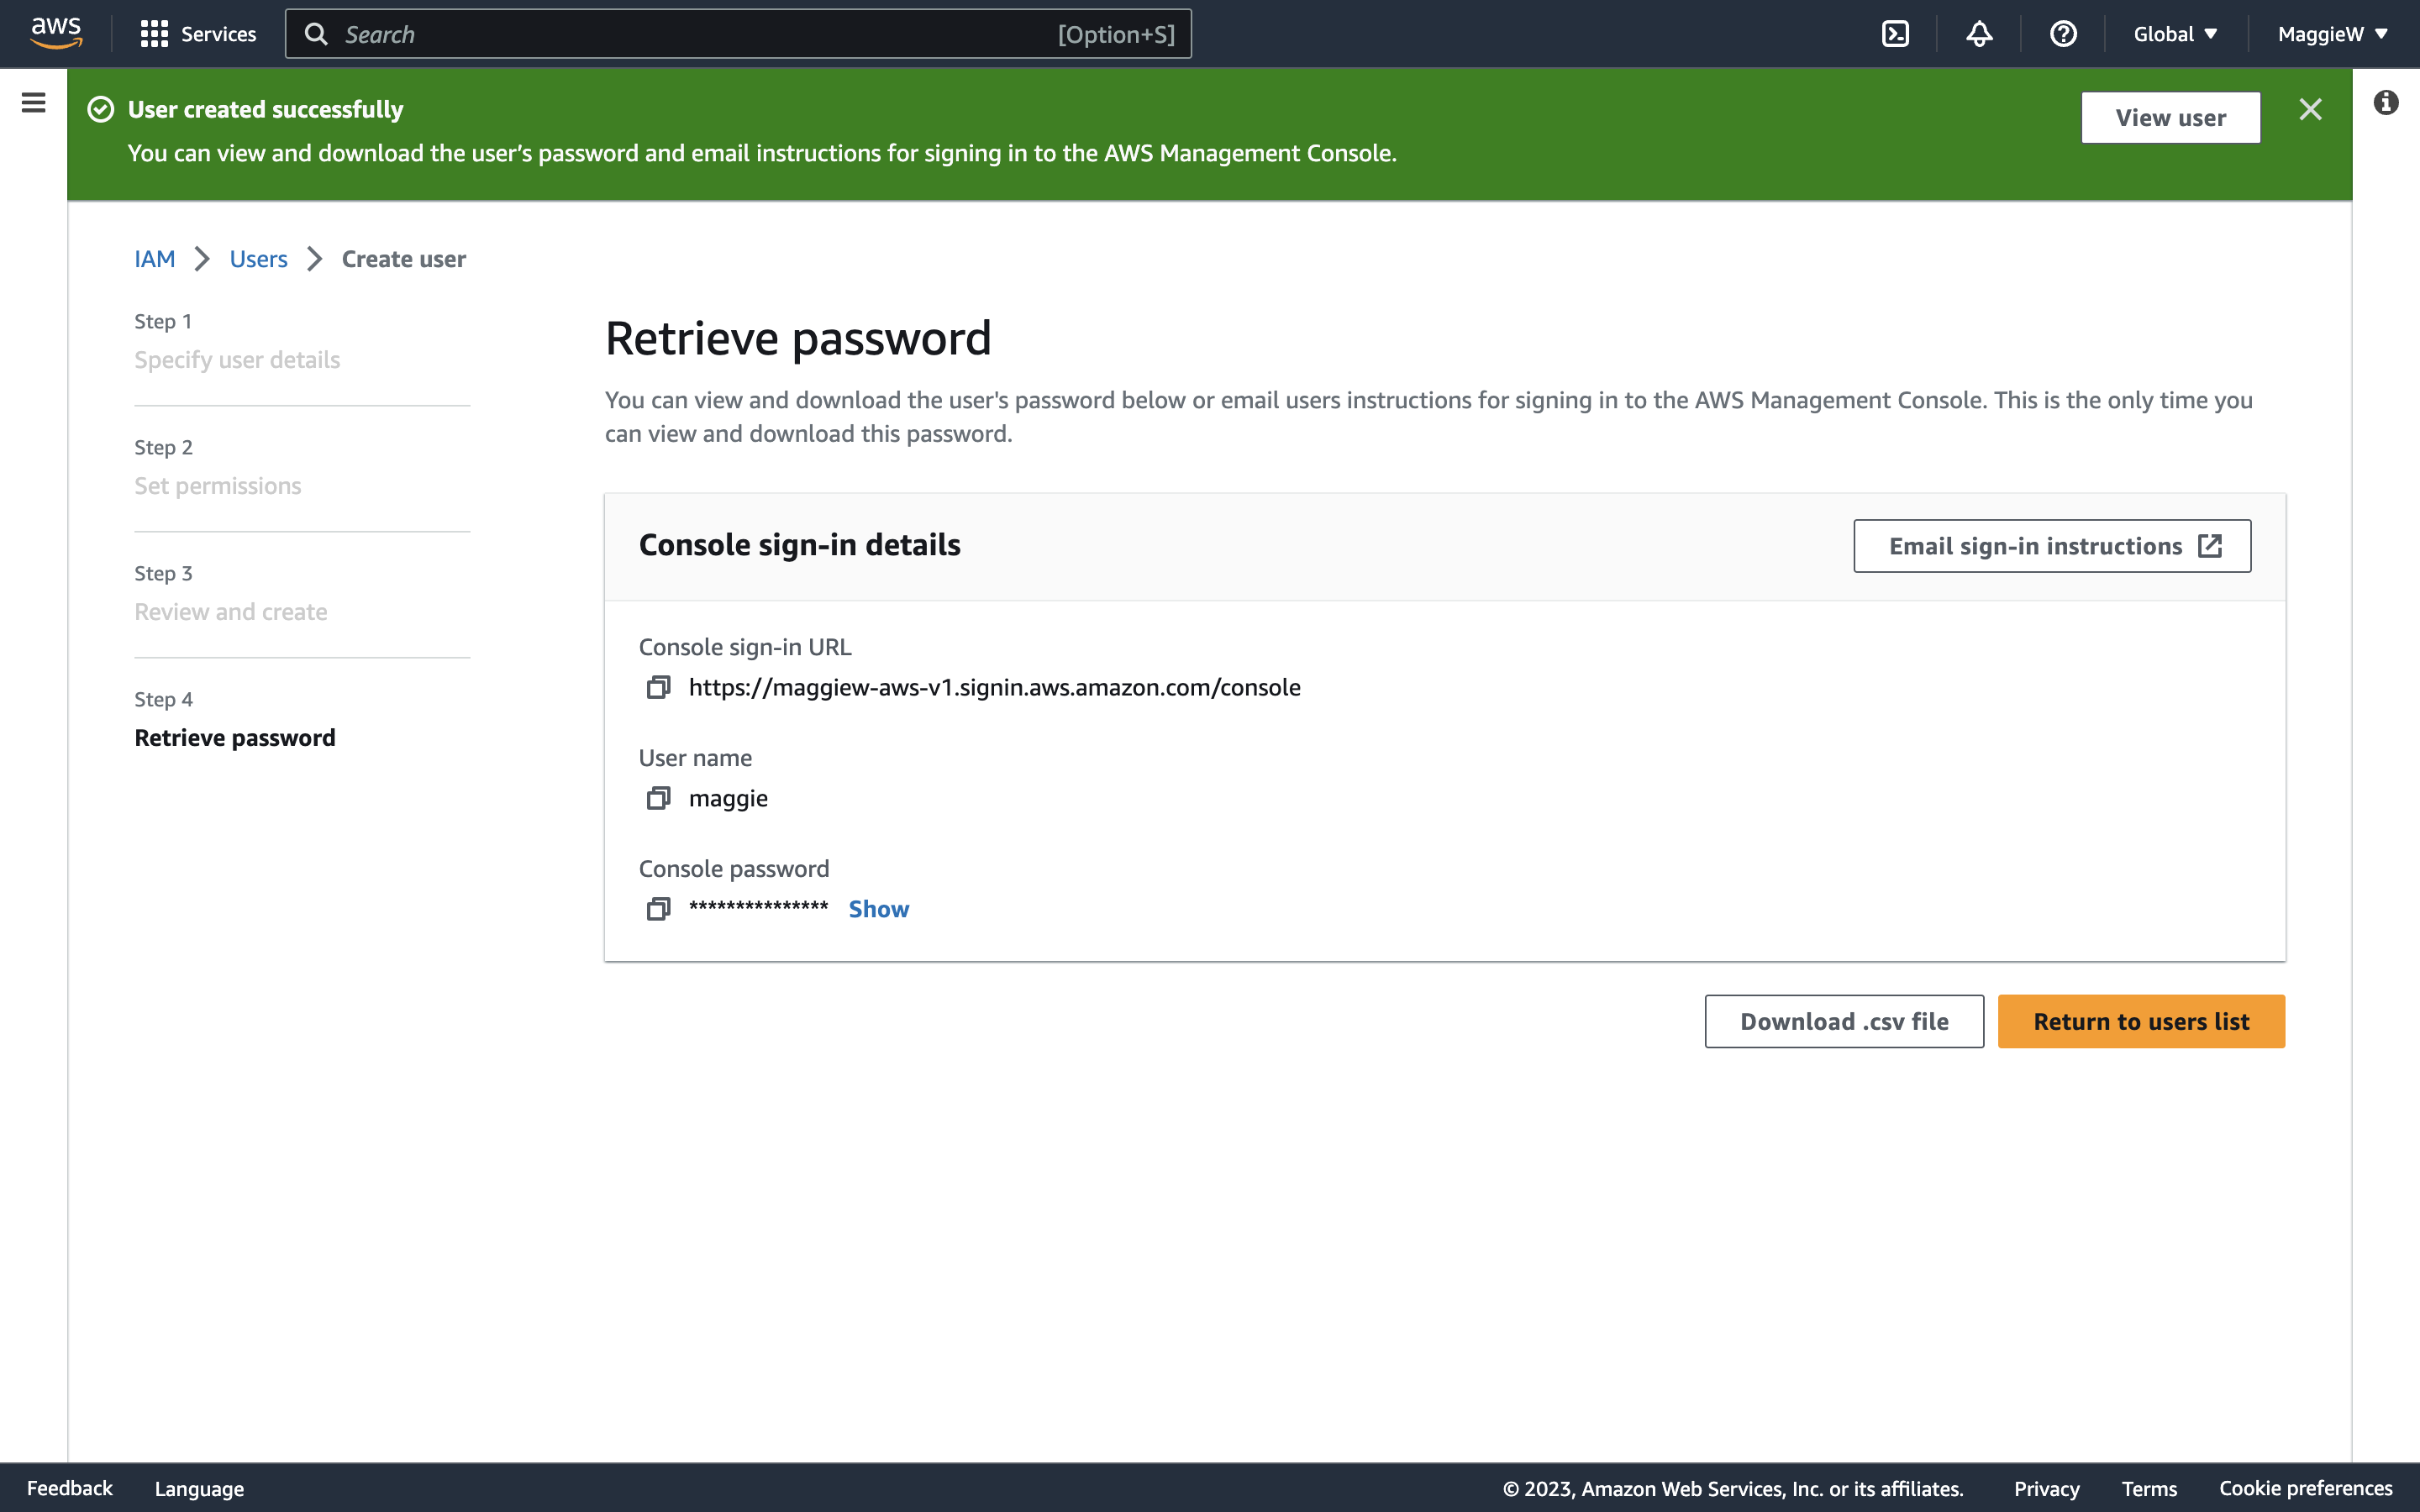
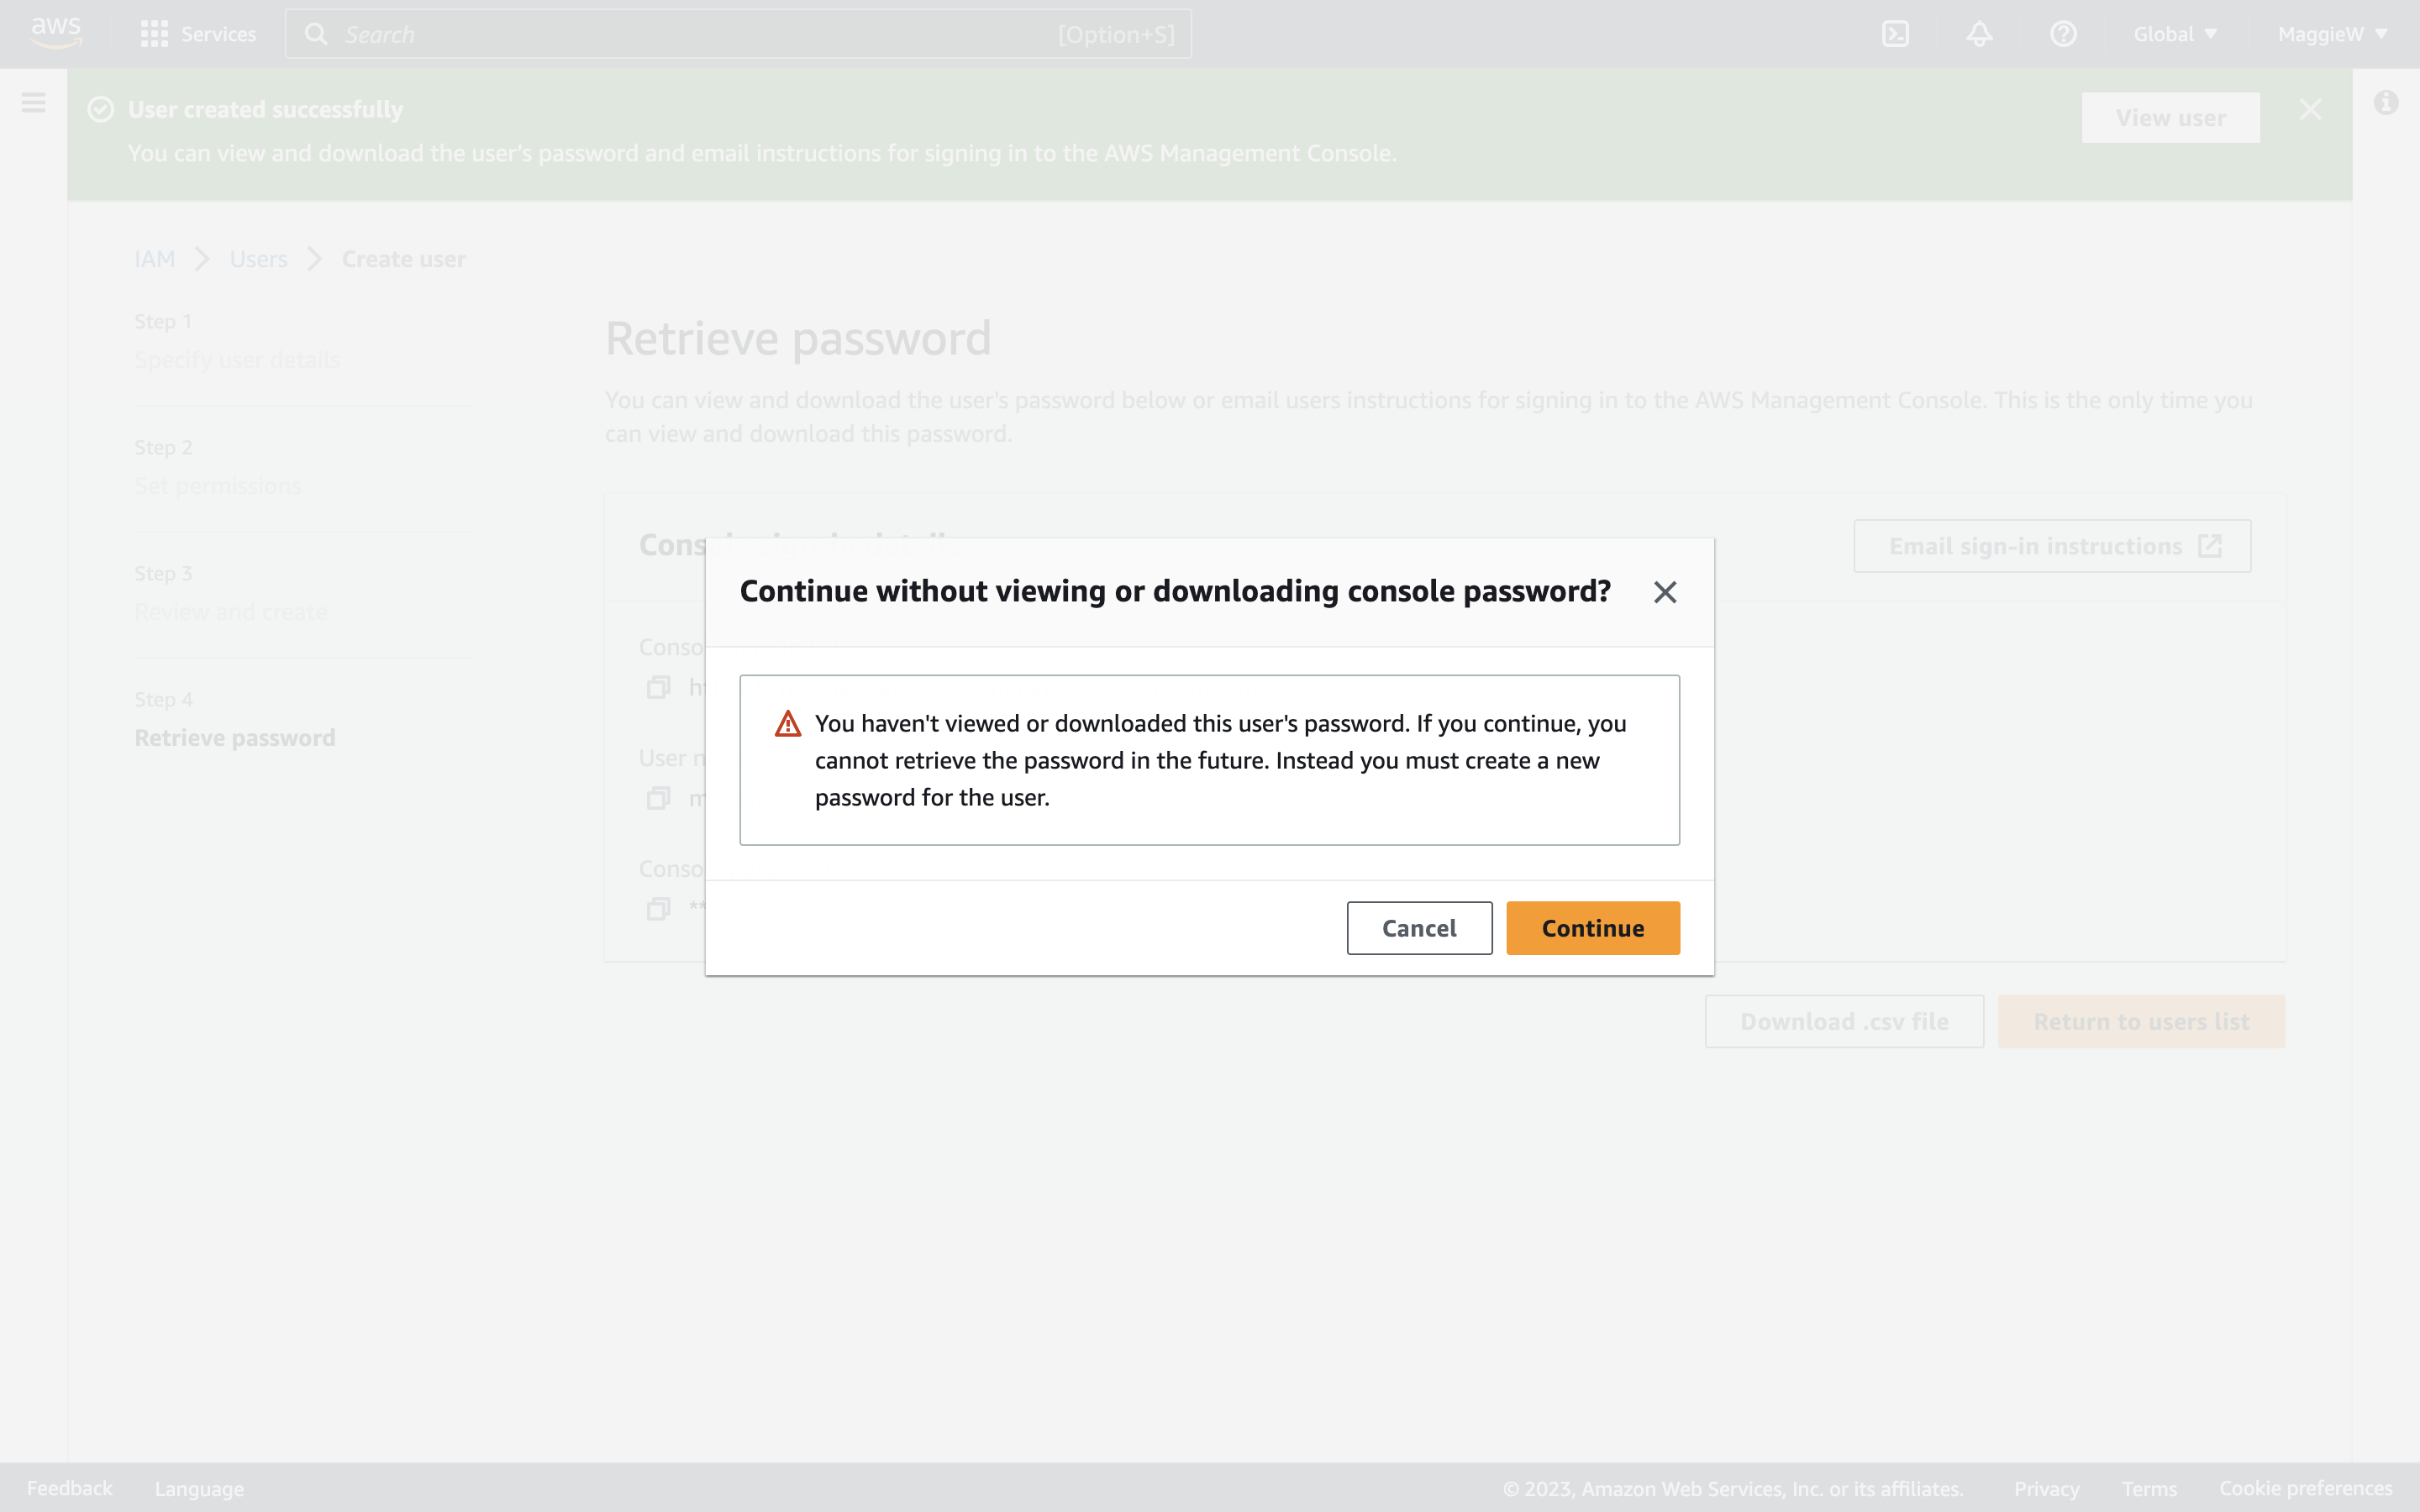
- Next you have the ‘Retrieve Password’ step. If you created your own password and are certain that you have a note of it, you can proceed. If not, you need to make note of it by clicking ‘show’, download the .csv file to your computer, or alternatively you can email it to yourself. Once you are satisfied that you have saved your password you can click ‘Return to users list’ at the bottom. Note: You can only view and download this password once, but AWS will prompt you with a warning modal if you attempt to navigate away from the page without saving/viewing the password first.
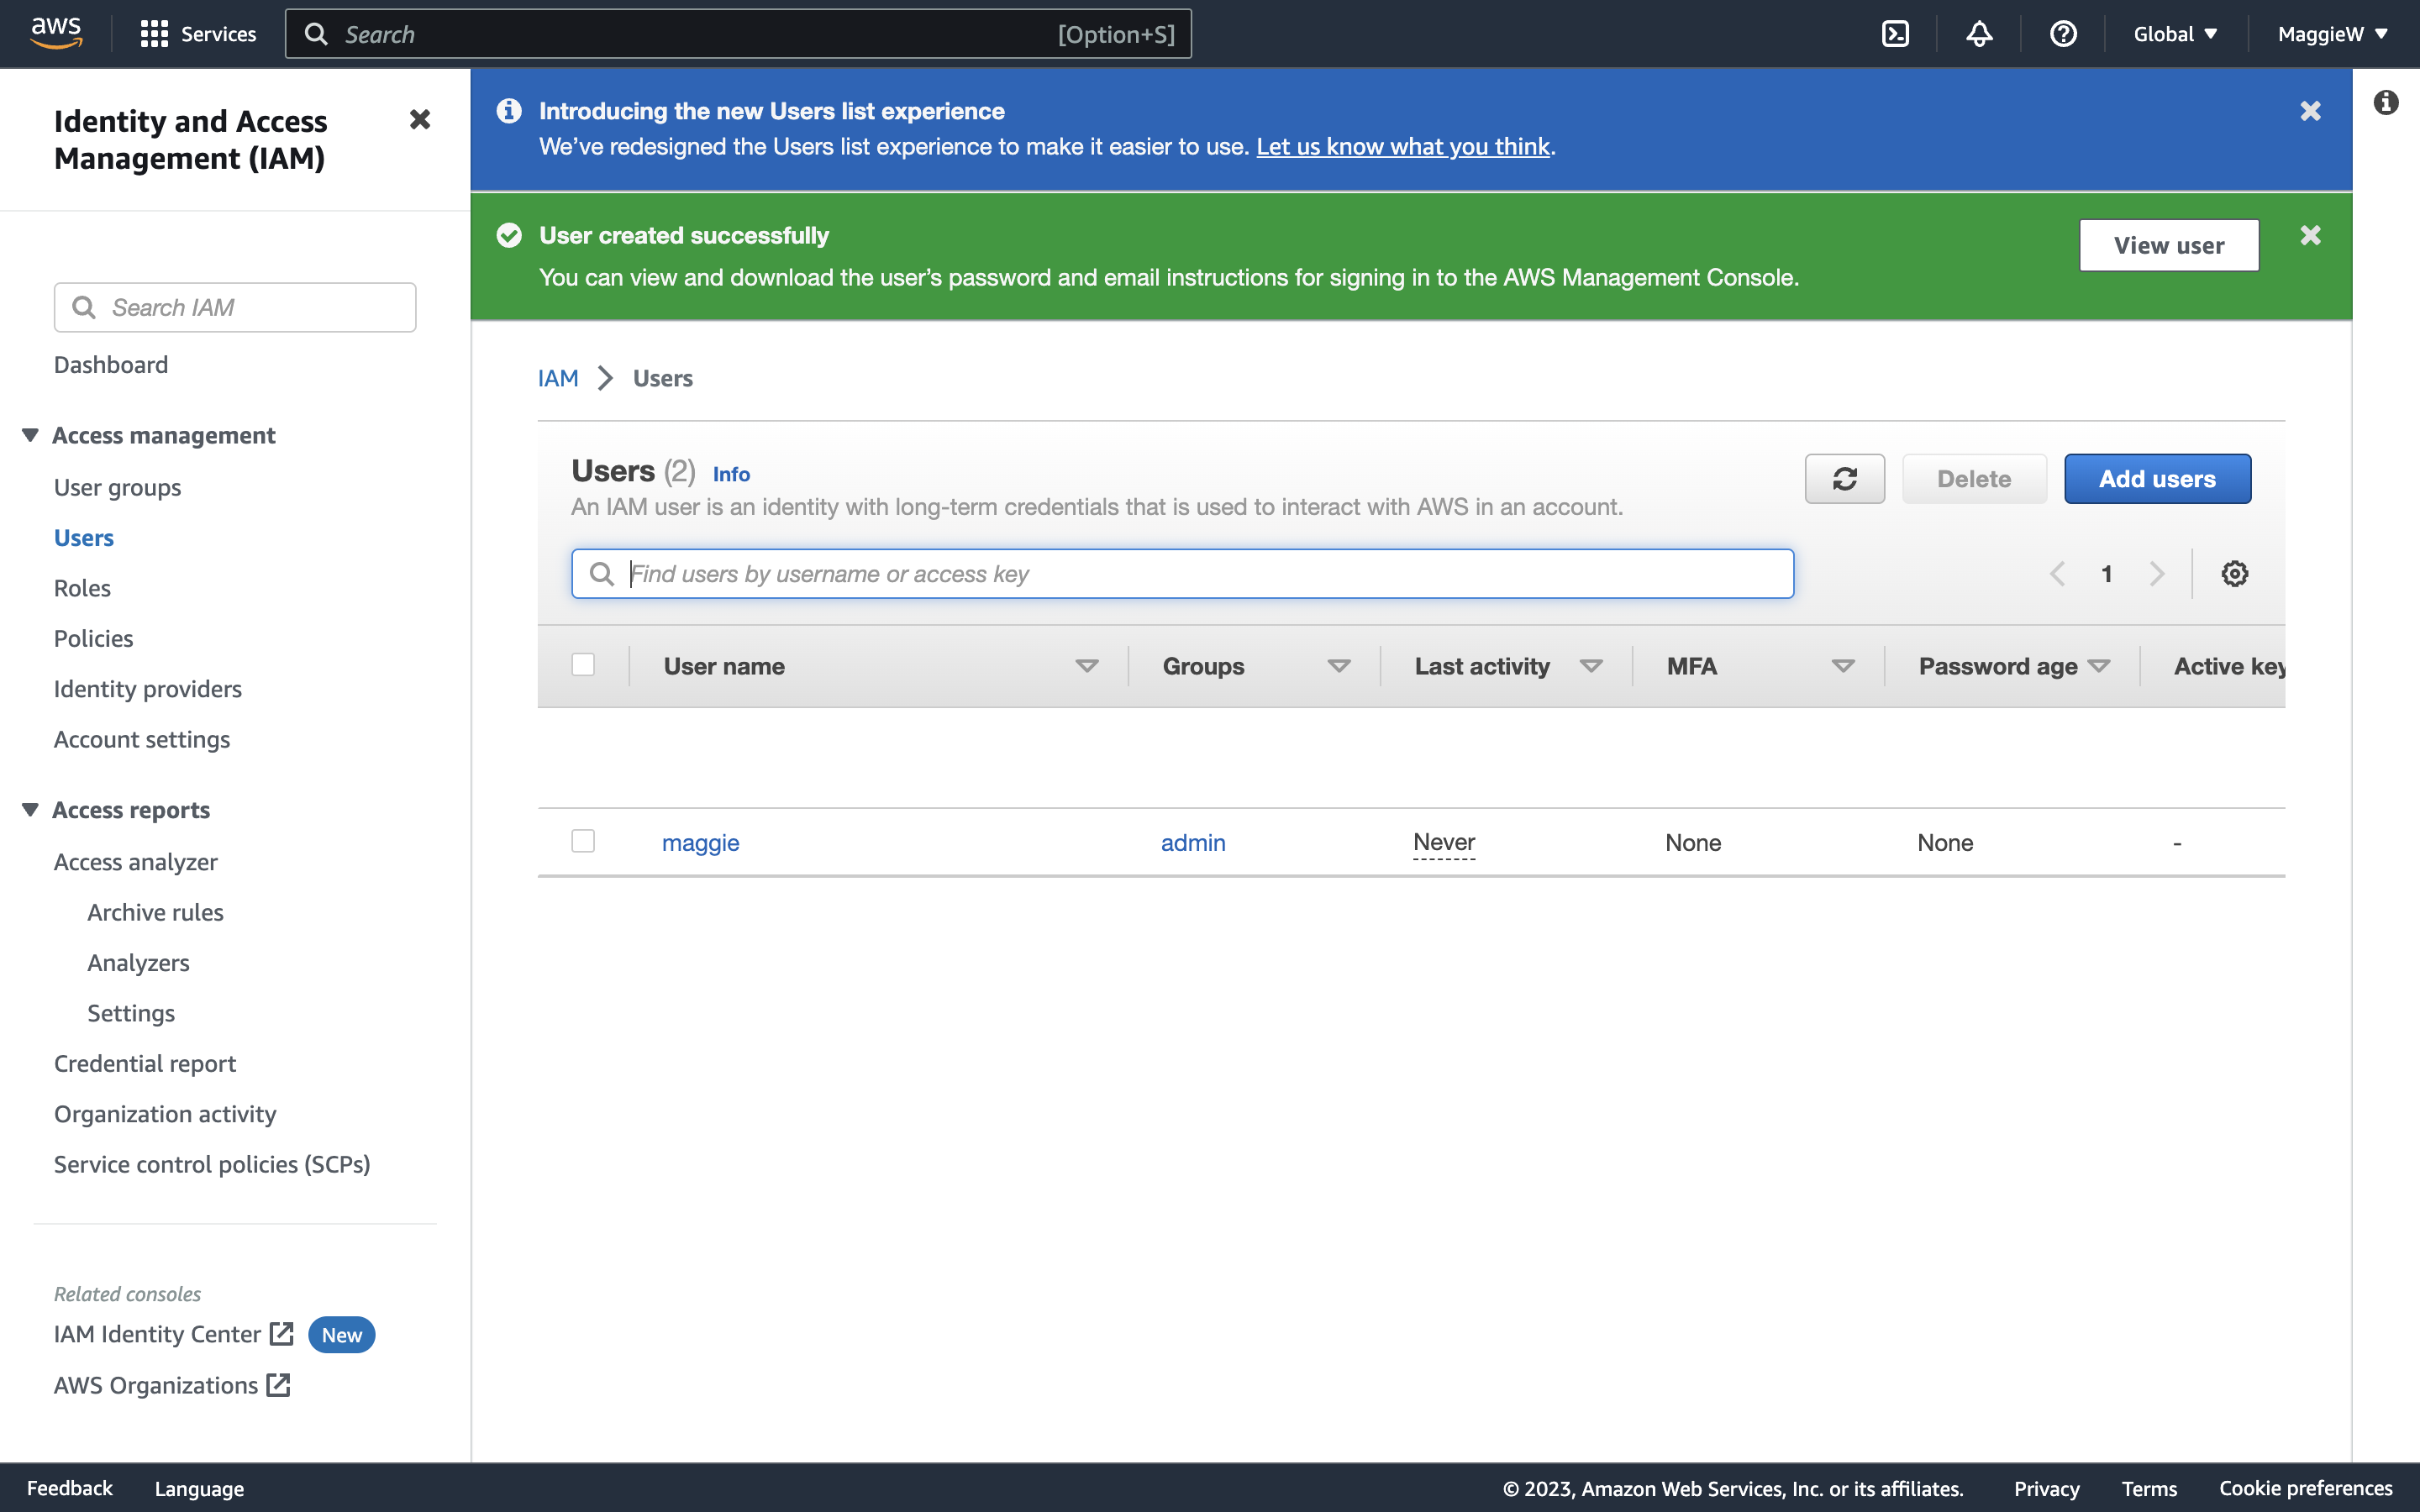
- You can verify that your user has been created by navigating to the Users tab in the left-hand side.
There you have it. You have just created a new user to access your account more safely. So how do you login?
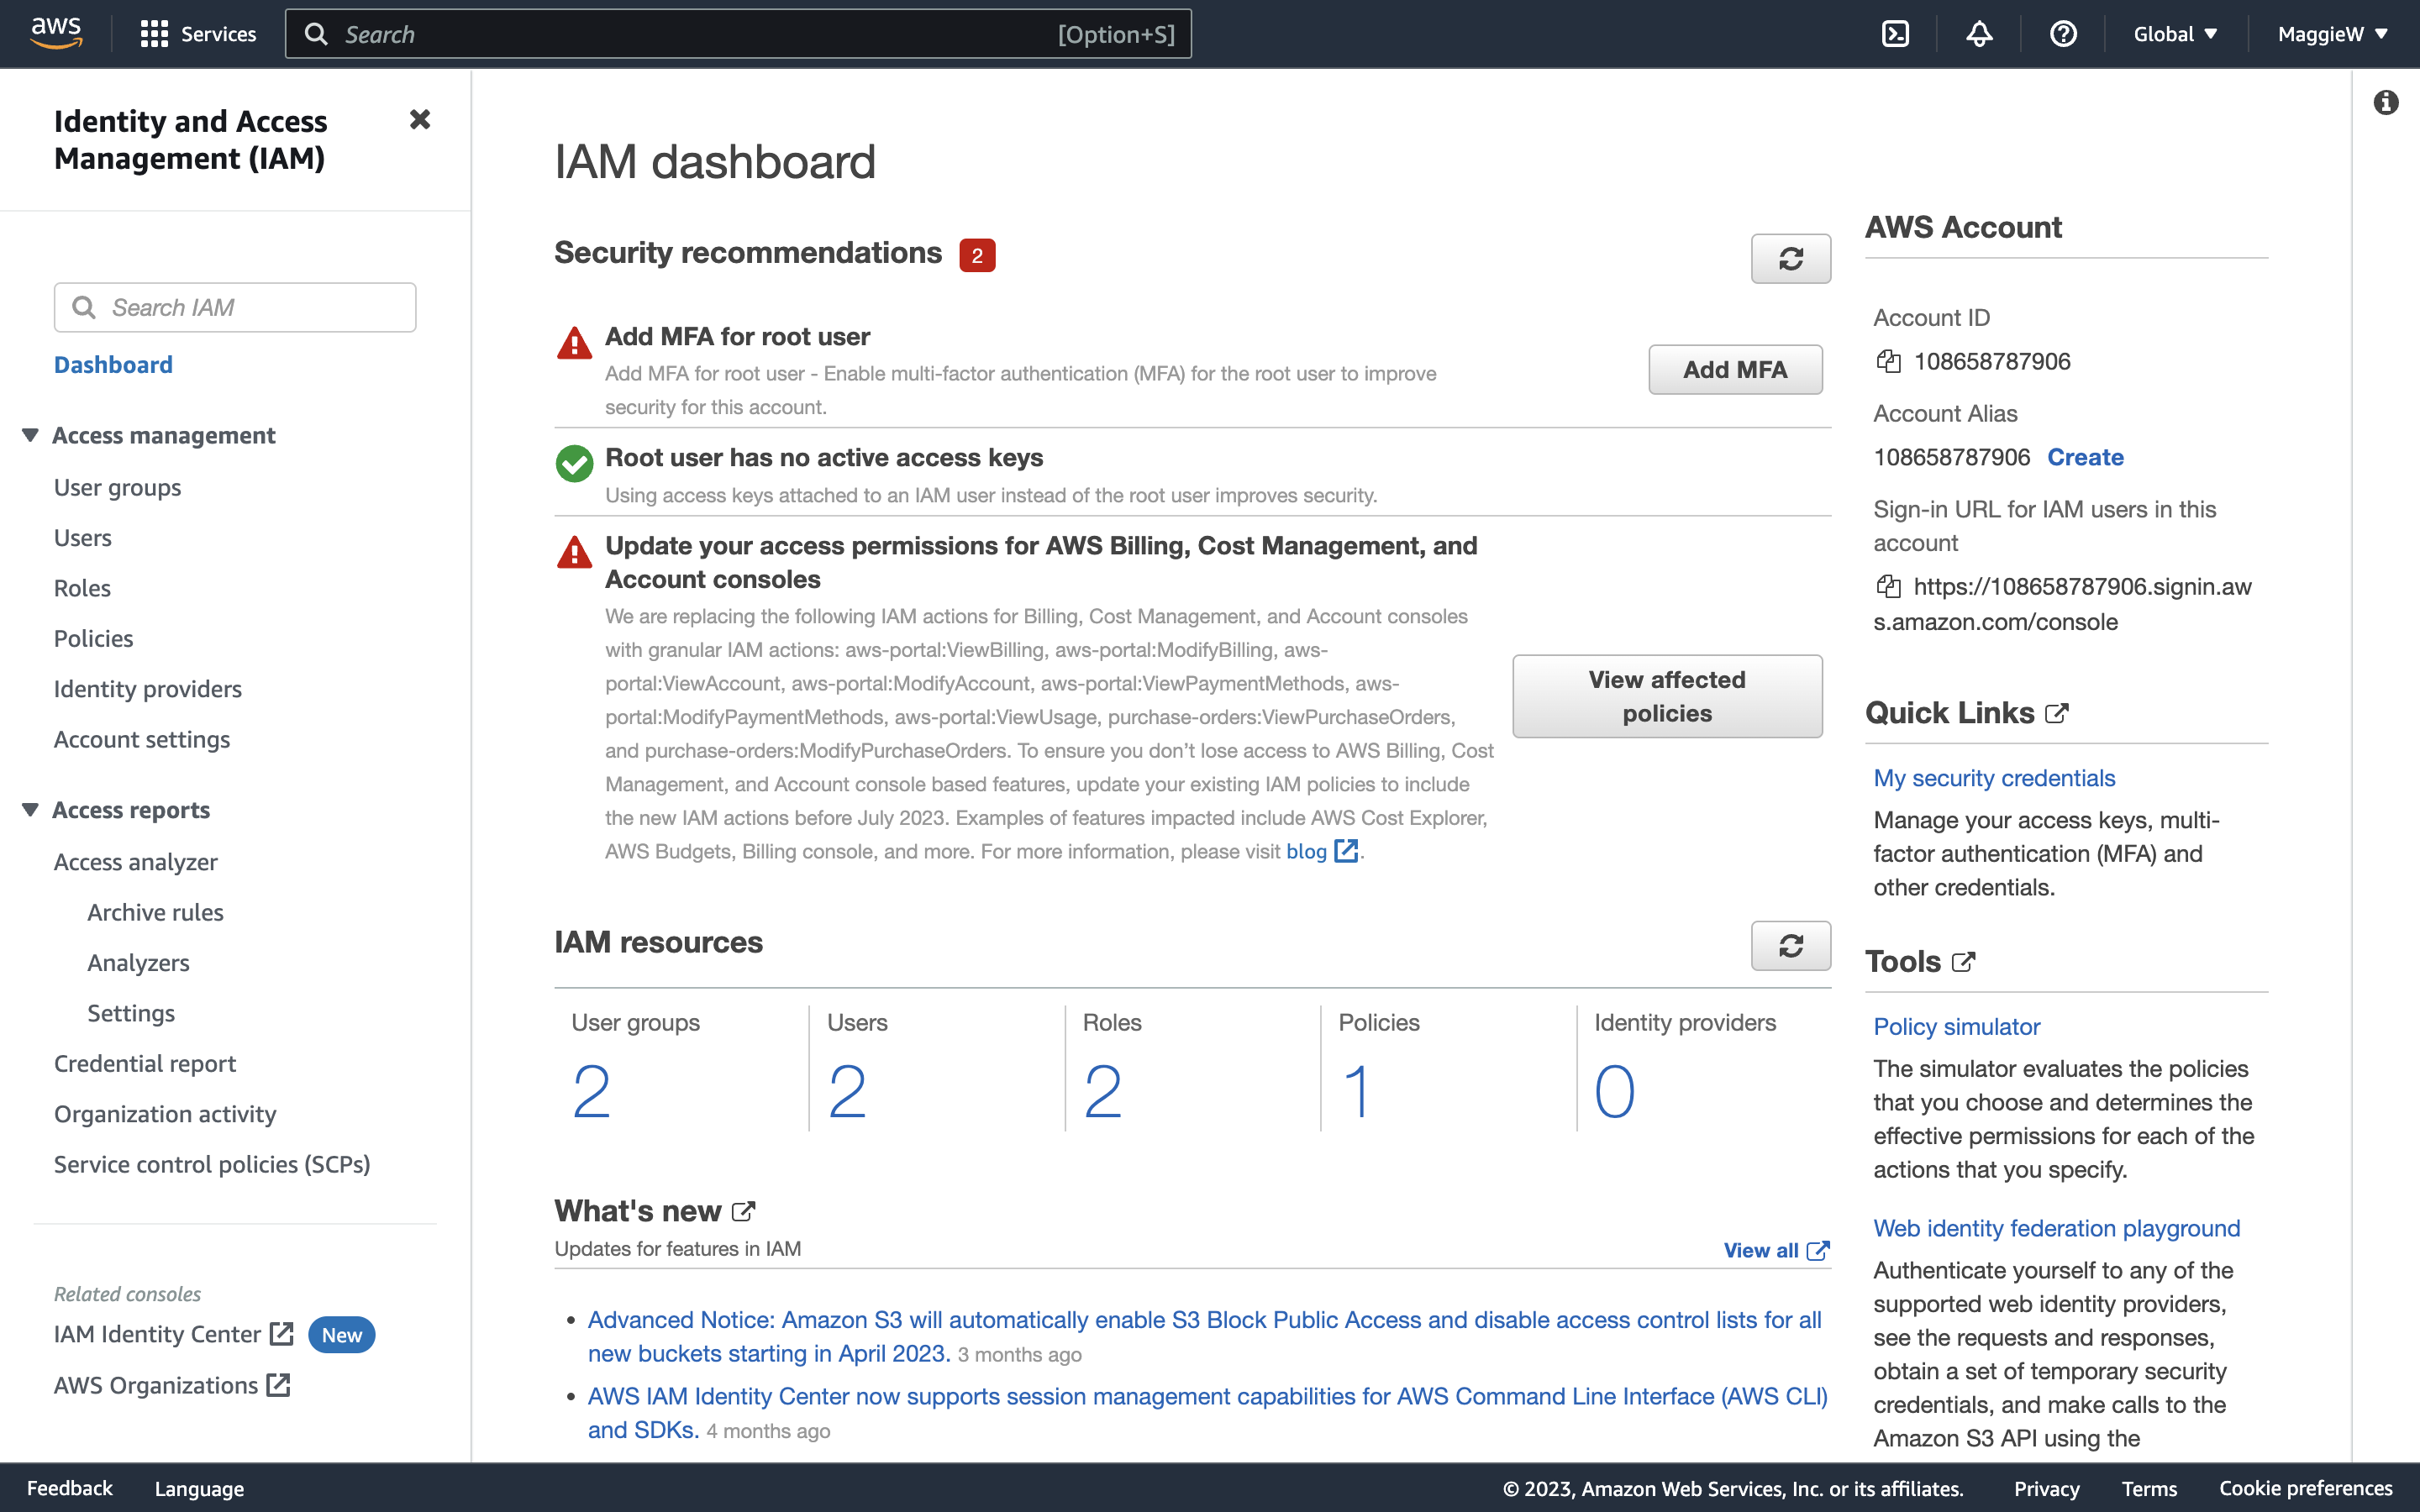
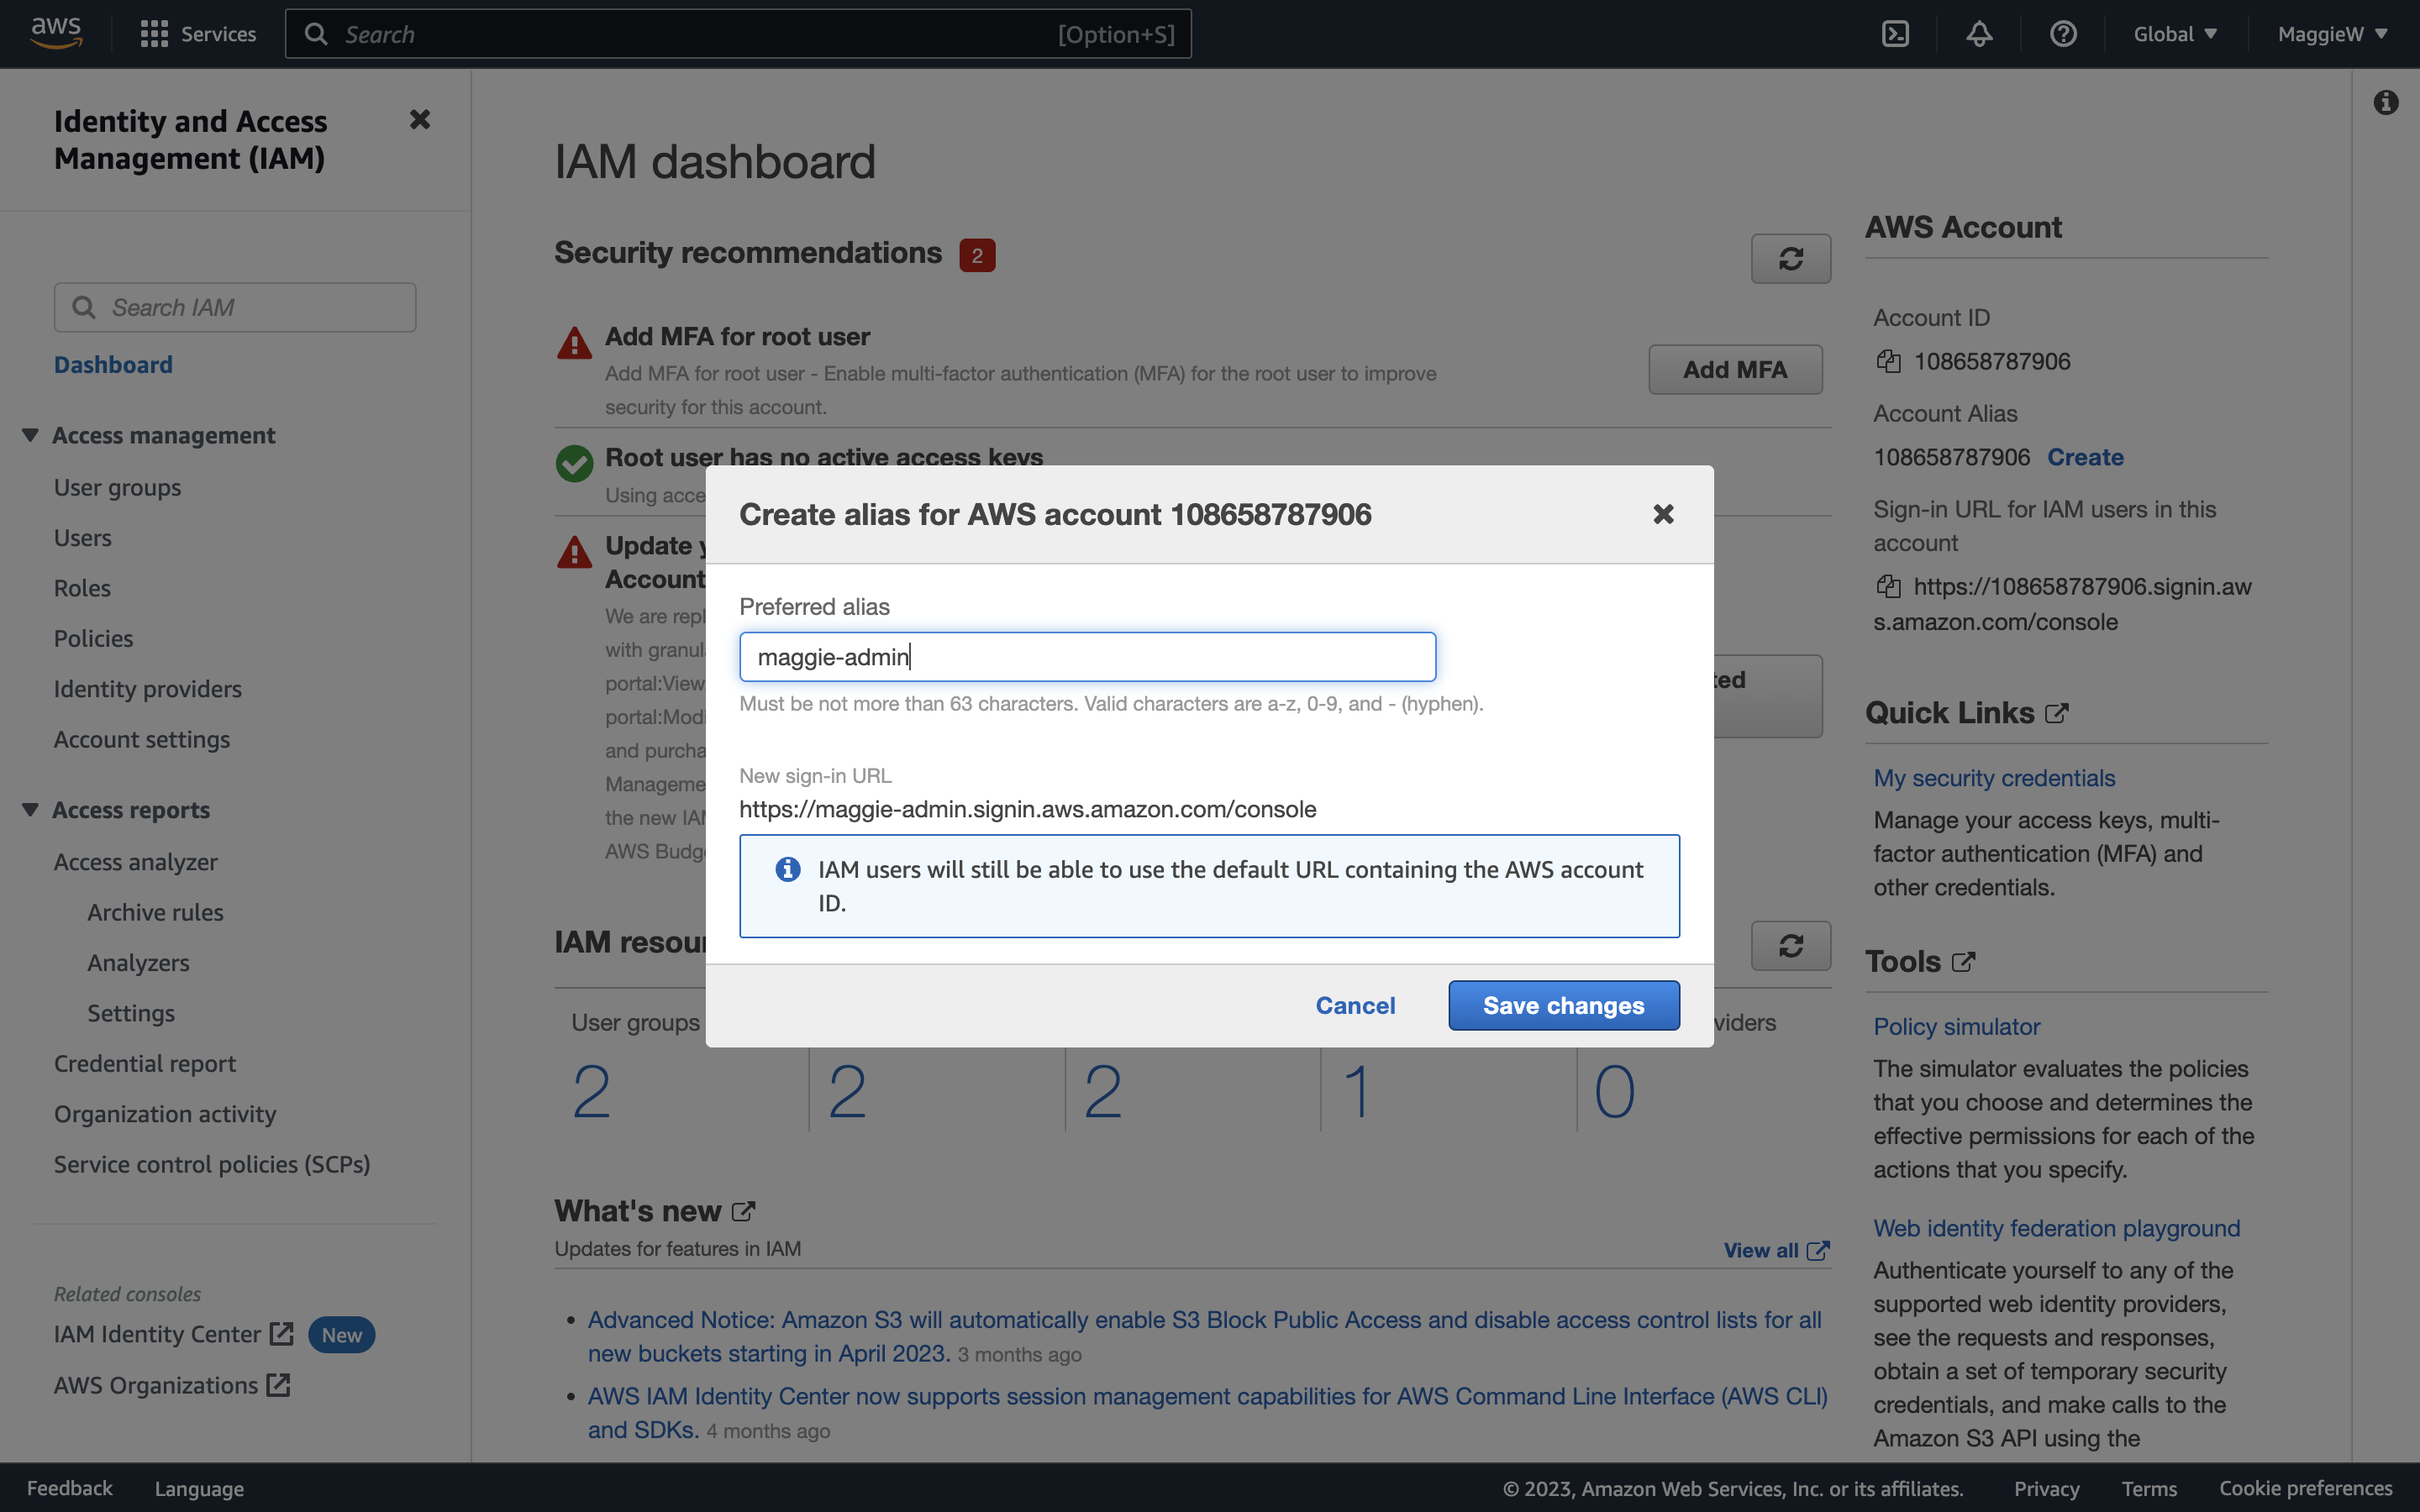
- Go to the dashboard. On the right-hand side you will see a section titled ‘AWS Account’ with different information. Under ‘Account Alias’ you will see a number, and also the ‘Create’ button. This is to create a more user-friendly login.
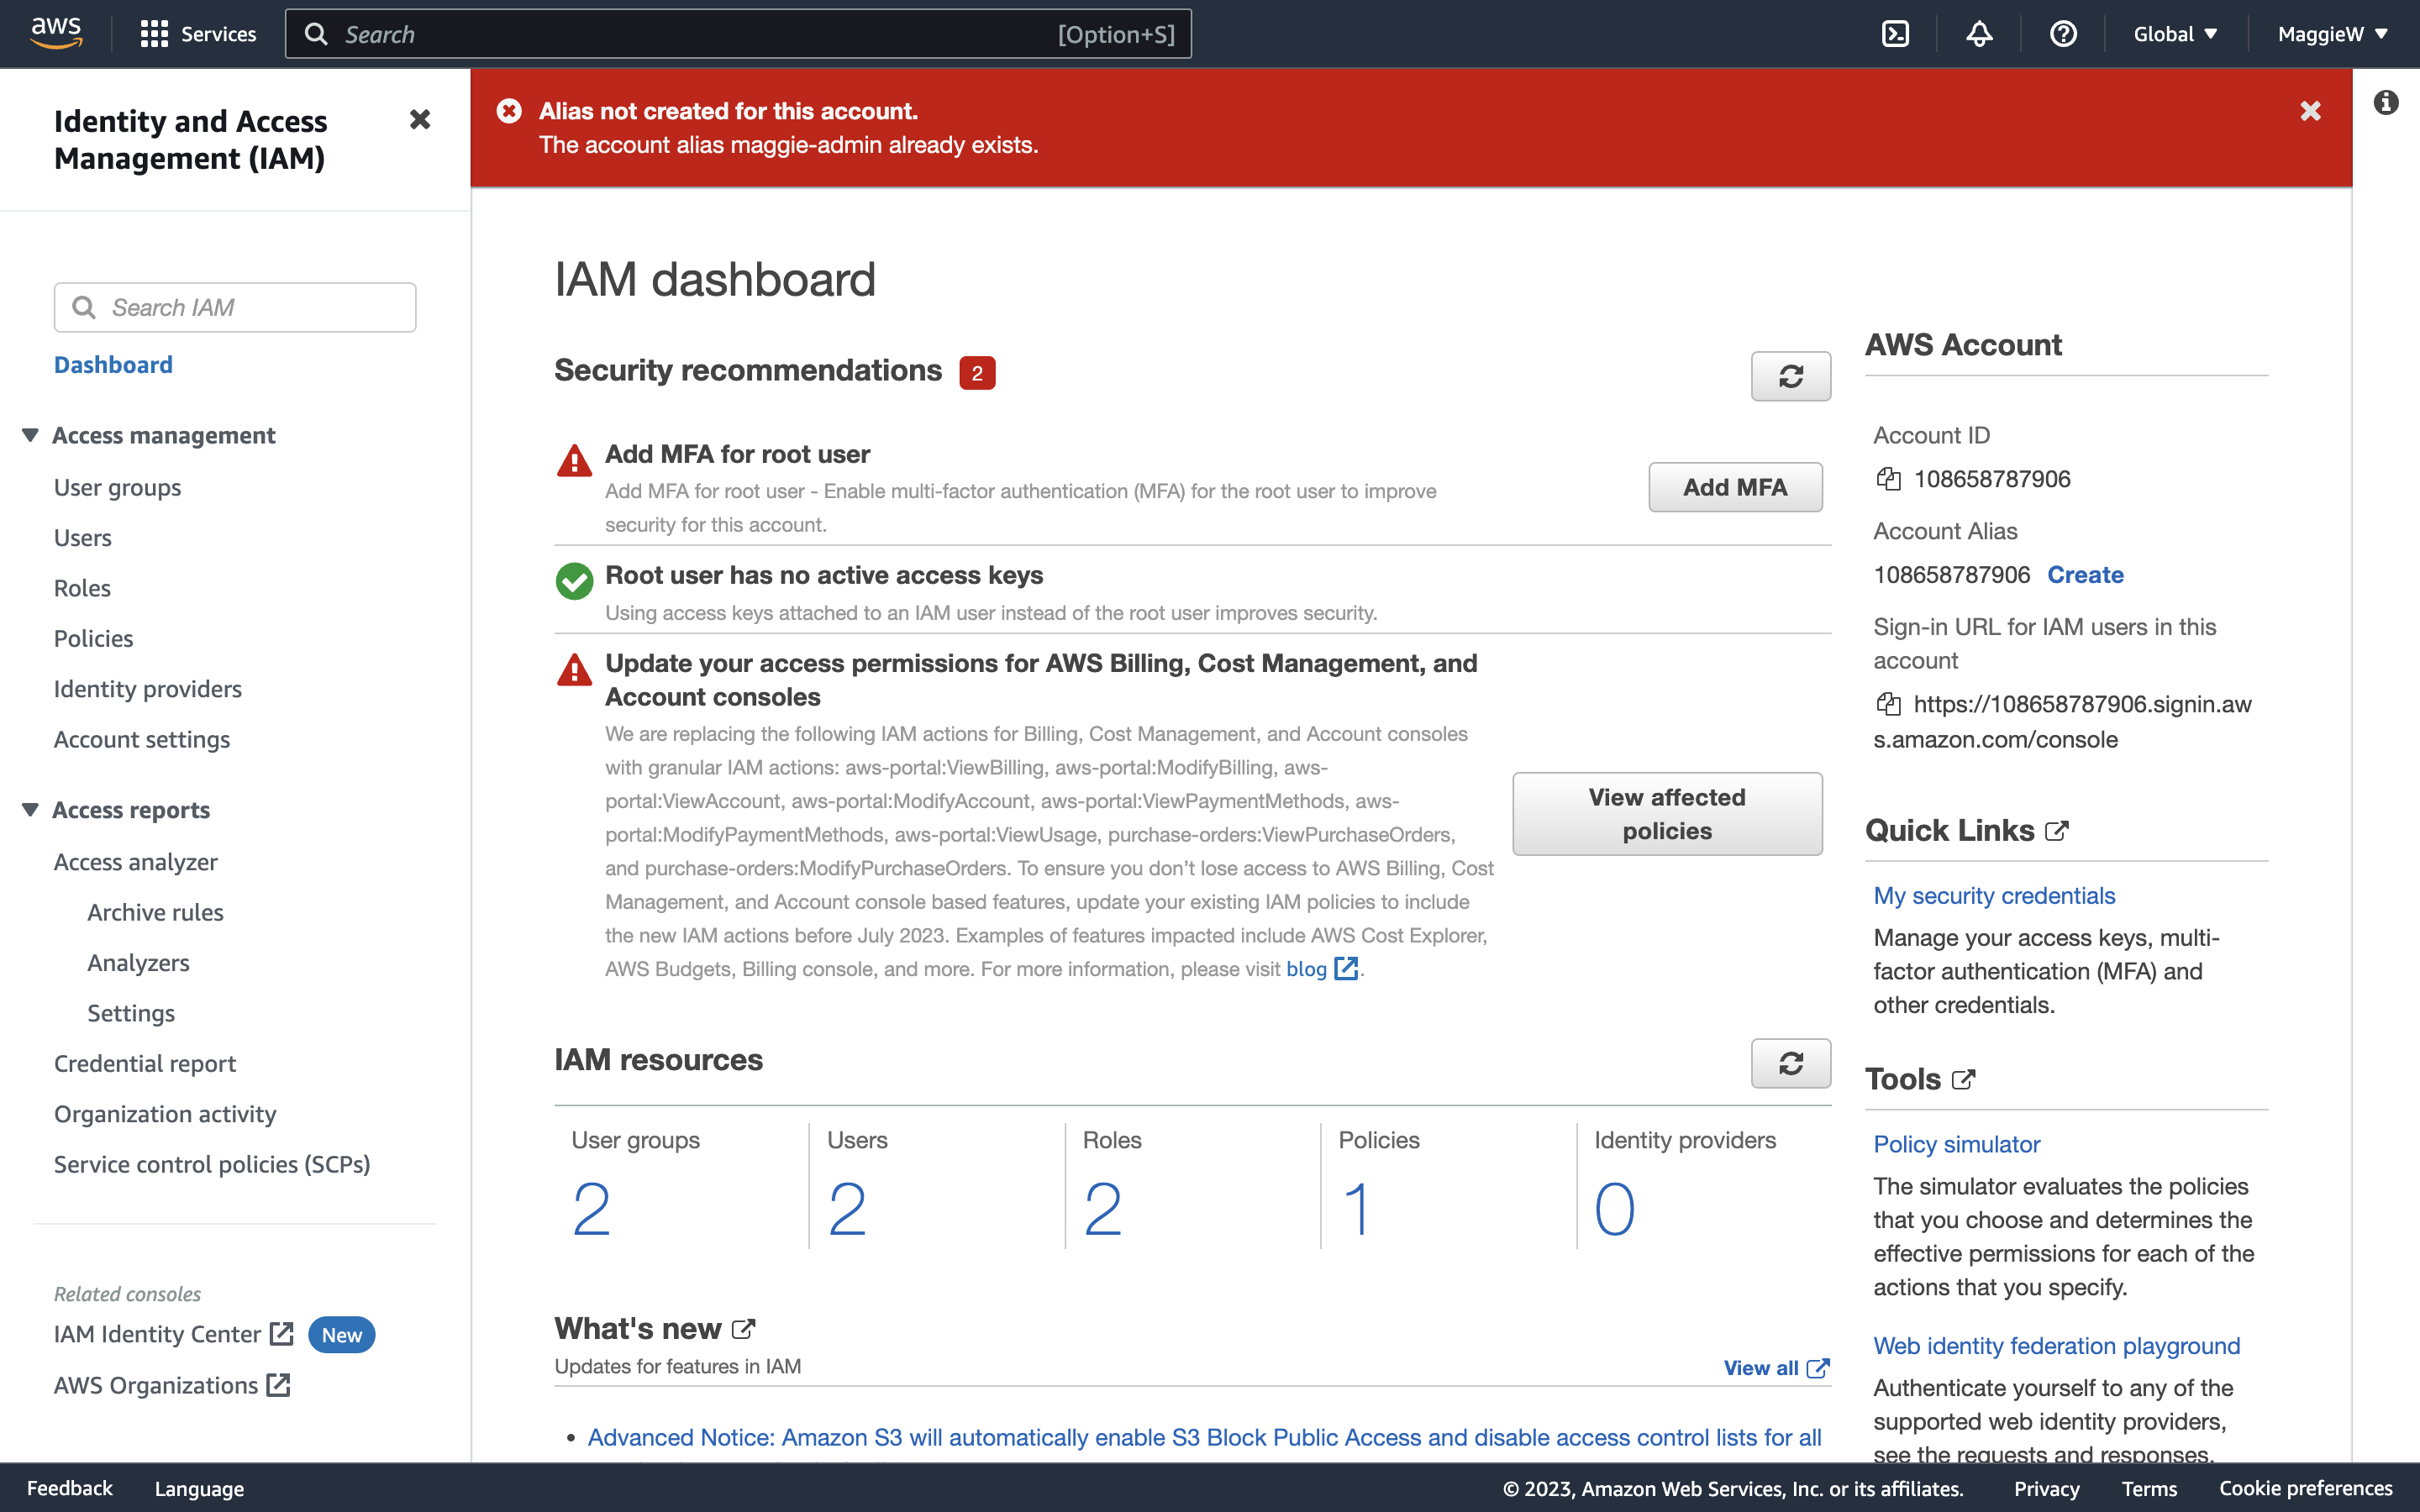
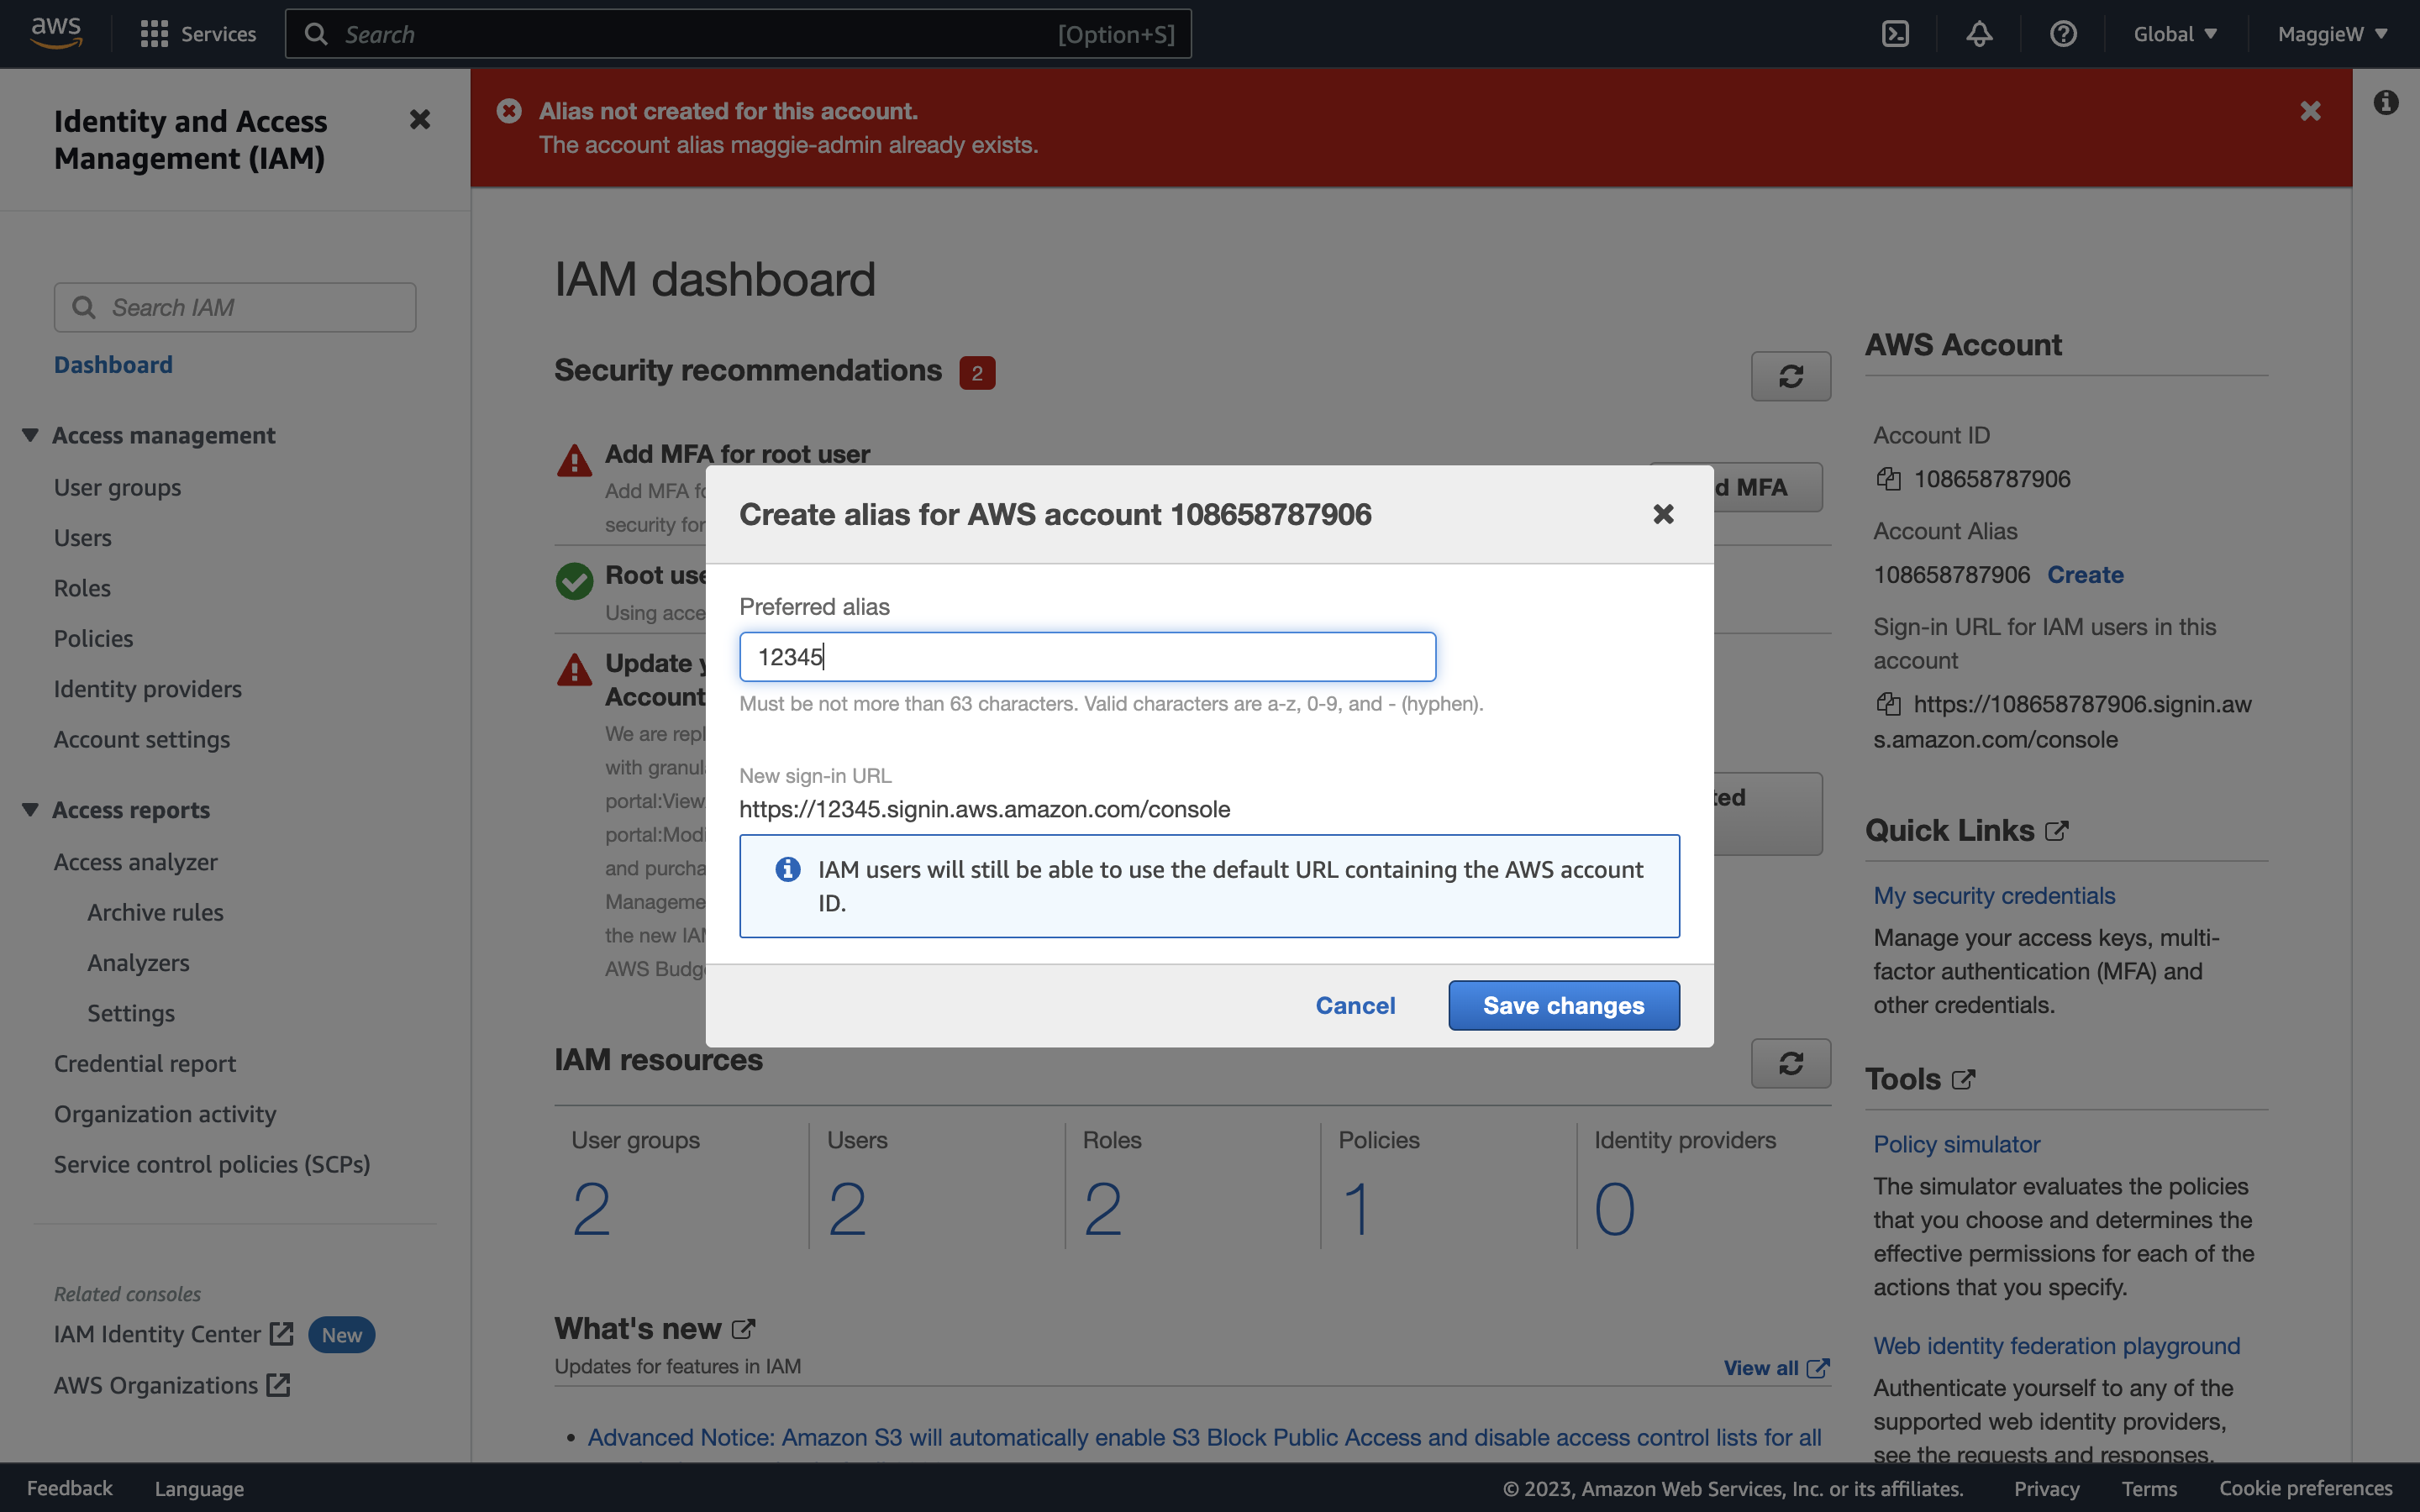
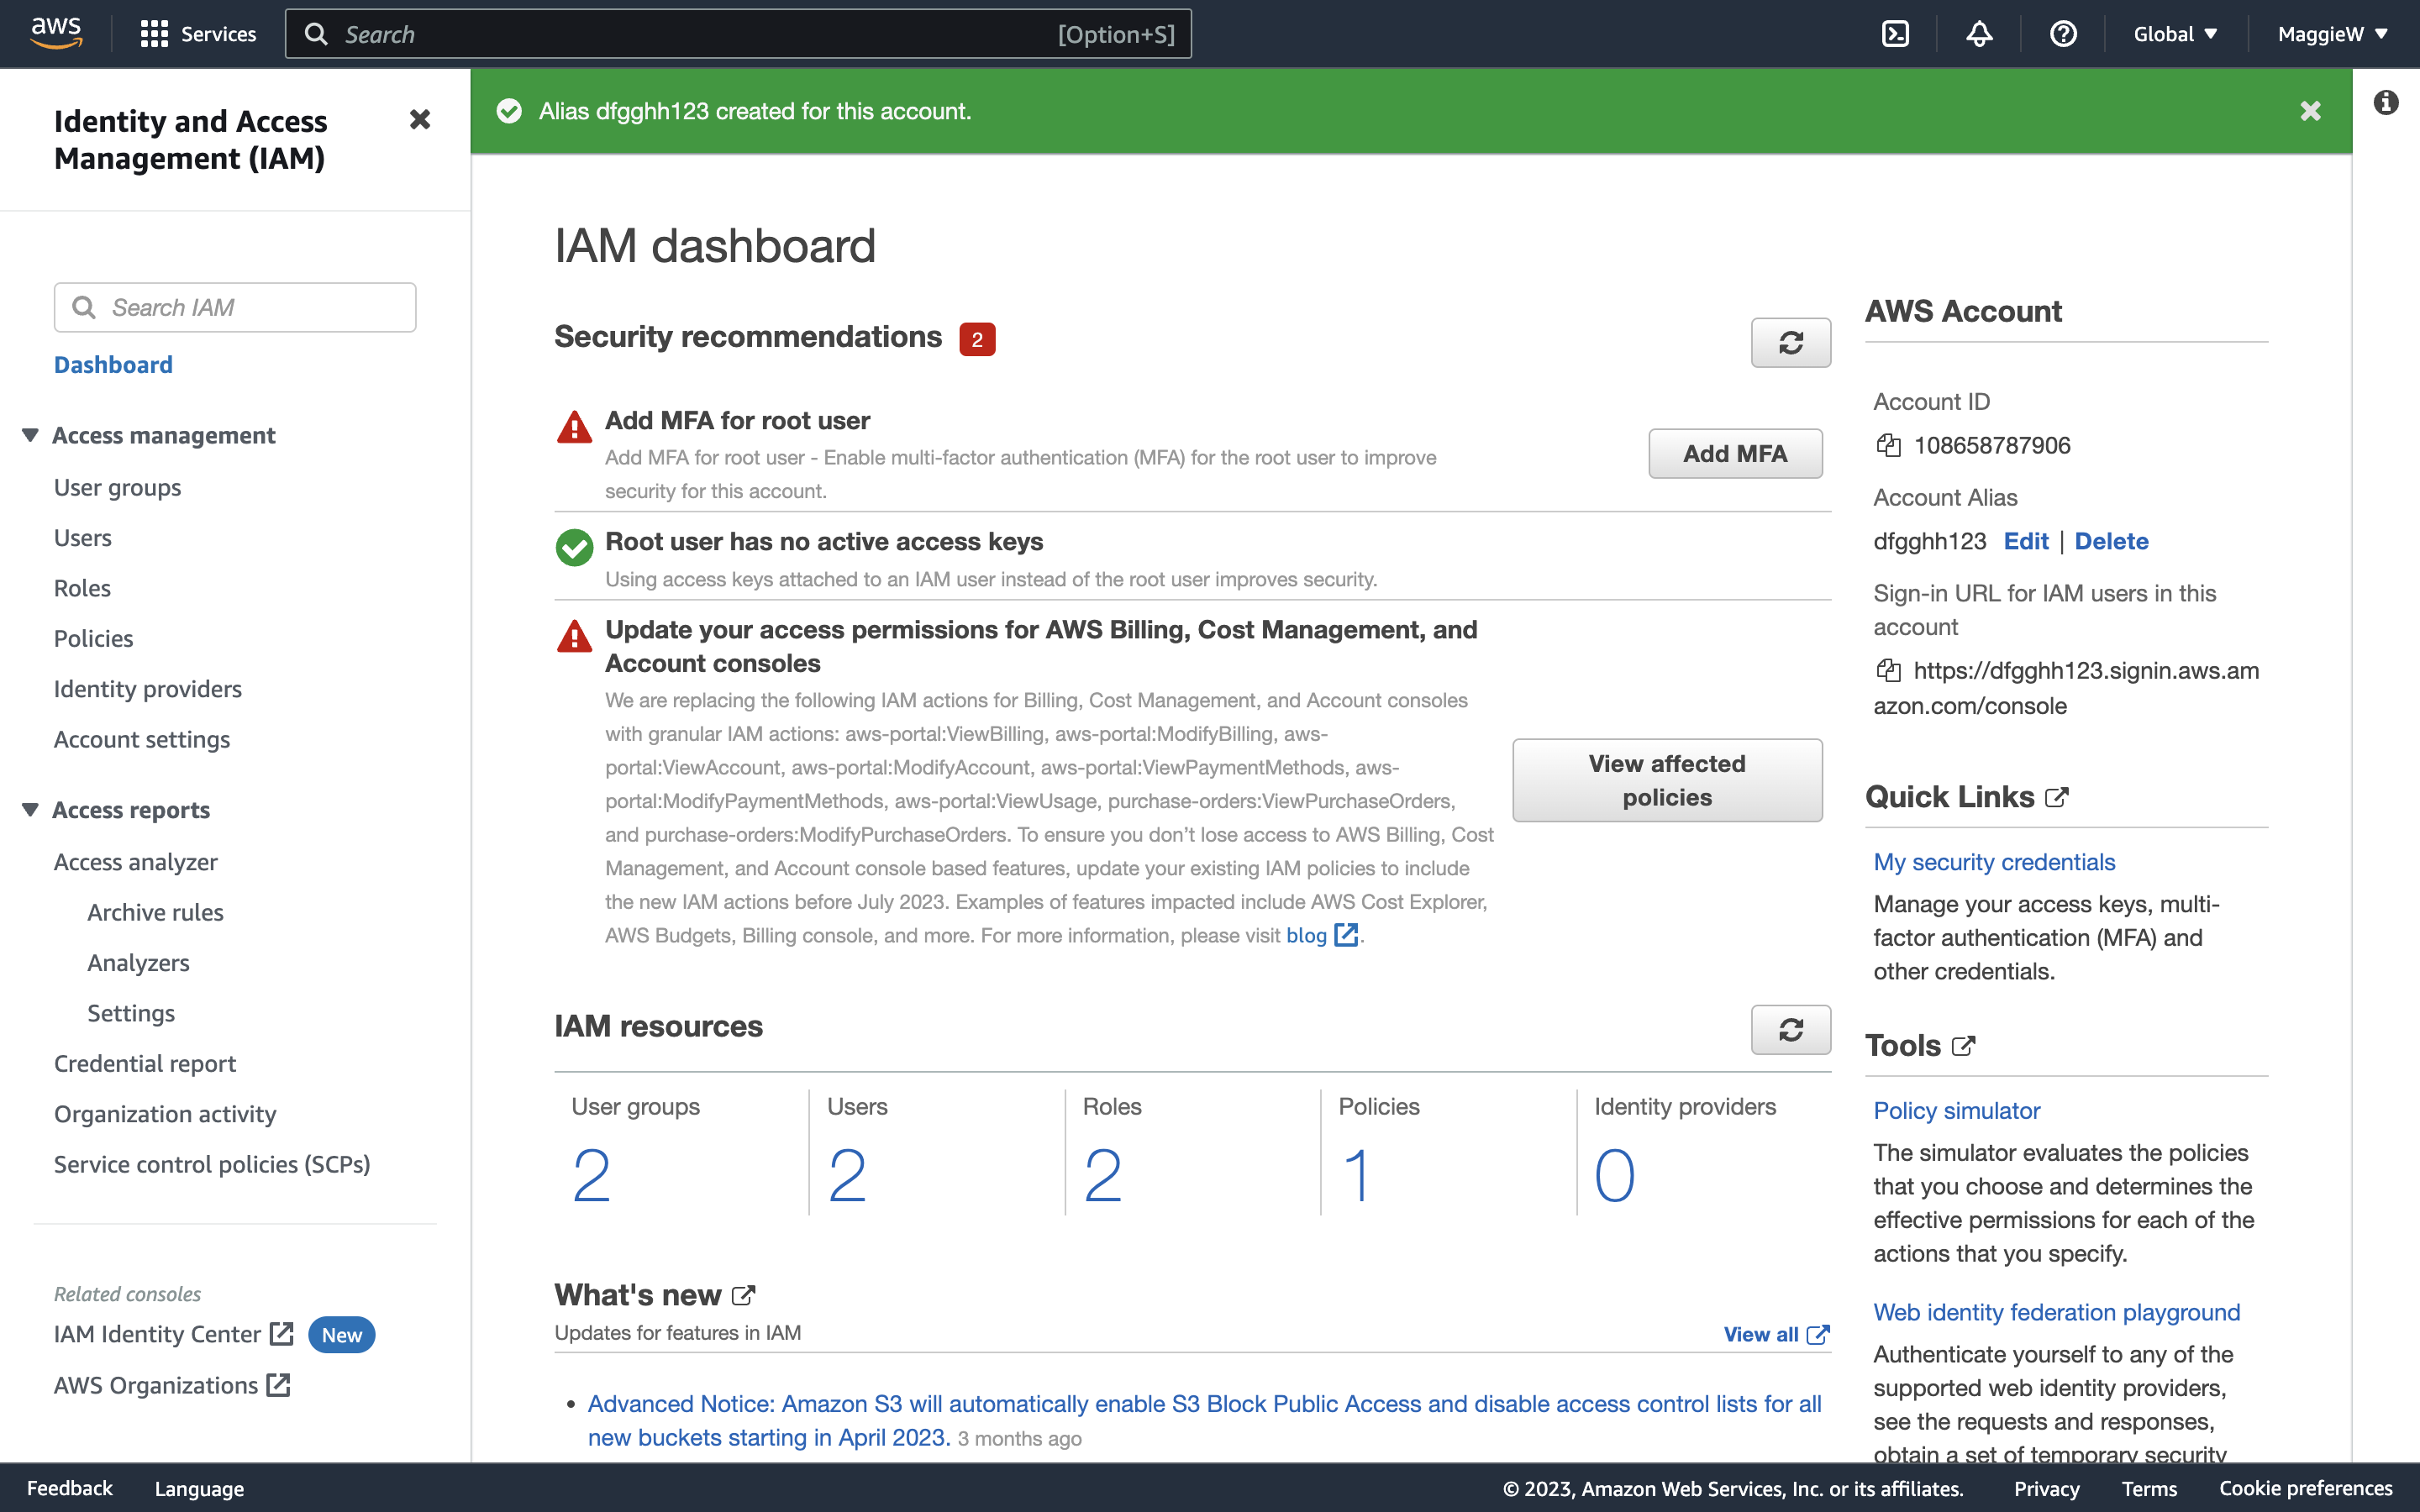
- Click ‘Create’, choose an alias and save the changes. Note: Occasionally you may encounter an error with your chosen alias. You can try a hard reload of the page. If that doesn’t help you can create any alias, save it and then go straight back to edit it to what you would like it to be. This usually works, if it doesn’t you may need to slightly change your desired alias. Below are some examples of what the errors and success look like.

- You will now see the sign-in URL below has been updated with the new alias. Copy the link and paste it into a private tab, or a different browser.
- You are brought to a new sign-in page for the IAM User. The Account ID will pre-populate. You need to add the IAM User name in the next field, and the password that you saved in the last field.
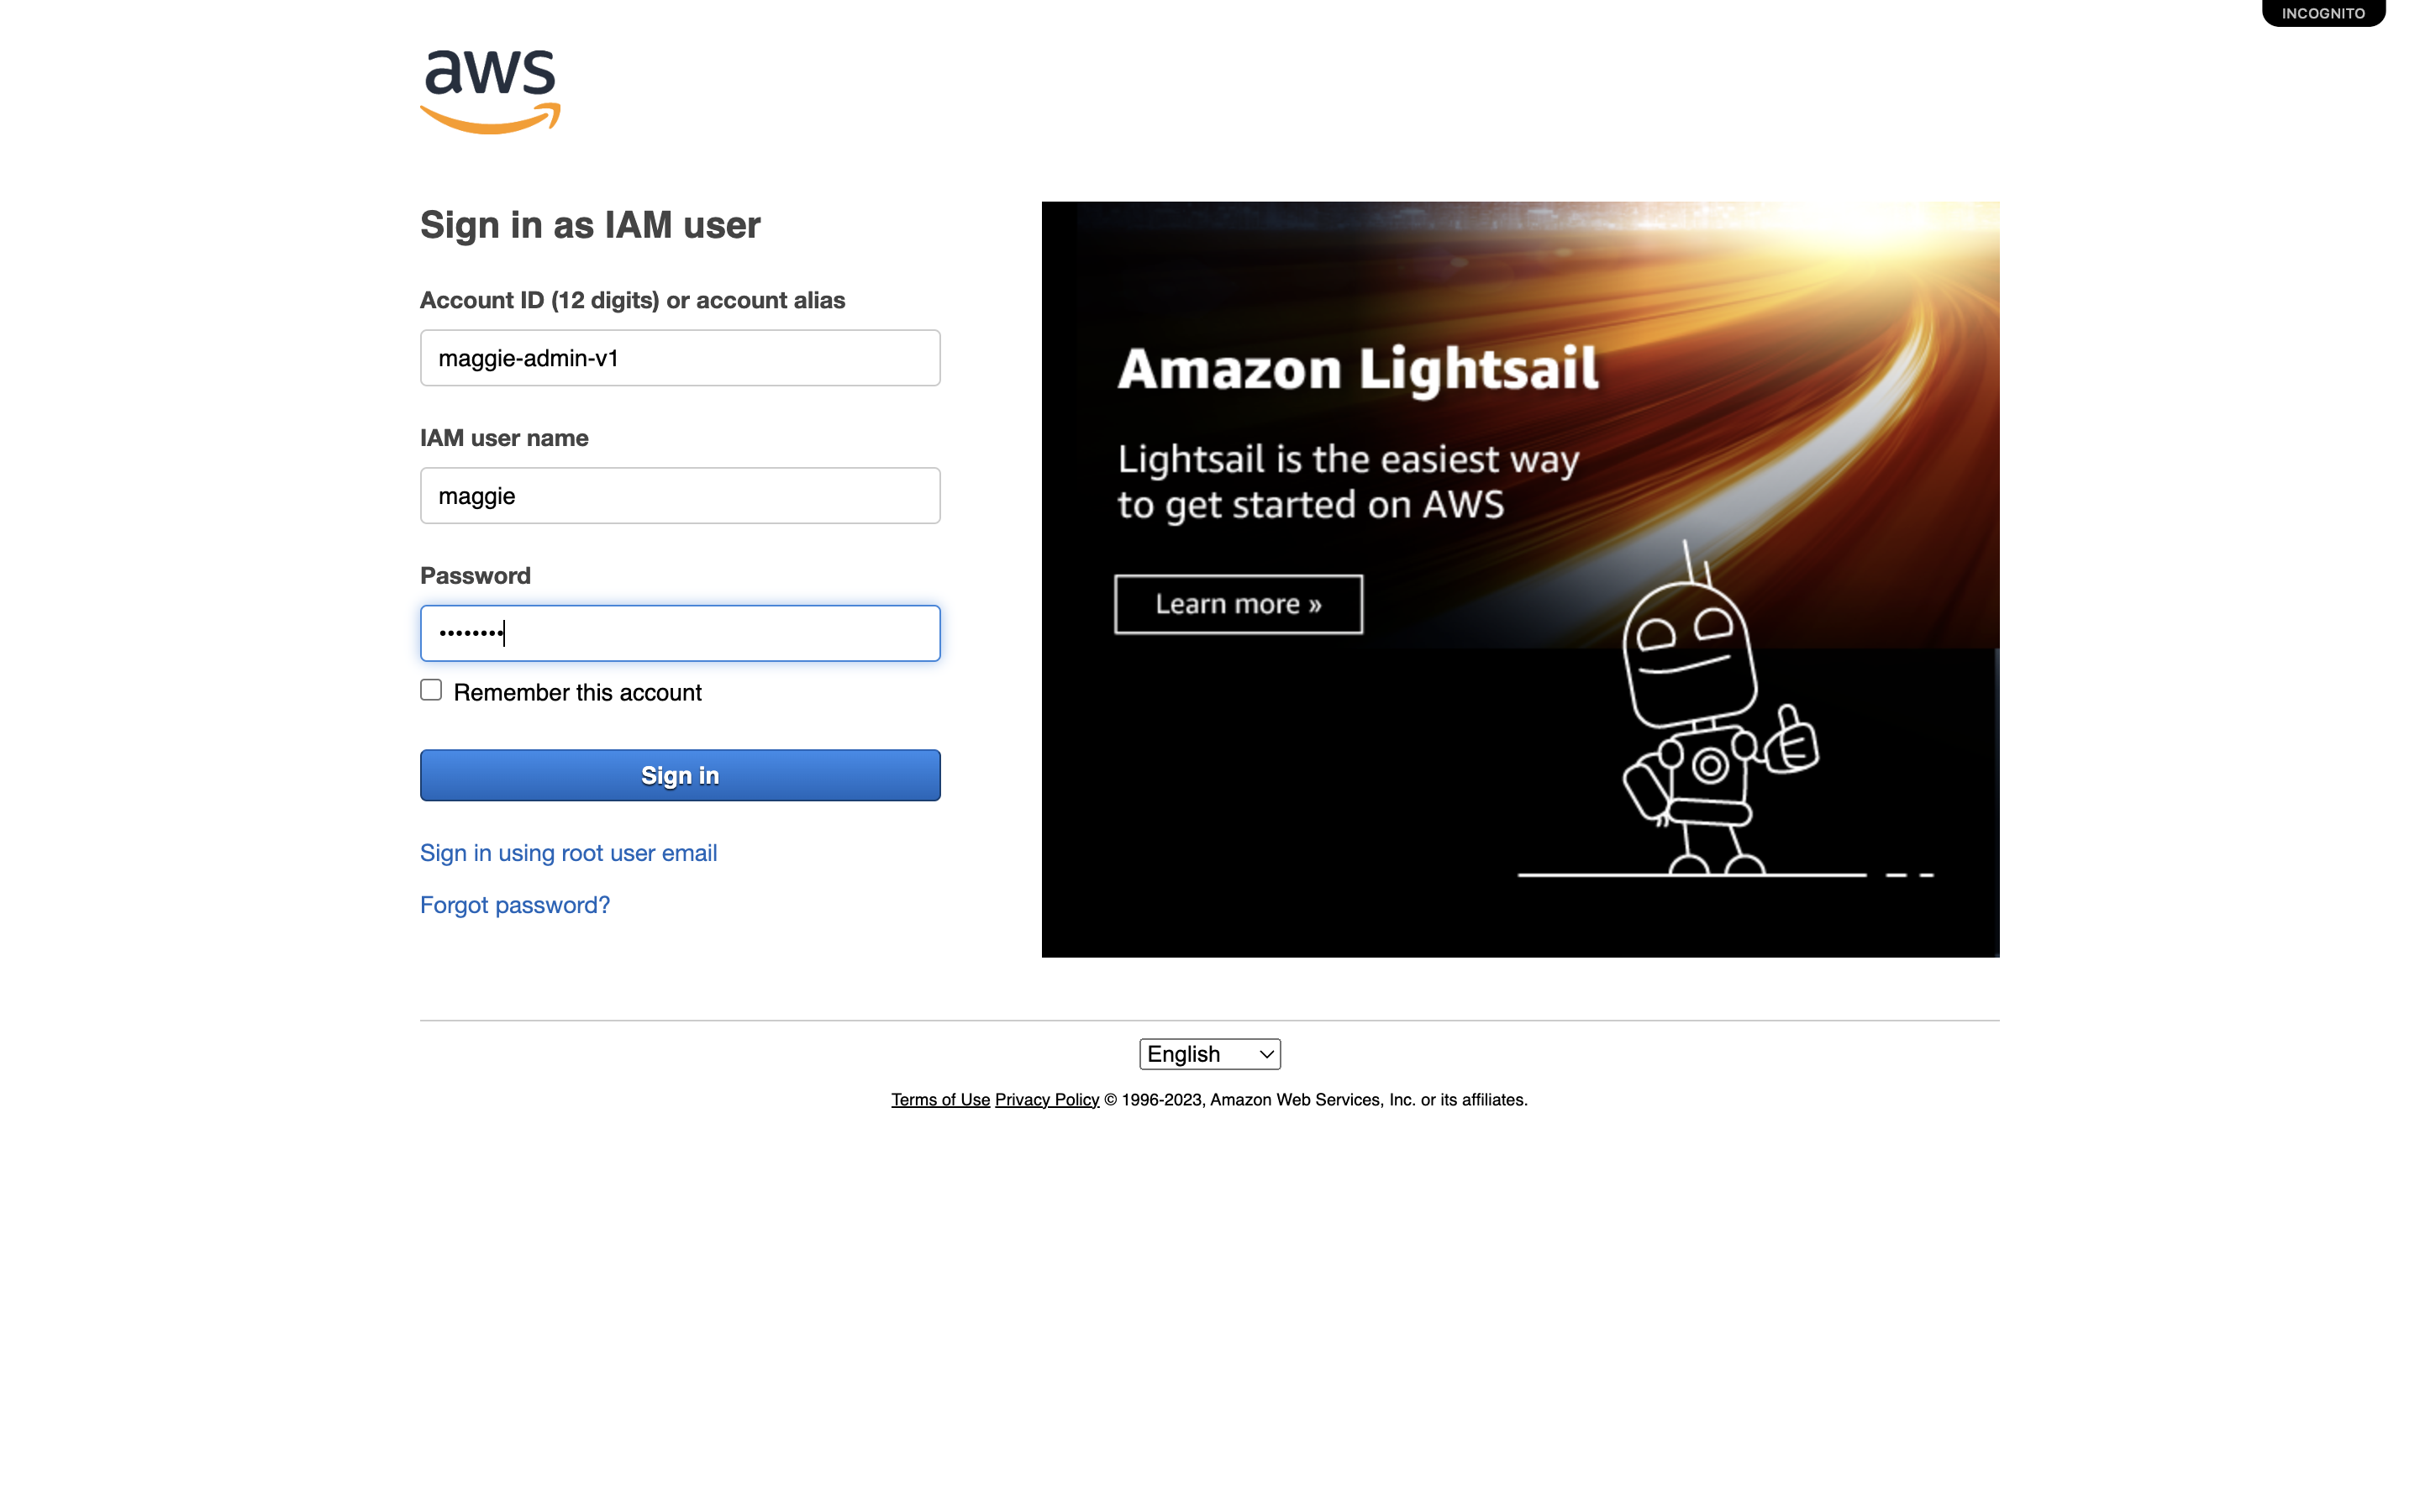
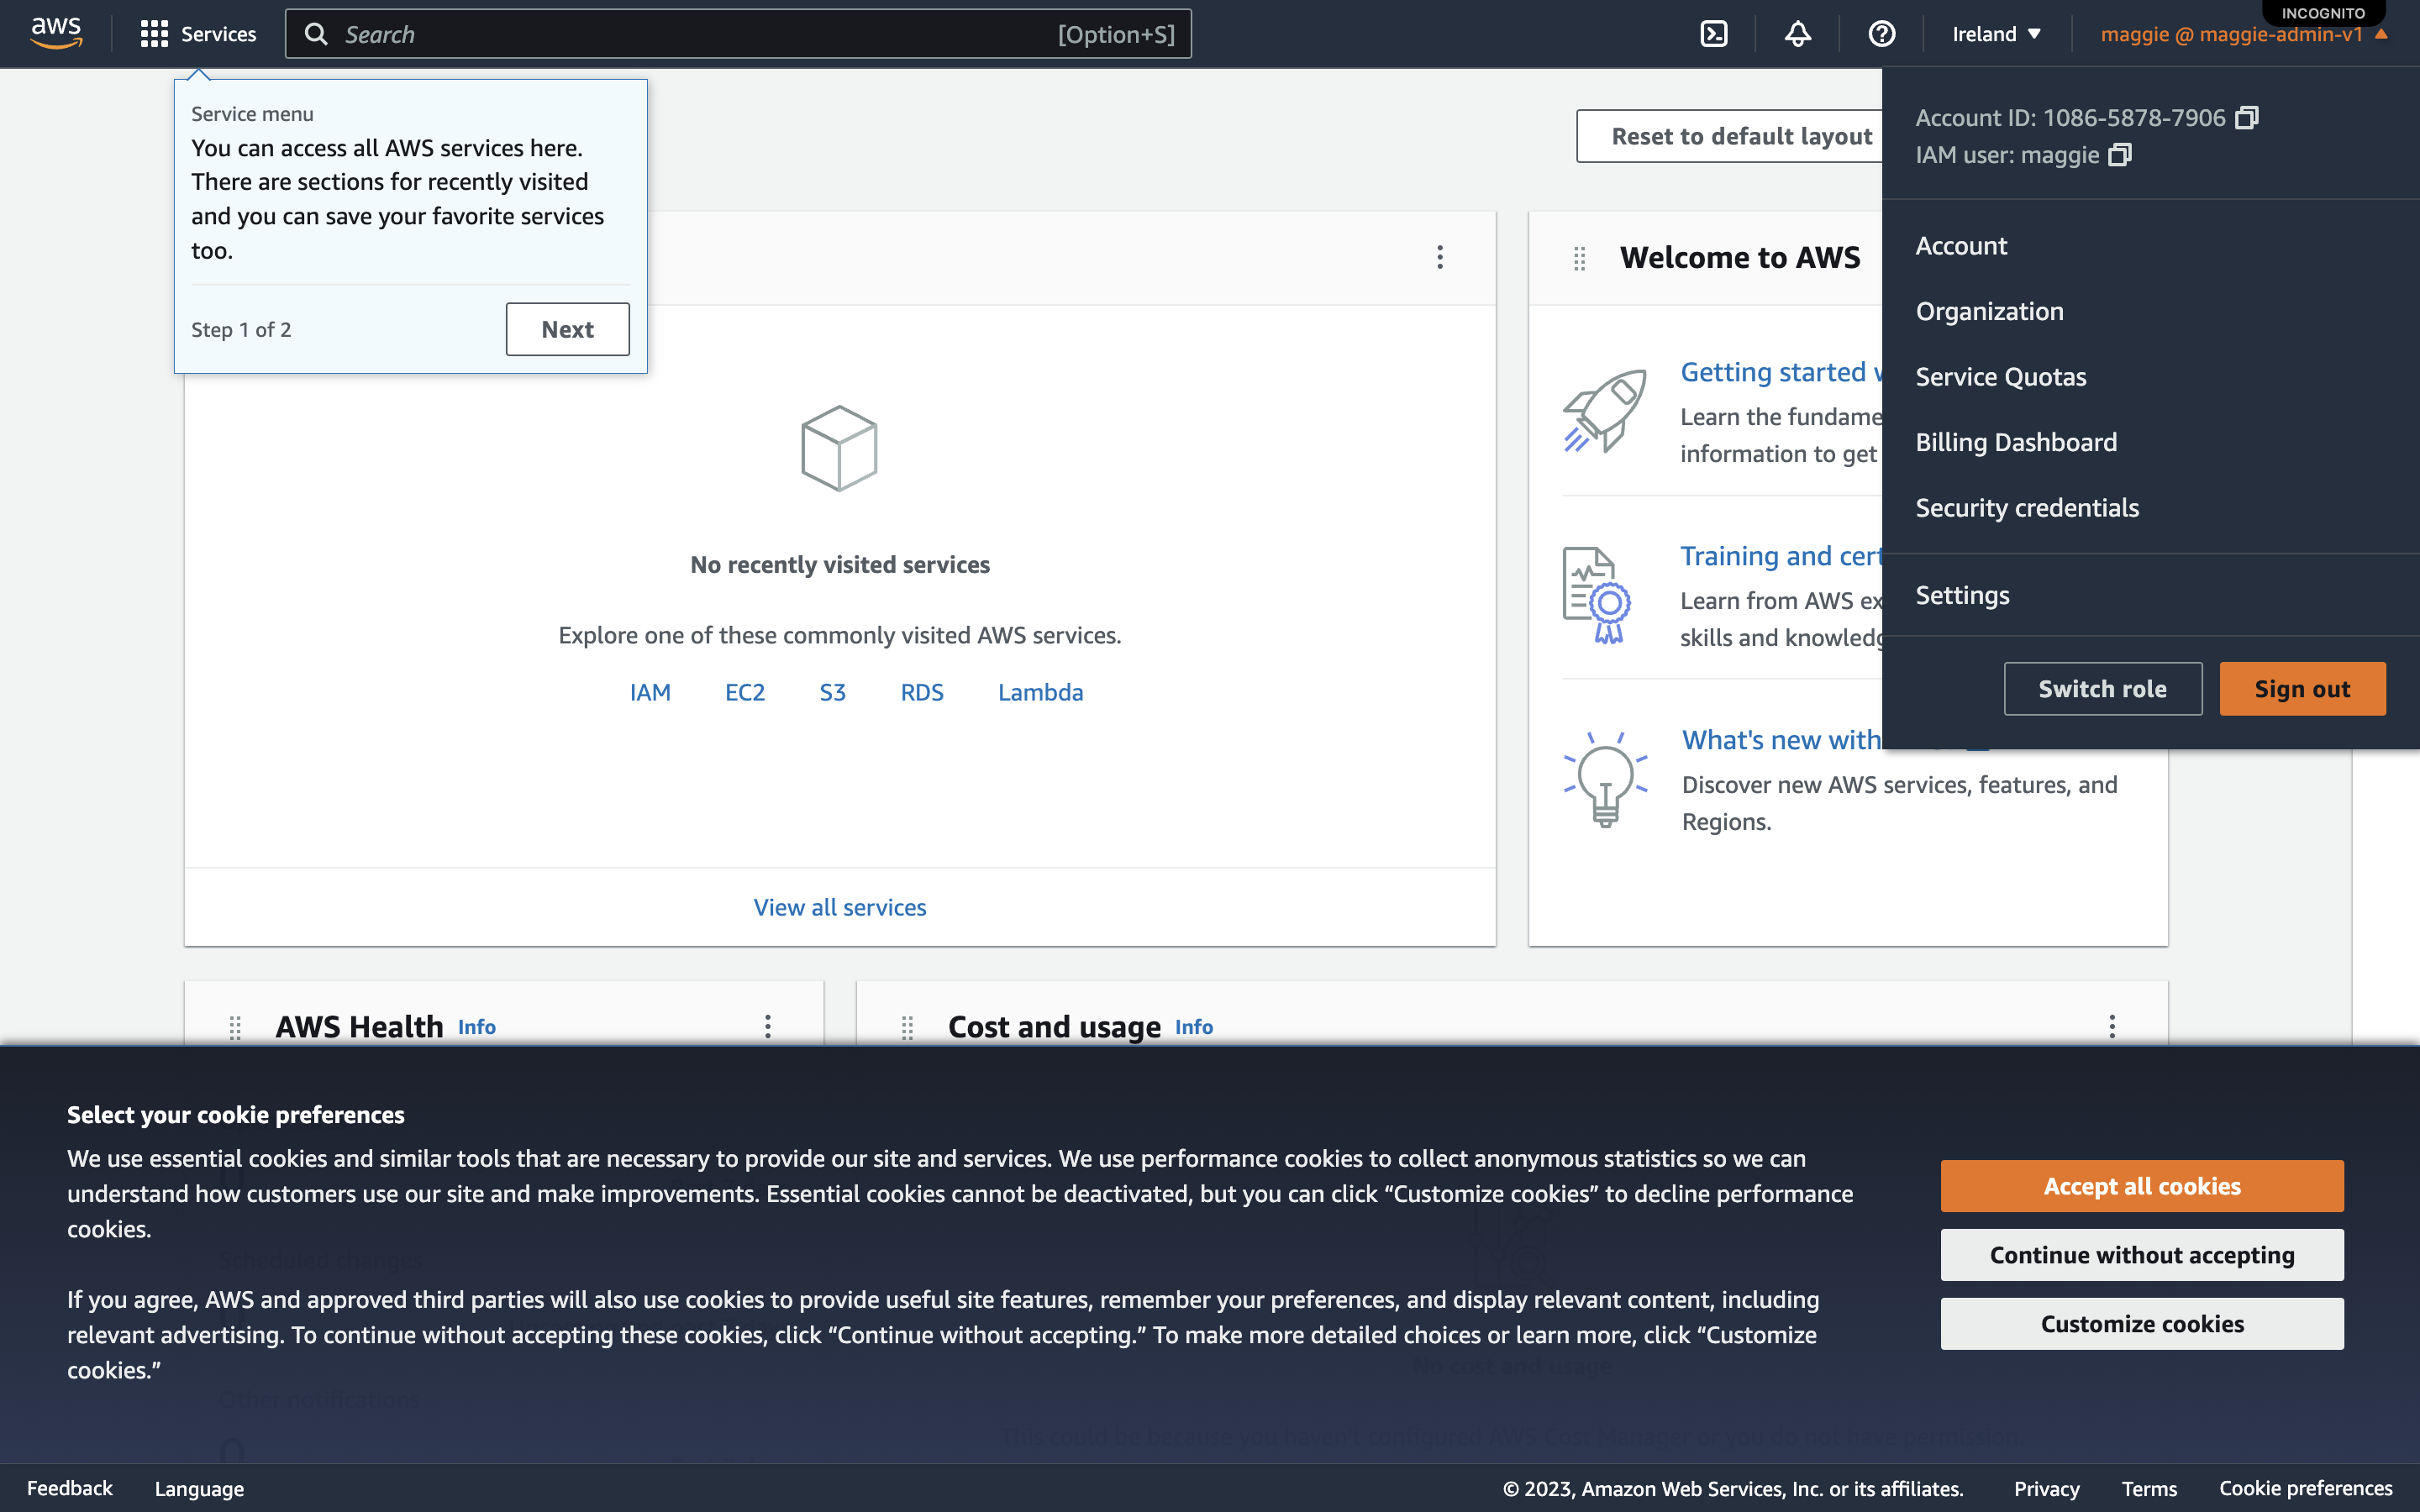
- When you sign in you will see in the top right-hand corner that your name looks different. In my case it is maggie@maggie-admin-v1. Tip: This is a quick way to check whether you are signed in as root or a user.
- You can go back to the normal login by selecting ‘Sign in using root user email’
Disclaimer: The information provided in this article is based on the author's personal experience and research. While every effort has been made to ensure accuracy, readers are advised to double check the official AWS documentation before implementing any of the techniques or practices discussed in this article. The author and publisher disclaim any liability for any direct, indirect, or consequential loss or damage caused or alleged to be caused by or in connection with the use or reliance on any information provided in this article.
